|
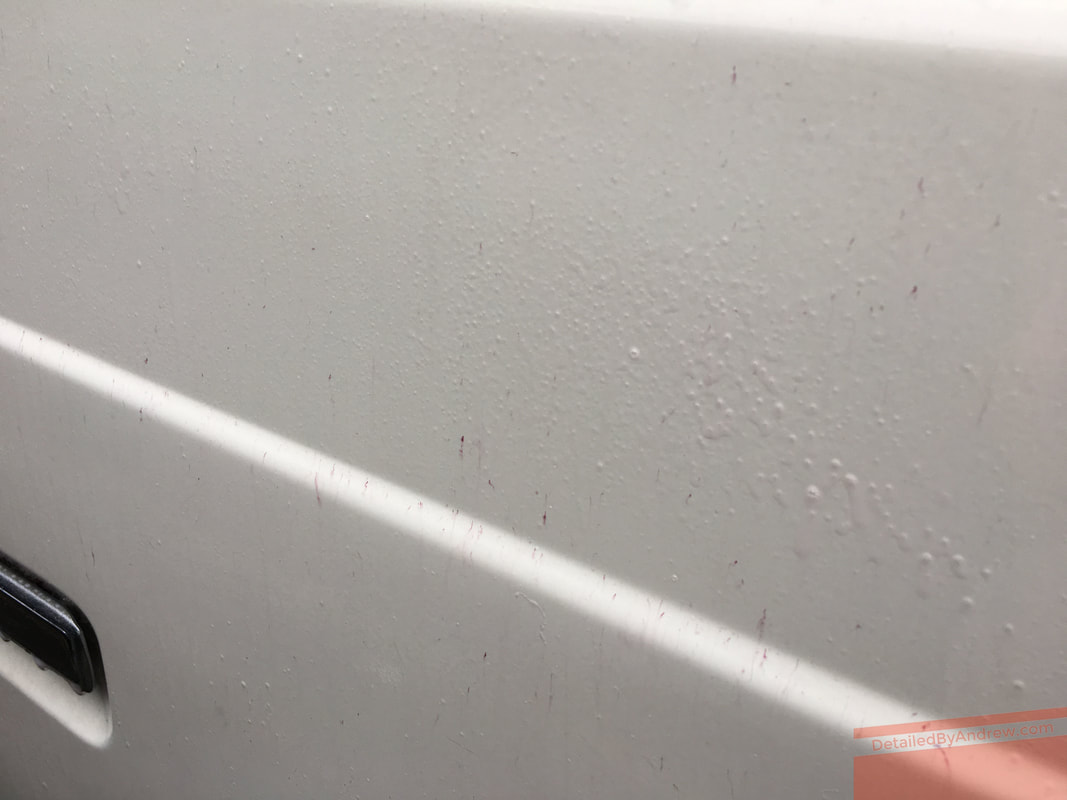
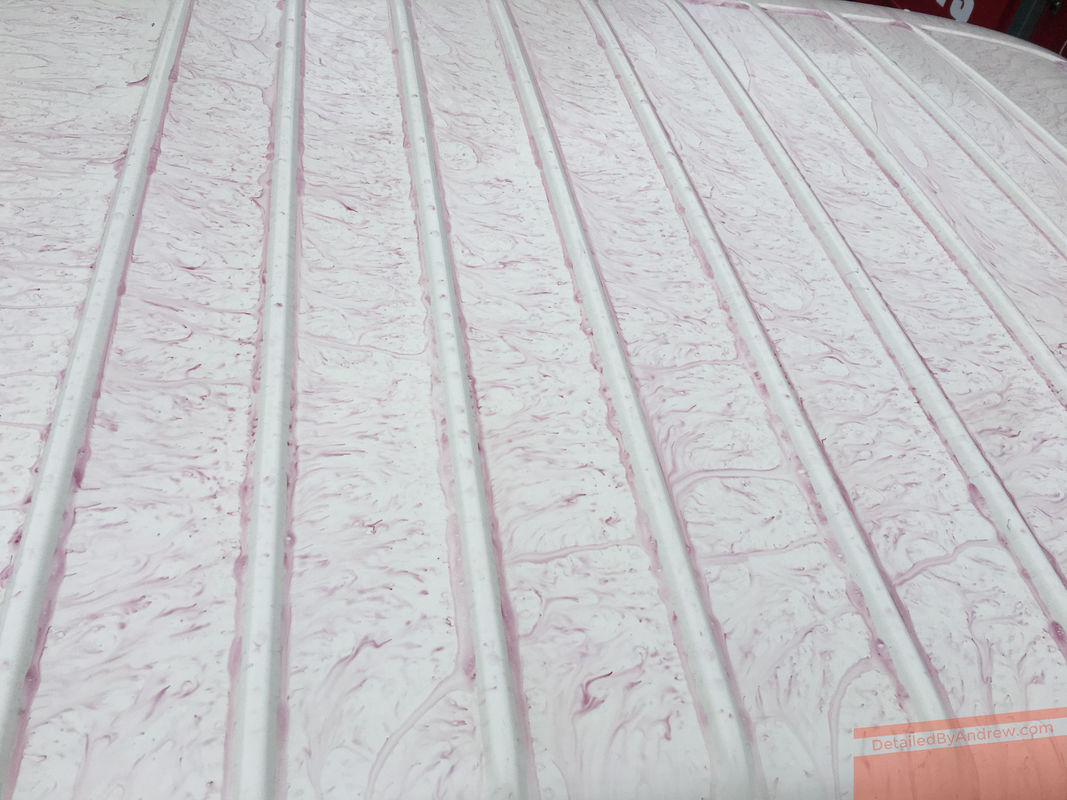
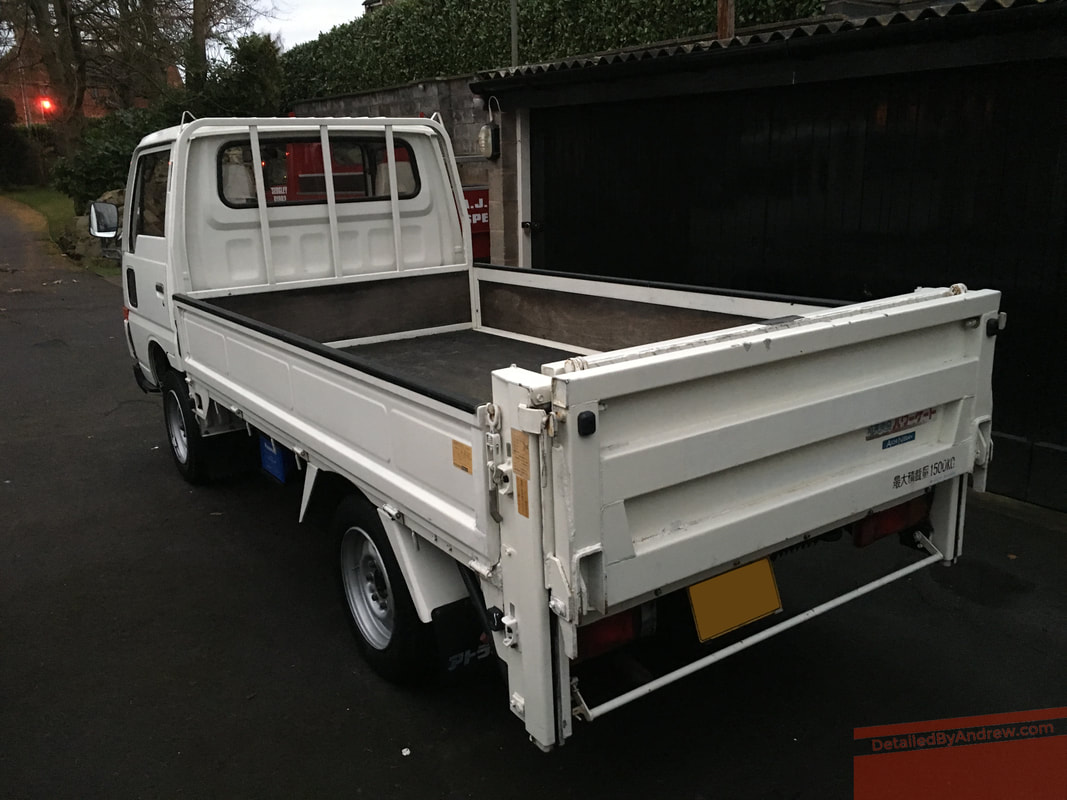
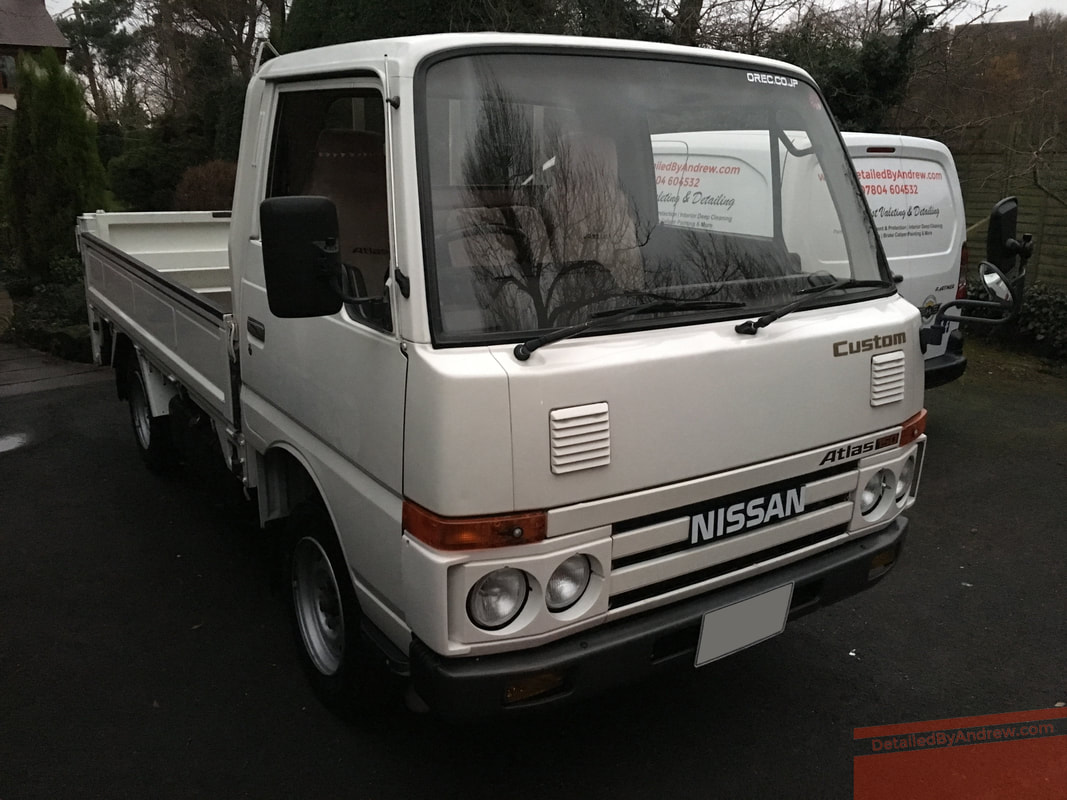
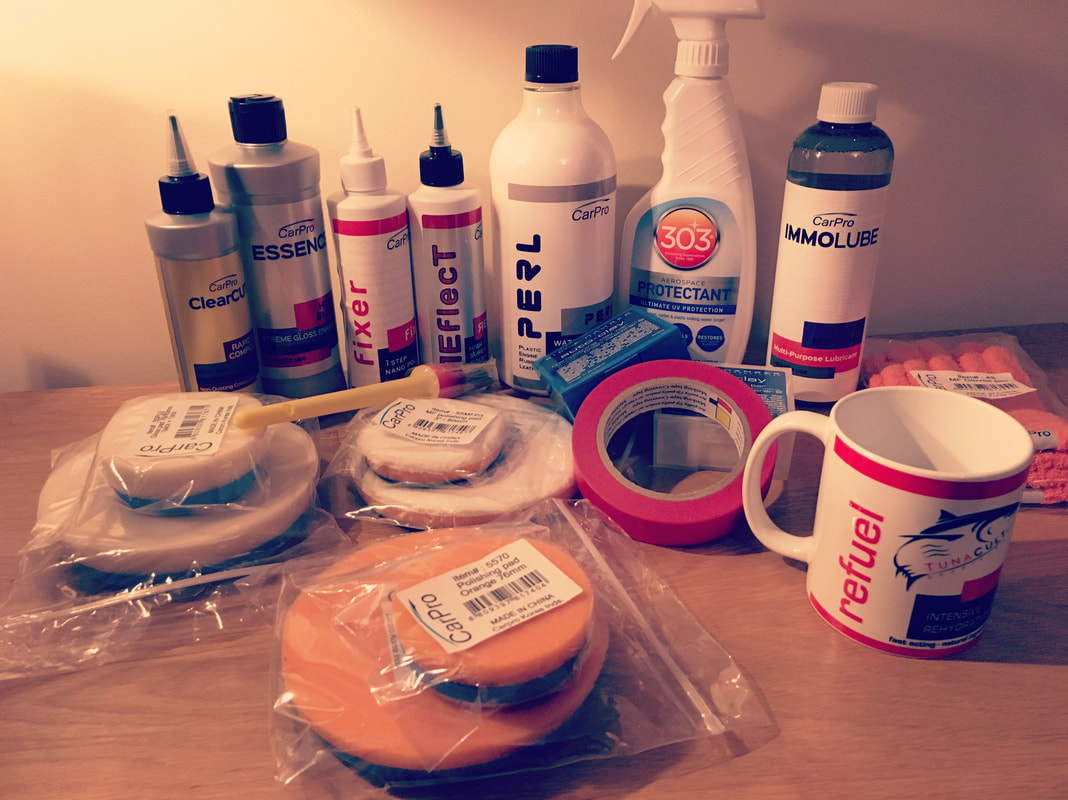
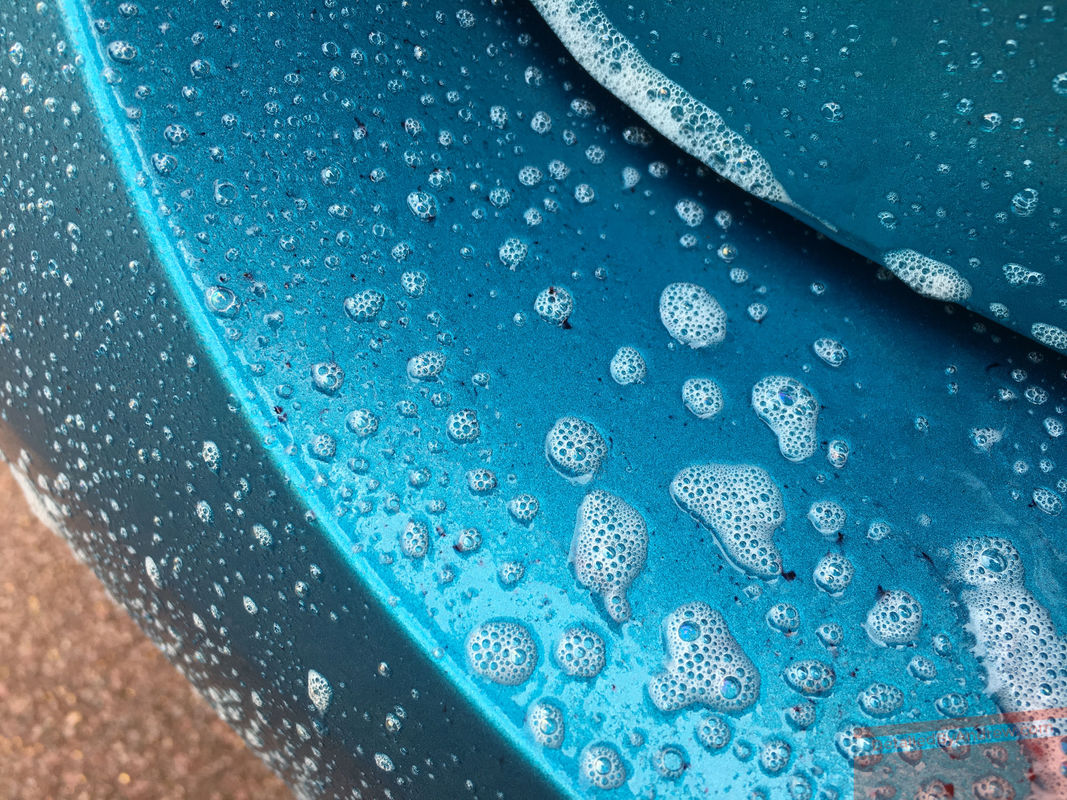
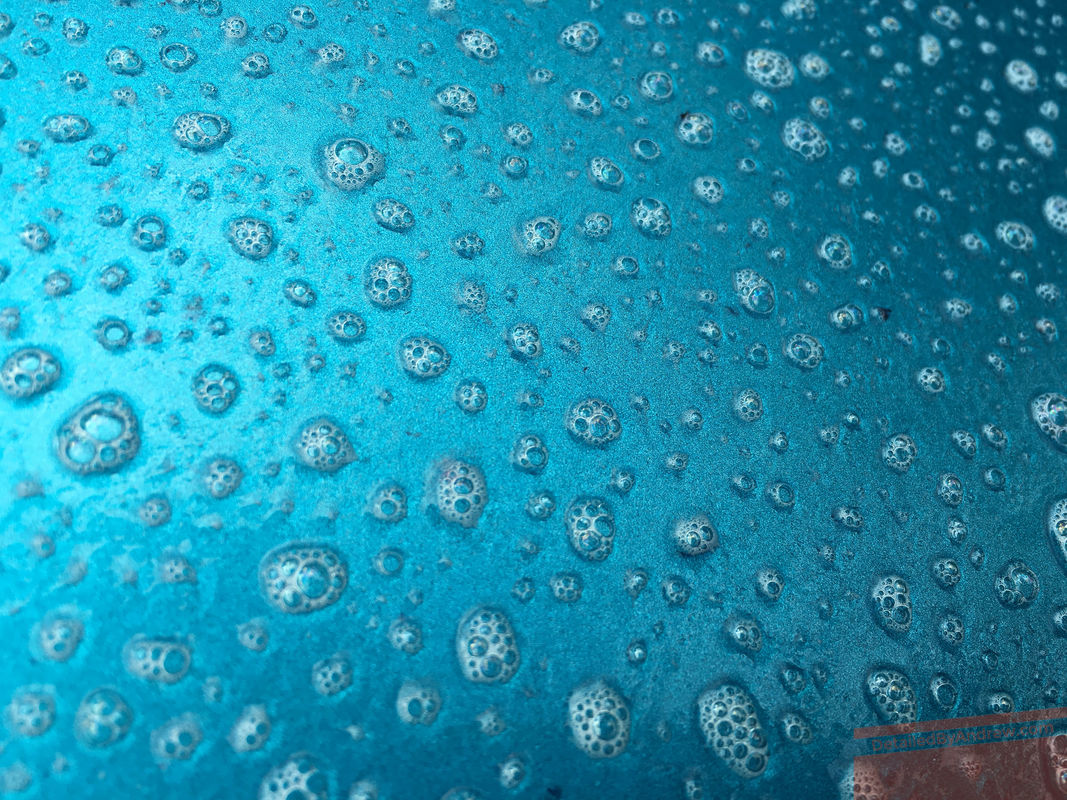
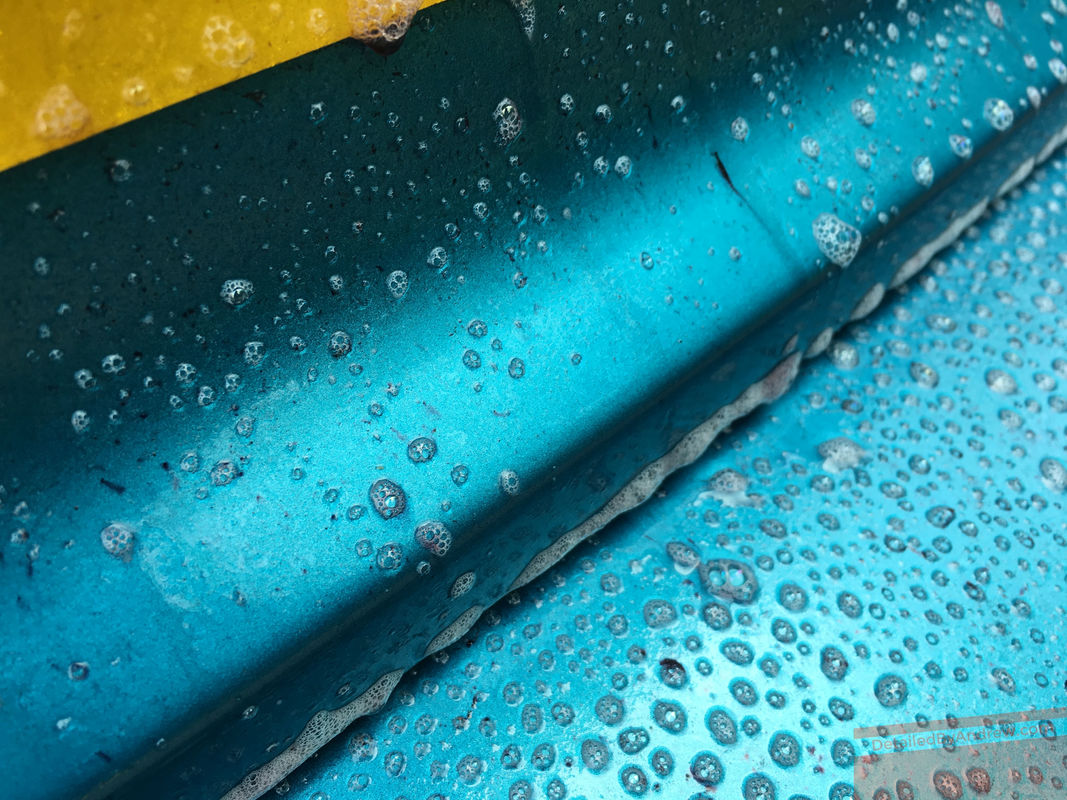
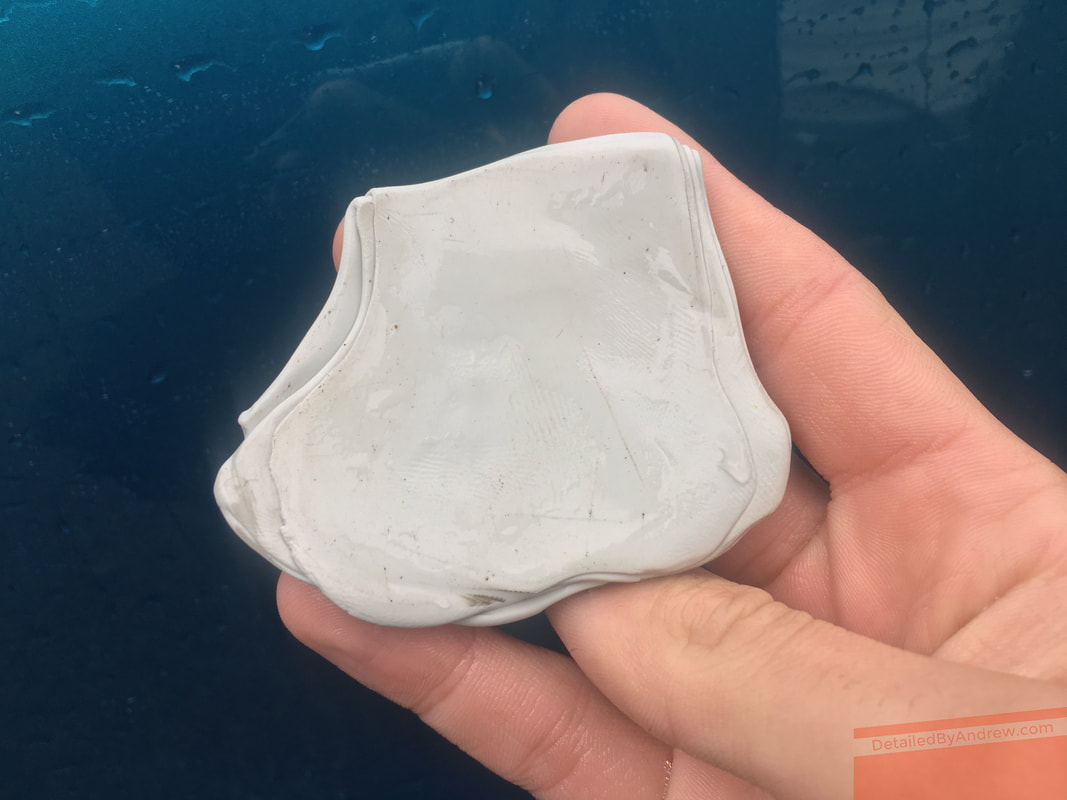
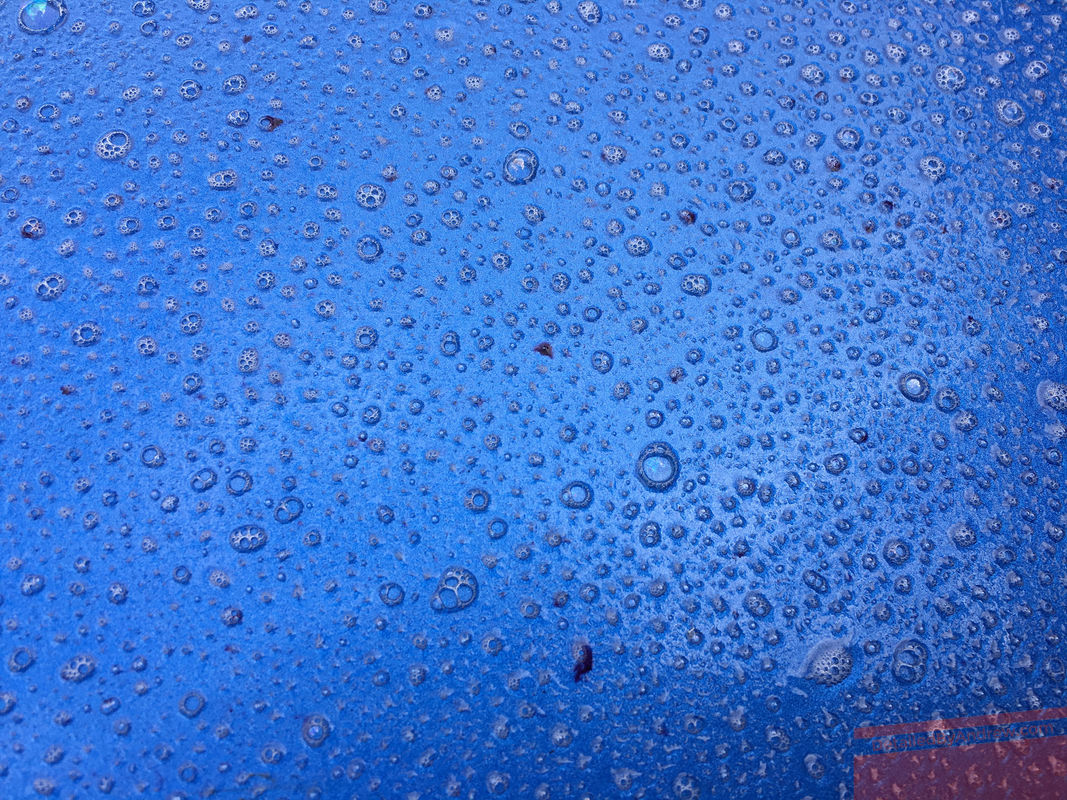
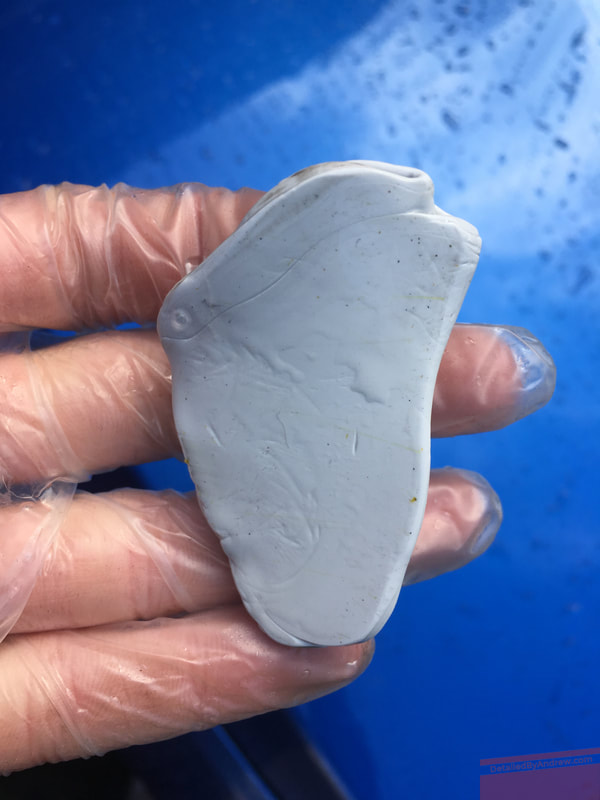
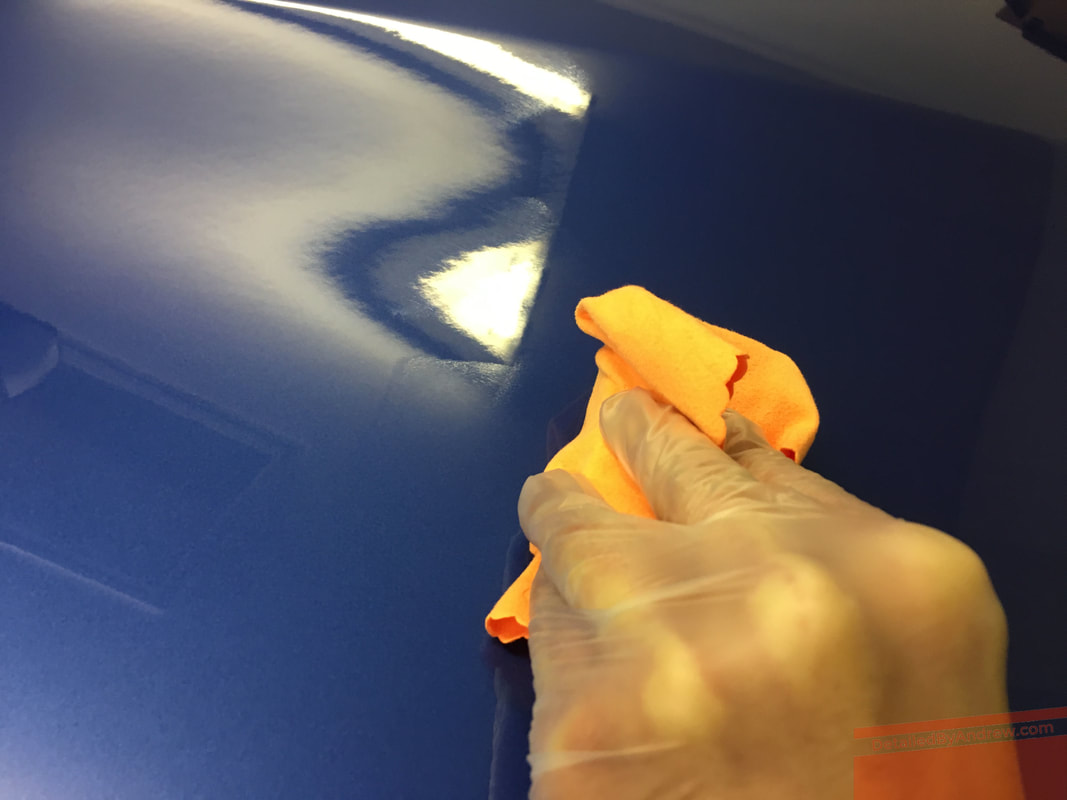
It is mesmerising isn't it? How a chain reaction between two chemical elements results in the production of a vivid colour... Out of nowhere, purple liquid just seeps out of the paintwork's pores to prove as a visual that one element of your cleaning and decontamination process can be witnessed with a colour change as proof of efficacy. Colour changing Iron Fallout removers have been on the market for a decade at the very least. The first one I personally tried was CarPro Iron-X. As the market leader in Iron Fallout removers, most brands have upped their game to keep pace and produce an alternative to challenge the original colour changing Iron Fallout removers. Before I delve into the car detailing geekiness involved with reviewing such a product, I would like to quickly give you a run-down on what Iron Fallout actually is. Brake dust and factory pollution contain iron particles that just love to sinter into your paintwork, and from there start a chain reaction of tiny bits of rust into your finish. It is better to arrest the affects of this process by nipping it in the bud before it takes a serious hold. This is why Iron Fallout removers are formulated. They break these deposits down into a water-soluble compound that just rinses away. Autoglym have recently stepped into the fold by launching their own colour changing treatment called "Liquid Clay". Interestingly, they have had an Iron Fallout remover on the market for many years, which is an Oxalic acid based product that does not change colour on application. Firstly, I would like to echo the rhetoric that this product is perhaps a little misleading in its nomenclature and printed description. Autoglym have said that the use of the use of this product will result in smooth paintwork, just as if you have clay barred it! Personally, if I were employed by their savvy marketing department I would have dubbed it "Clay Mate". Why? Because treating Iron Fallout, as well as tar spots, should be done in conjunction with clay barring for a fully comprehensive clean of the vehicle's bodywork. So, the product itself. It has a zesty scent that overpowers the usual eggy-fart smell that is all too well associated with these types of products. A bonus for the user before we have even started, in my books! Some would argue that perfumes hamper the yield of these treatments, but this one delivers well and truly. I put it to good use on a worthy recipient - that being a 27 year old Nissan Allstar, in all its glory with white paint. If any colour change effect was going to be best visible, it was going to be on a truck like this one, what with some areas of surface rust quite literally running down the paint. Within 5 minutes the "bleed" effect was evident in abundance. Application was smooth, it would seem a little goes a long way helping this product to be economical in repeat use. In terms of price, you will have to contact your local Autoglym sales rep for exact cost as this is currently a product only available through your local franchise. For a 5litre container, you should expect to pay around £40, making this not quite the most expensive deal, but not the cheapest outlay either. The use of this product certainly broke the back of decontaminating this truck, which was then followed with clay barring and a light cut machine polish with dual action machine utilising CarPro Essence polish, with Bilt Hamber Hydra-wax.
Would I buy again? Certainly. It isn't the cheapest per litre, but spreads much better than the cheapest - giving it that economic value so much well known by the dish wash soap that we dare not use on our cars. If they choose to make a 25 litre offering, I will be all over it. Andy out!
2 Comments
Detailed By Andrew as a business is exactly what it says on the tin - a #Detailing company! 🌠🚙 Only the best products, machines and techniques are used to polish and protect your vehicle to high standards. This is what it has been all about since initial establishment in 2011. There are very fine lines between detailing, valeting, and just washing a car that are sometimes difficult to distinguish and explain simply. In summary, you cannot give a vehicle the #WowFactor by relying just on washes. Pollution, contaminants and contact marring are why detailing processes exist - to get your vehicle in A1 condition and keep it that way! After careful consideration there are some guidelines in place ready for 2018 to help ensure that the business' customers utilise the services on offer for the intended purposes and of course; best effect and value for money. The "Service Clean" on offer is the answer to a proper valet. Featuring snow foam, the three bucket wash method, wheels attentively cleaned with brushes, door checks cleaned, and dried with 1000gsm towels in conjunction with certain products to top up shine and protection, this is the perfect upkeep clean for your vehicle's exterior. The interior is vacuum cleaned, with the fascias, fittings and glass maintained. The bolt-on extras available (such as fabric shampoo extraction machine) make this service ideal for a one off visit, particularly on vehicles going back to lease company. Otherwise, this is an ideal service as a regular follow up to detailing packages. There are three core detailing services on offer. The first is an "Enhancement". This is a thorough decontamination of the vehicle from any stubborn debris and iron fallout pollution, using processes such as clay barring to leave the surface perfectly clean. The paintwork is then machine polished in a single stage (medium polishing pad with a diminishing polishing compound) in a focused manner to alleviate around 75% of defects such as swirls, light scratches and marks whilst imparting a great shine. A full paint depth measurement will be carried out throughout the task, and the results are inspected with various lighting tools. Finally, a layer of protection is applied by hand before the interior is treated as per the "Service Clean" as courtesy for the sake of doing a complete job. This package is ideal for those who can't be without the car for more than one day, and in most cases can be carried out at customer's premises as long as there is a clean and spacious environment. Takes between 7-13 hours depending on vehicle size so more of a summer job unless being done indoors. "Service Cleans" will help to maintain the vehicle afterwards, and around 6 months down the line it is recommended that the "Maintenance" package is carried out. This features similar preparation cleaning to the "Enhancement", but this time is just a very light polish with the machines using a soft foam and CarPro Essence; to tidy up any mild defects accrued in the last 6 months, boost gloss and add trace elements of protection. This is then followed with a layer of protection by hand and the usual interior clean. In the case of vehicles that have had a ceramic coating prior applied, the light polishing process will instead be done with CarPro Essence Plus - a zero cut repair polish that keeps the coating in ideal condition therefore making it last longer, whilst providing semi-permanent defect filling capabilities.
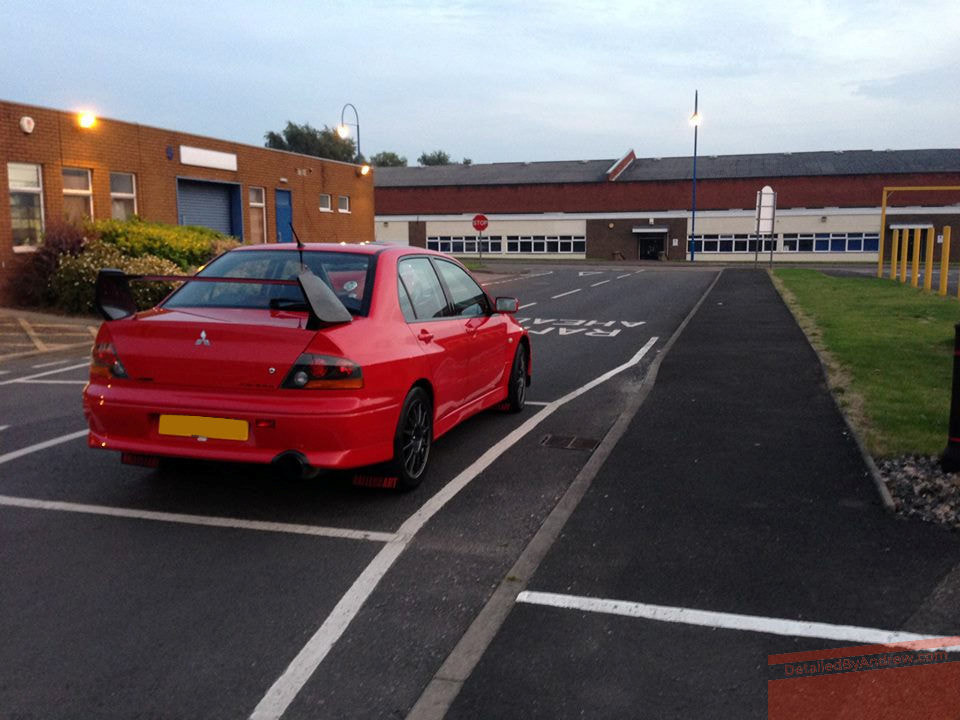
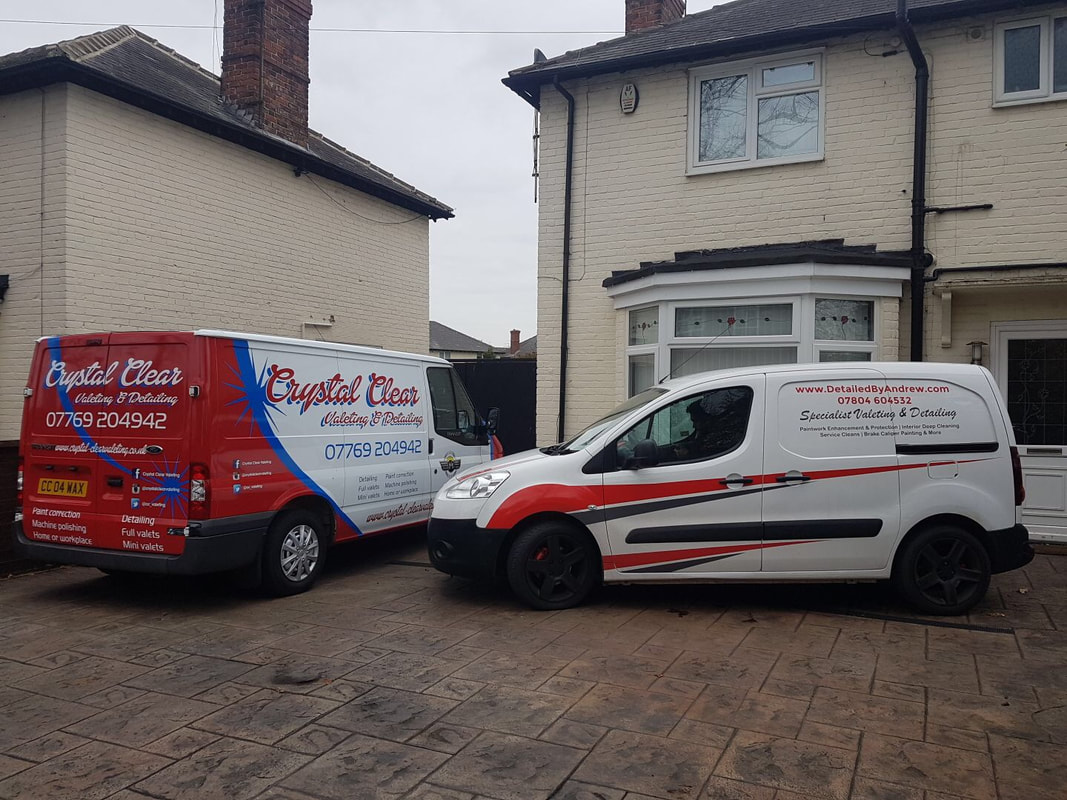
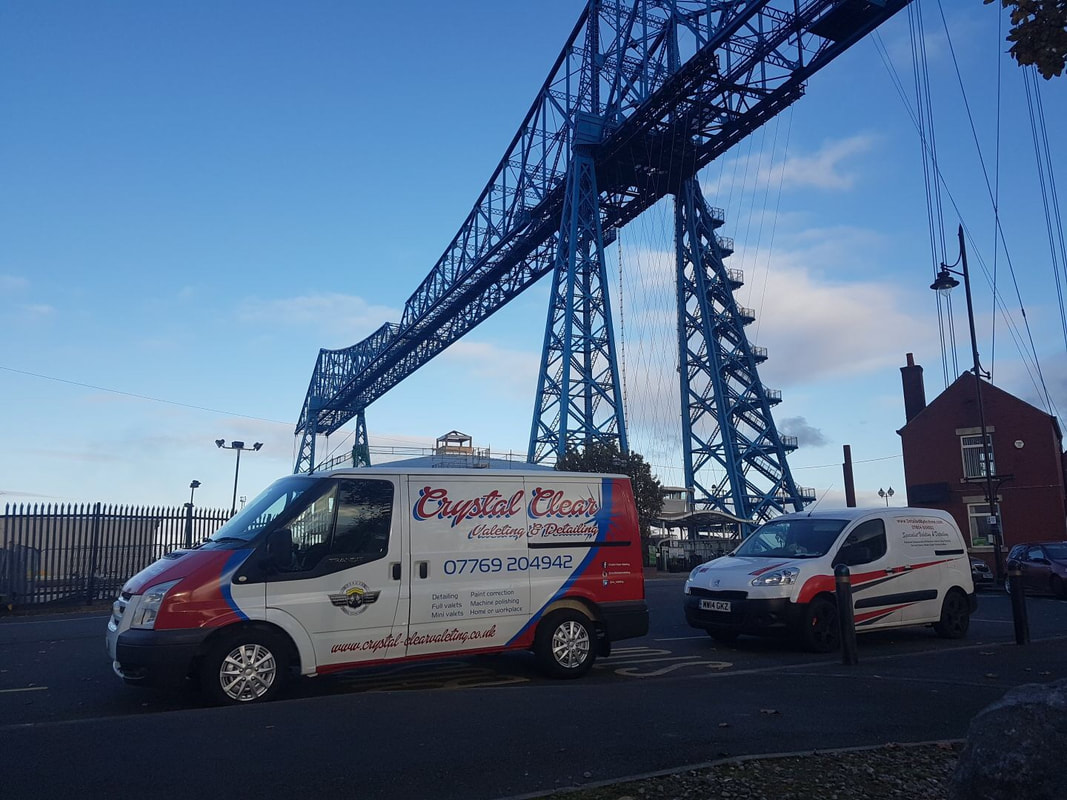
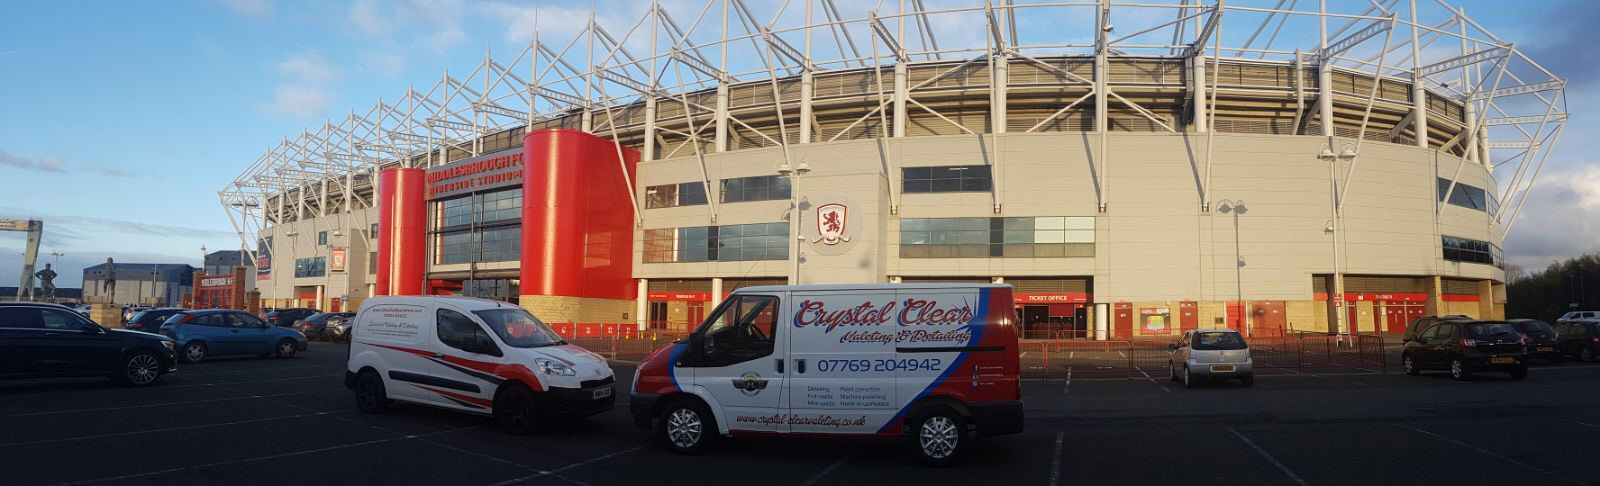
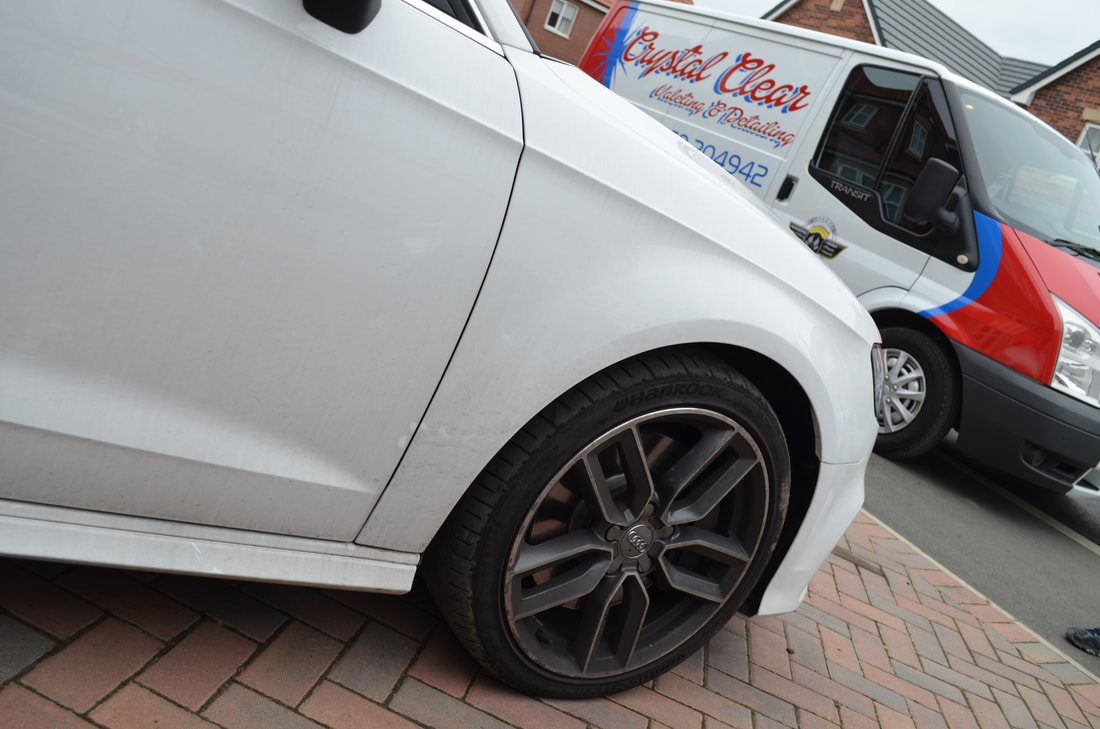
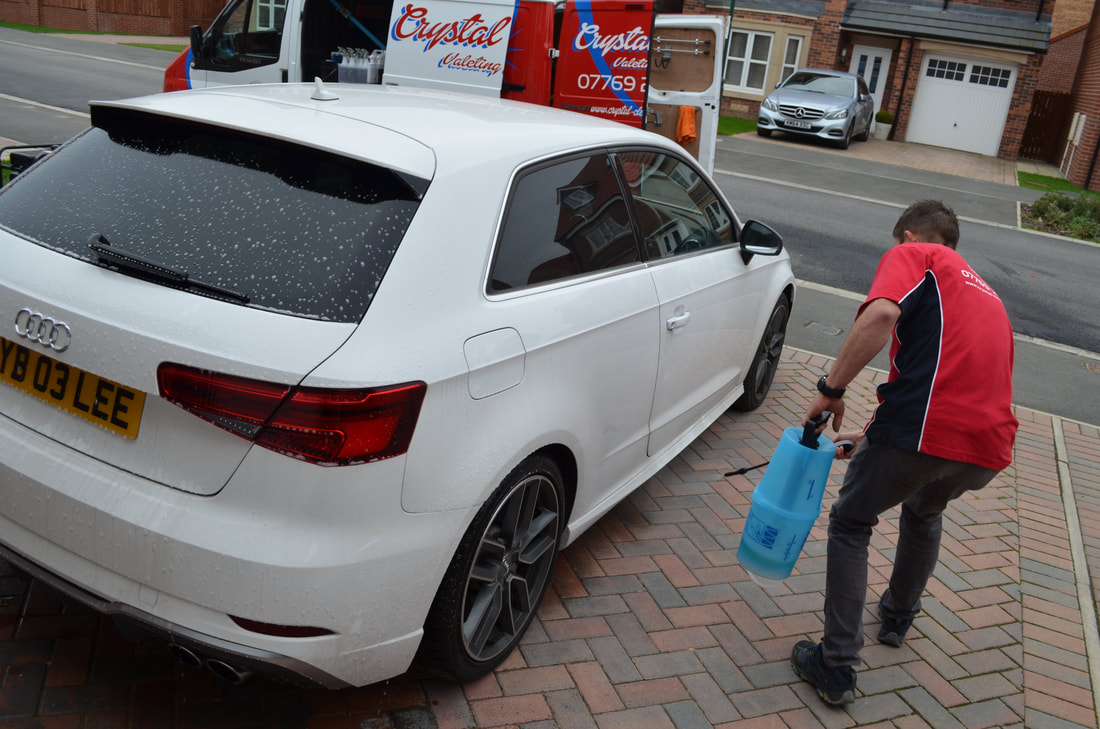
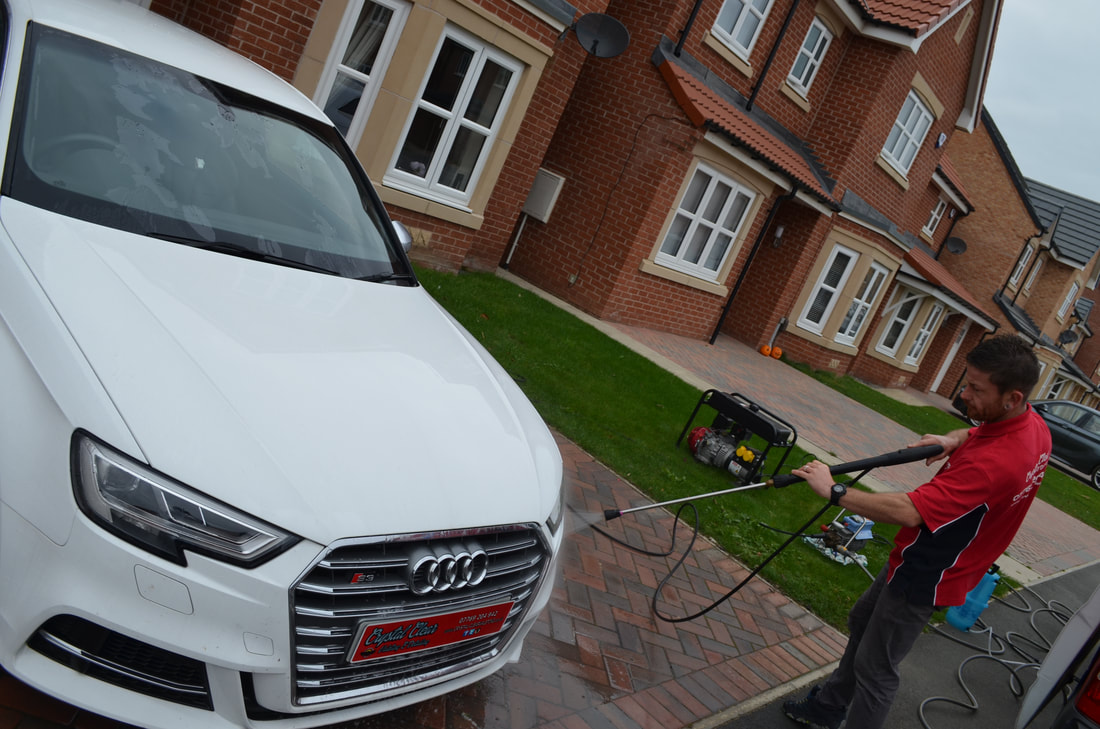
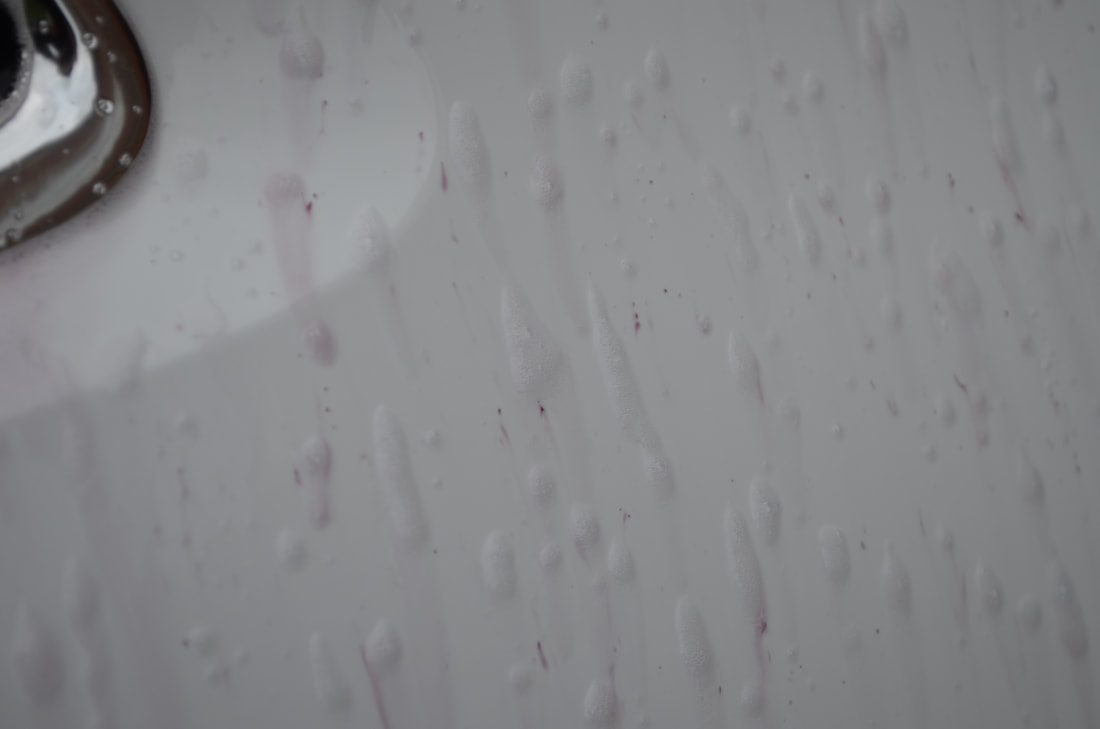
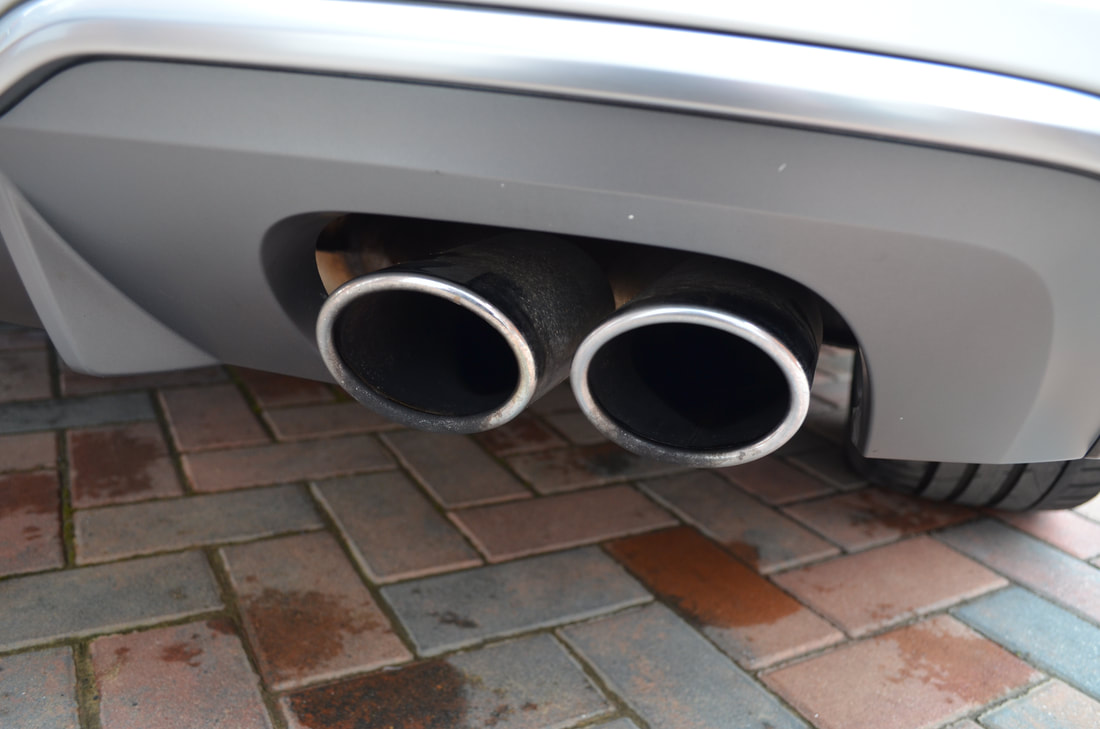
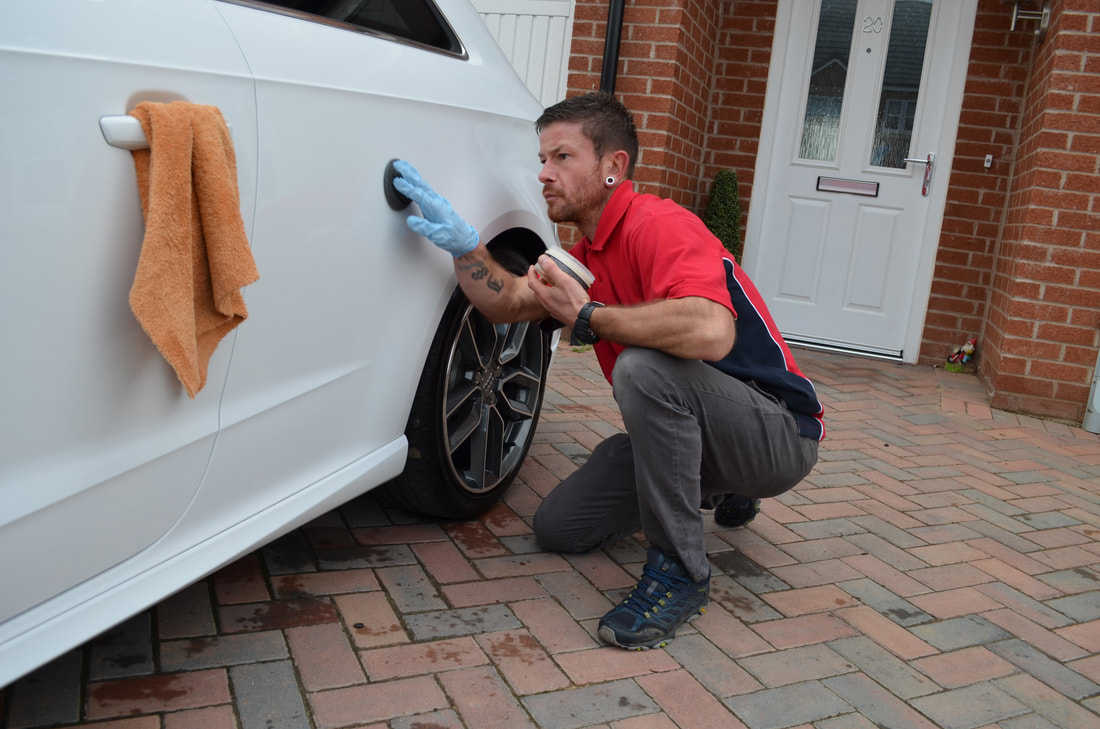
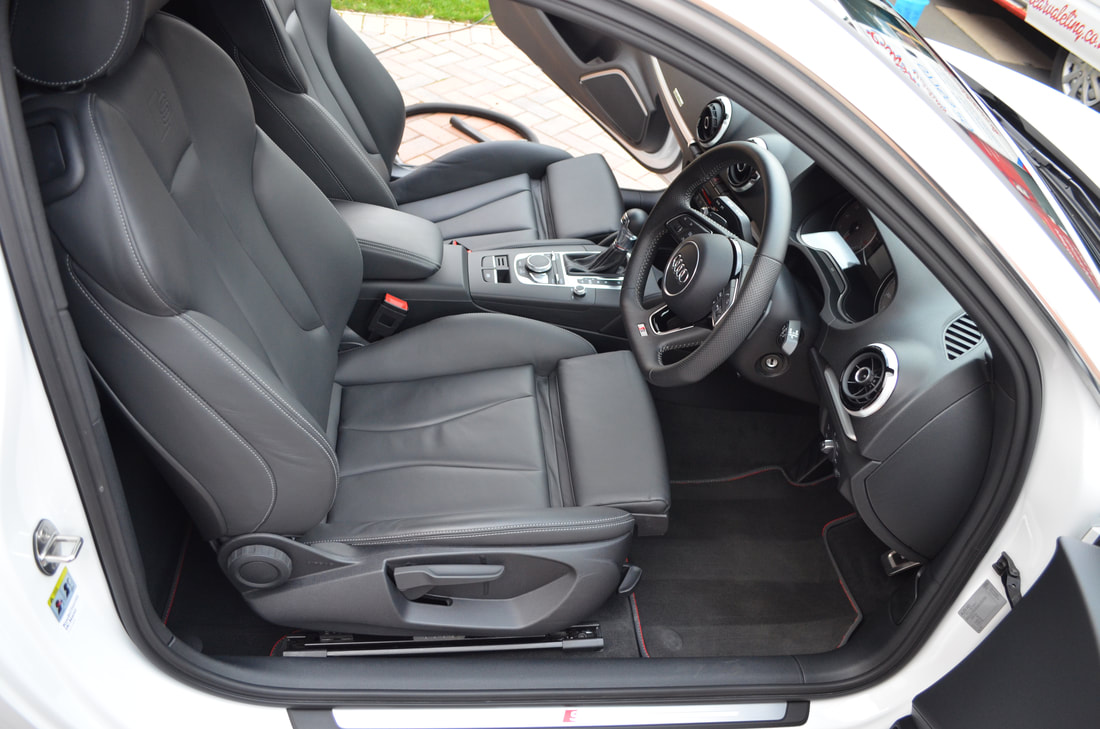
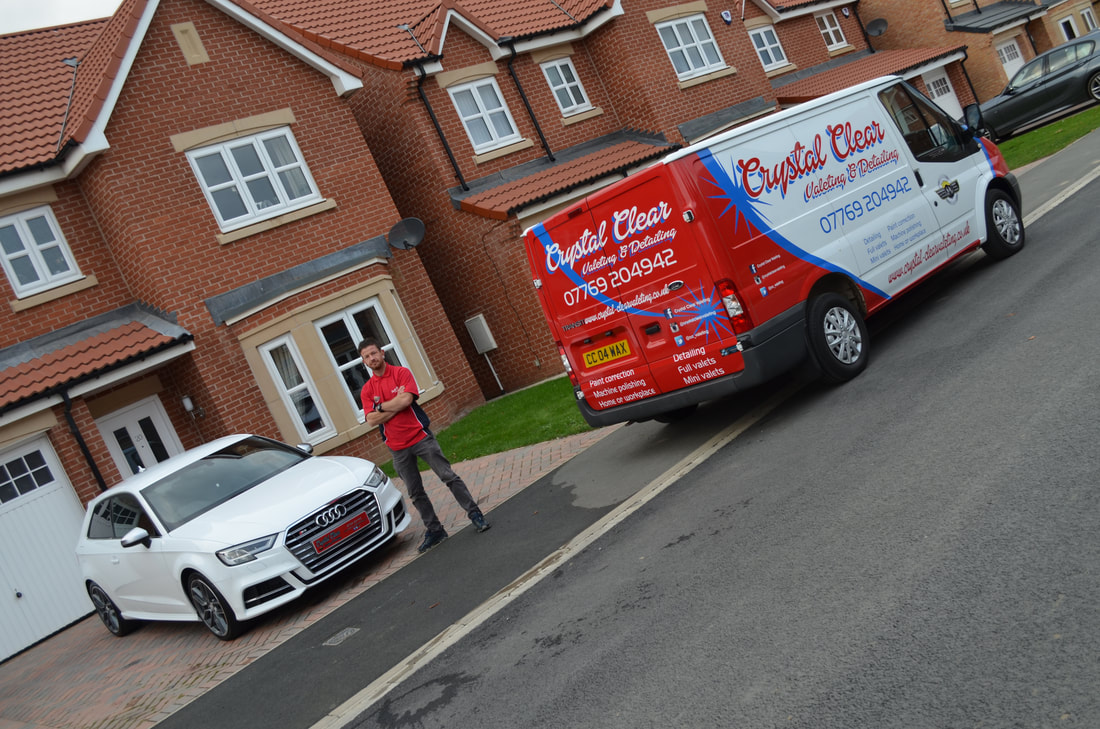
Of course, there is also "Correction" on offer, which is multiple stages of compounding and refining to get the very best result reasonably possible. This particular service takes many, many hours over at least two days and must be done indoors. If these services appeal to you please visit www.detailedbyandrew.com/services for a full list of services, prices and add-ons available. Whilst the "Service Clean" is popular and I want you to use this particular service, there is a limit to its use. It isn't intended as a stand-alone service - it is indeed part of an ongoing car care regimen! Going forward recommendations will be made to customers on what service is due on next visit, and repeat "Service Cleans" may have a cut off point after 6-9 months before a "Maintenance" is due *if it is of professional opinion to be needed*. I want your cars to show the full benefit of the services I specialise in! Thank you for reading! All the best - from Andrew An industrial conurbation known as the Black Country, where I was born, is vastly all I have known in a practical working sense for all of my life, much less my valeting and detailing career. It has a unique, abstract yet proud background deeply rooted in the industrial revolution and a hard working character, with an intriguing throwback Anglo-Saxon accent to accompany it. Working in the West Midlands and its surrounding areas provides no dull moment. It is a great place that I enjoy working in, whether that be serving customers in good old Gornal, suburban areas such as Droitwich or Wombourn, M6 J10, or quaint villages such as Kinvere and Enville. However, there comes a point in one's career where there is just that bit more to learn and experience where the norm has to go out the window, so to speak. By saying this, I don't just mean geographically either. Myself initially cleaning, polishing and inspecting my car to obsessive standards in early 2010 and first starting as a business in 2011, have always had that express desire to constantly improve and learn. In contrast I feel such a disdainful emotion of disappointment when I hear, see or read of individuals who act so arrogantly and be all too prepared to shoot their peers and fellows down in the name of being, quite frankly, pretentious. It is far better to be humble, make allies out of your peers and accept that there is always something new to learn; there is always an aspect of your game you can proactively improve on. This, in my opinion, gives a professional the ability to work on a priceless Supercar one day, but still earn the bread and butter working on a Ford Fiesta the next. As they say "If you can walk with crowds and hold your virtue, or walk with kings nor lose the common touch"... As a result, It was decided a couple of months ago that I would set aside six or seven days in November to do a little bit of travelling. This wouldn't just be any old aimless travelling though. As part of this blog series I want to share with you my incredible journey learning and gaining experience with some of the people who have helped me to an extent they didn't quite realise, before I had even met them personally. Jonny Fryett of Crystal Clear Valeting and Detailing was one of the first Professional Valeters and Detailers Association members to personally welcome me to the group on my acceptance back in September 2016. At the time, I struggled with pricing my work. Yes it sounds ridiculous to hear from me, but newly starting as a mobile business from a previous unit based set-up in a Kingswinford trading estate, whereby everything I offered was considered a "rip-off" without actual consideration of the full process and cost, I (re-)started off well but fell into the trap of the dreaded "mini-valet". What is a mini-valet anyway? As far as I'm concerned in hindsight it was a cheat code that the public used to get a neglected car to look like new at the fraction of the cost of the full valet that it should have been booked as. Needless to say, despite the full paintwork enhancements I was busily carrying out I soon ended up tearing my hair out, at all the excessive pet hairs I was tearing out of these mini-valets. Jonny spent the time talking me through where he drawn the line between his distinctly separate service packages. He didn't have to, but he did, and at great length. We discussed in depth the kind of questions to ask punters on the phone, where to draw the line when a vehicle is presented in an unacceptable condition, and more. I had also met members of Jonny's family when they were visiting Kinver and a bird had bombed all over their car. Jonny gave me a call as a trusted individual to clean the Mercedes in a manner that the car wash just didn't care for. A gentle pH neutral cleanse of the bird lime, or an acidic splash and dash? The choice was simple. So on the morning of Thursday 2nd November I got my van somewhat ready for a trip across the M6, M42, M1 and so forth before I reached Teesport and rocked up at Mr Fryett's. Our initial plan was to get some choice shots of our work vans in the local sightseeing backdrops, except the borrowed DSLR I had was out of charge and I kind of didn't have the charger pack. We made do with phone pictures whilst I went into the local electronics store to purchase a universal battery charger. With the Nikon battery confidentially on charge we headed out to an all-you-can eat buffet where I sampled the local delicacy called Parmo! The next day, Jonny had a rather mucky Audi S3 booked in coinciding with my visit. Starting with a Citrus pre-wash applied through a pump sprayer, the car was then pressure rinsed with the Kranzle K7 powered by the generator. The customer was not home at all during the visit, so a fully mobile service was required seeing Jonny providing both water and electricity. We then cleaned the wheels with a non-acid based formula paying attention to scooping the build-up from the inside of the wheel barrels and arch wells with EZ Detail brushes. A safe wash to the bodywork was then attentively provided utilising the multi-bucket wash technique and mitts; carefully cleaning the mitts between each panel contact. The car was then treated to safe iron fallout removal before a final rinse down and air dry and gentle plush towel dry. The customer specifically asked for attention to the tail pipes so after we hand polished the car my secret combination came into play from the bench to get them looking like new and sealed. Jonny explained to me that his speciality currently stands at hand polishing so we each grabbed a hand polishing pad with some Scholl S20 and met in the middle. Hand polishing can indeed provide some level of cut and a great finish. Jonny then phoned the customer to offer the various options in terms of waxes he carried on board to suit his customer's needs. Britemax Vantage was the order of the day, so whilst Jonny got on with this I tended to sealing the alloy wheels and dressing the tyres. A layer of SiCoat was laid down on the doorshuts whilst Jonny got on with most of the interior work including a KKD Lush Leather clean treatment. All that was required following here was an attentive vacuum of loose carpet debris, a light spray to the interior fabric with Autoglym Interior Shampoo, some light dressage to the plastics, and Krystal Klear glass polish before the finishing touch of carpet stripes and leather scented air freshener. Needless to say, Jonny received a text message form his customer to relay the delight in the work, and as the sun went down I headed towards an eerily quiet route towards the next part of the trip...
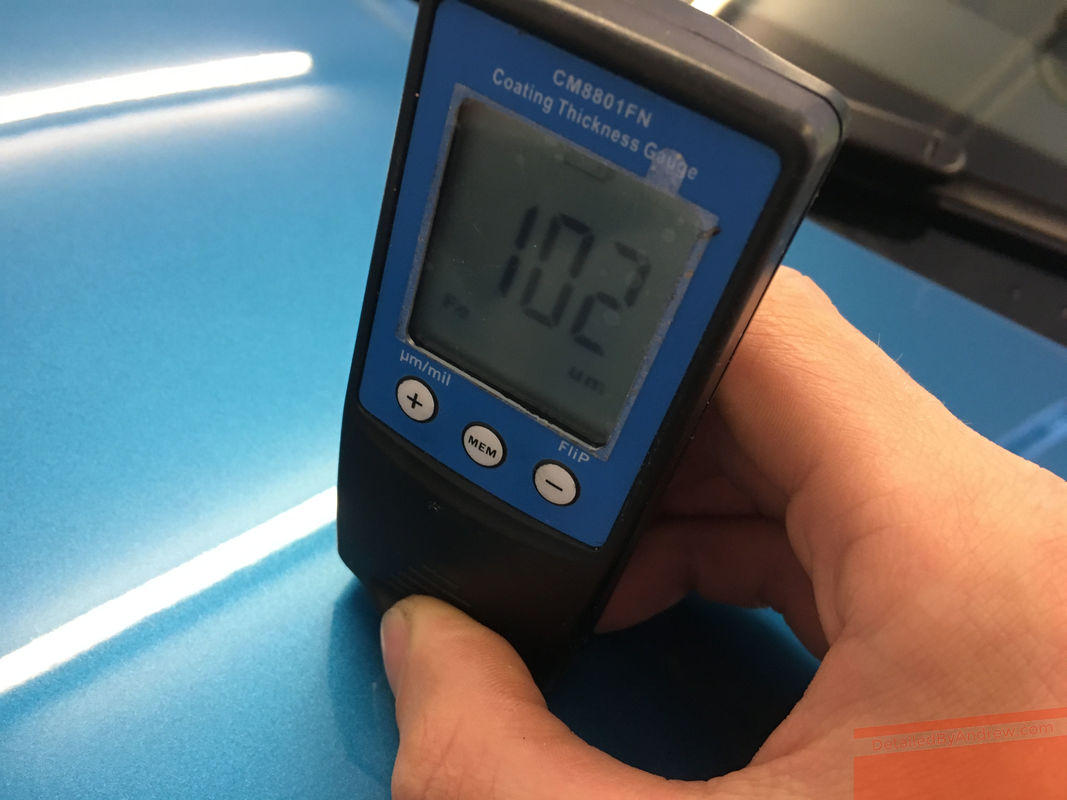
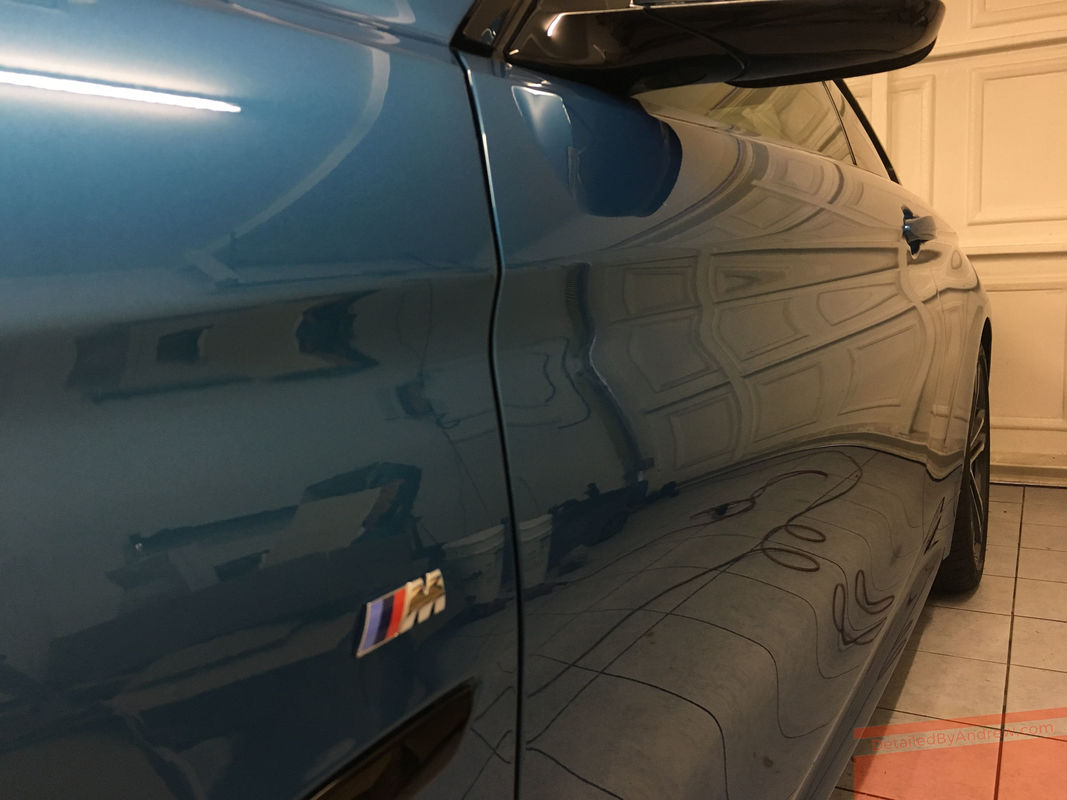
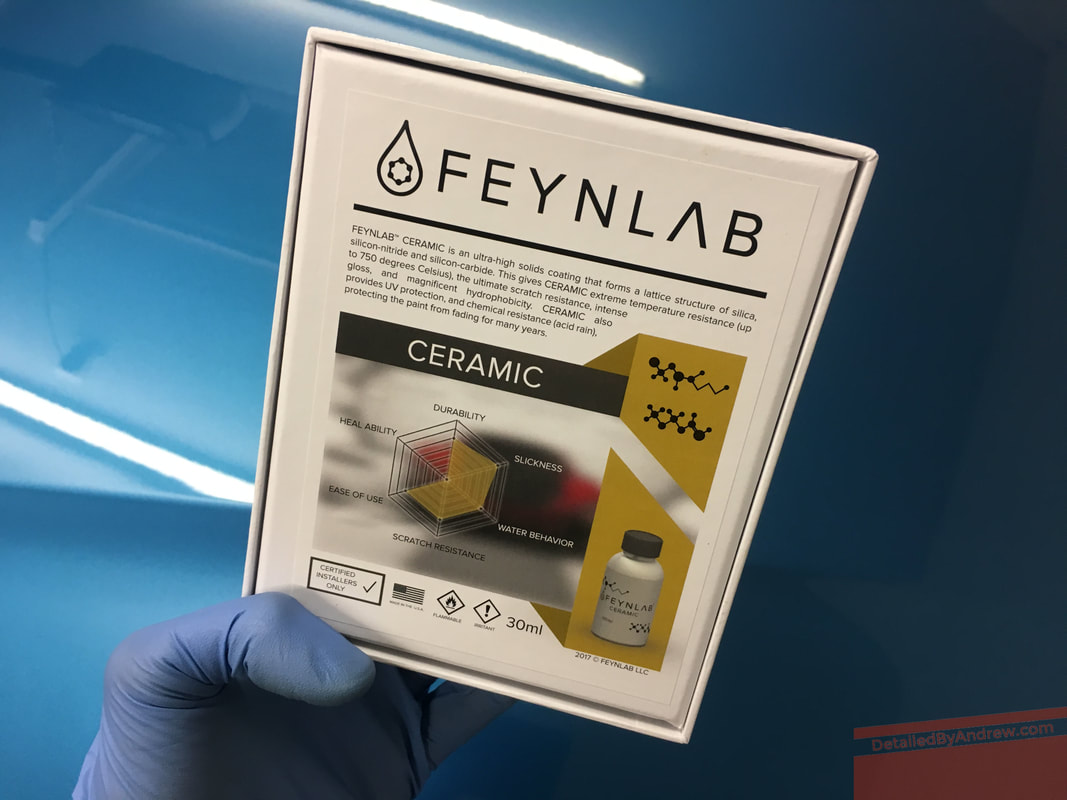
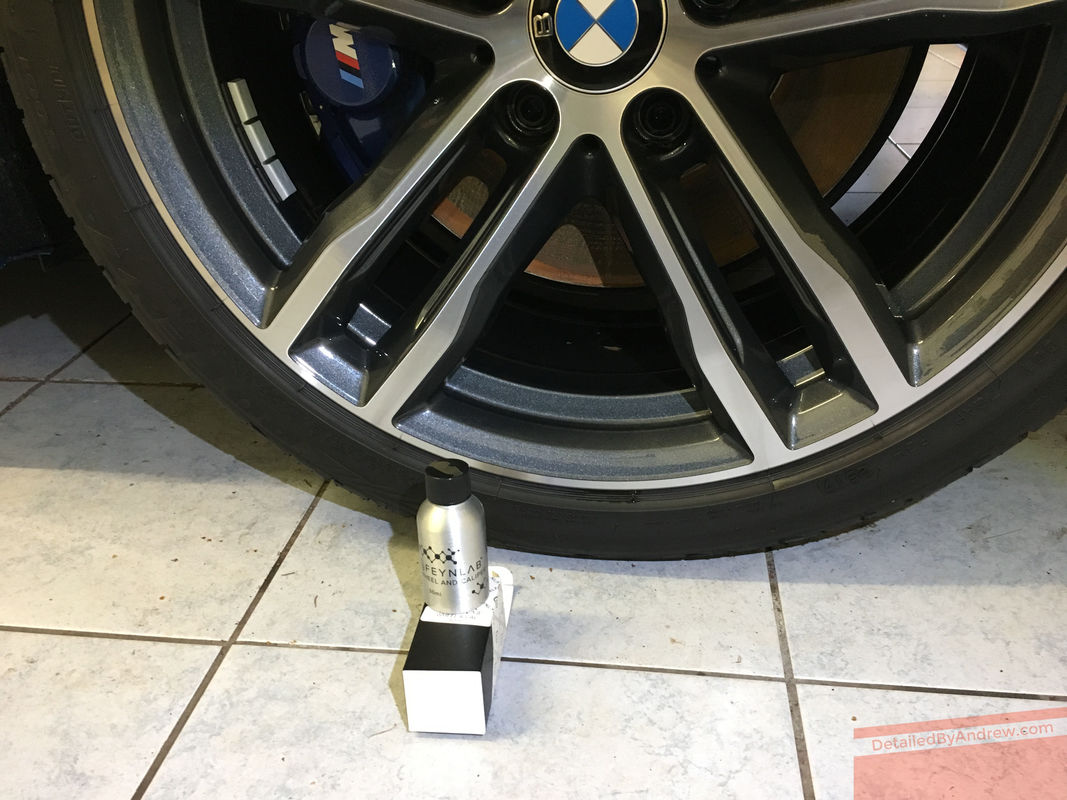
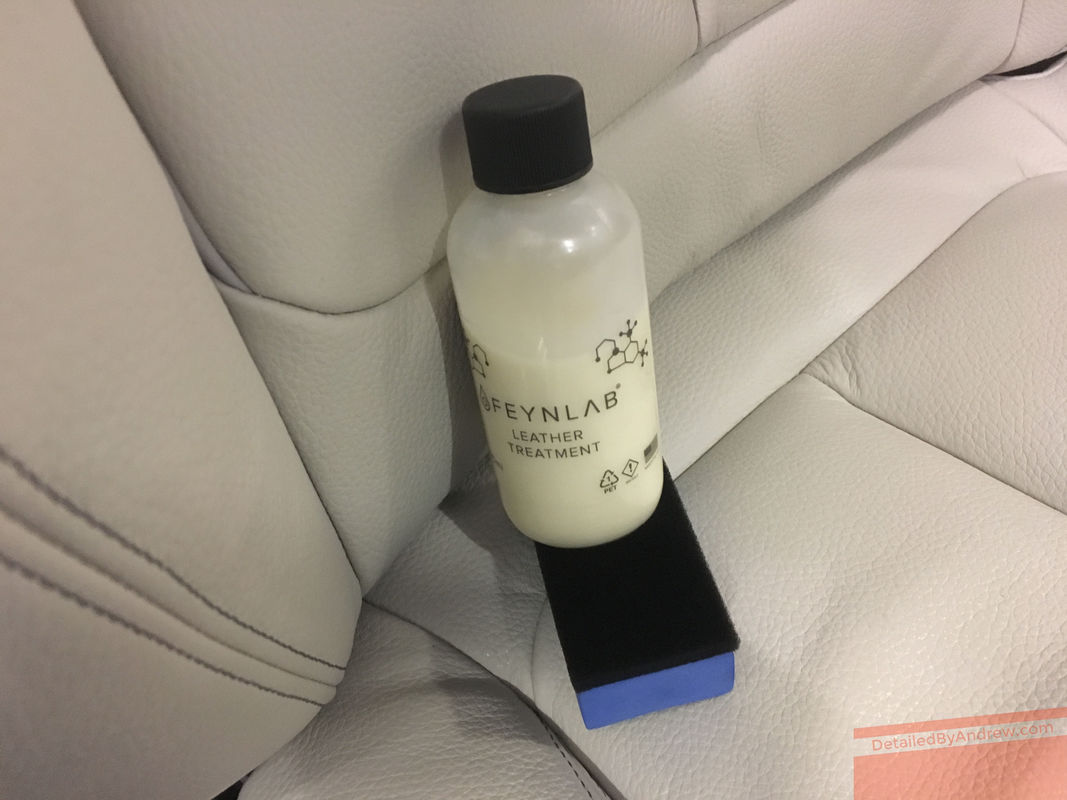
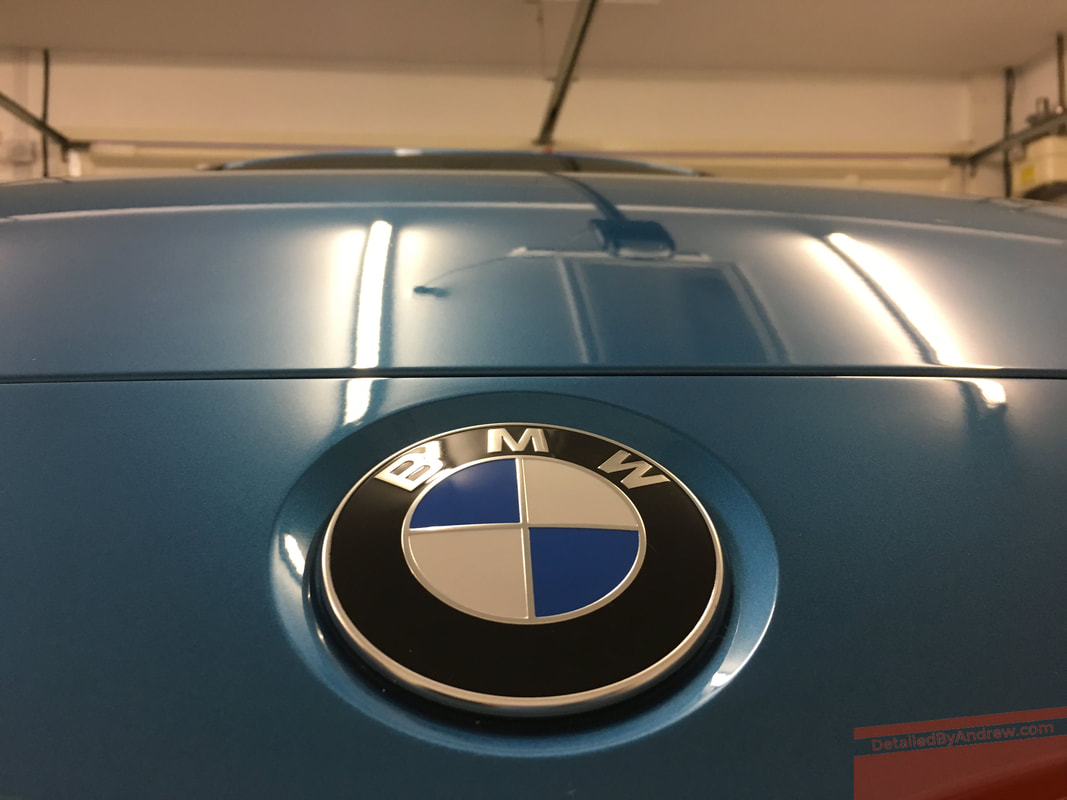
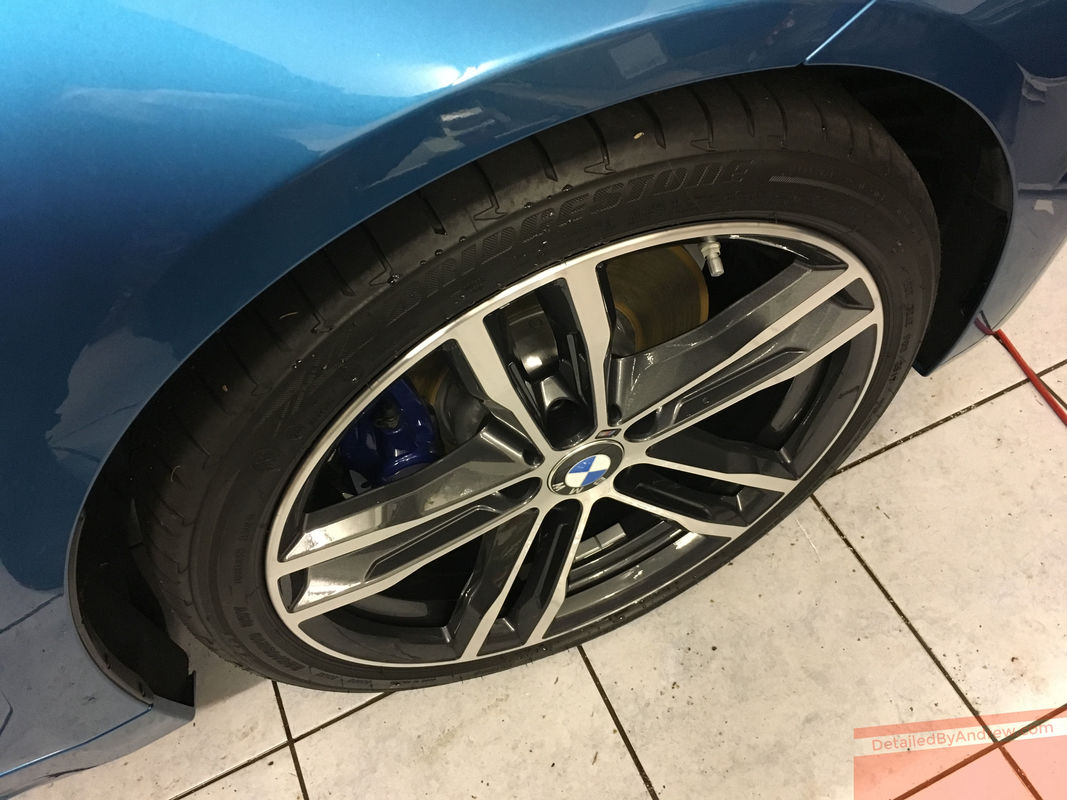
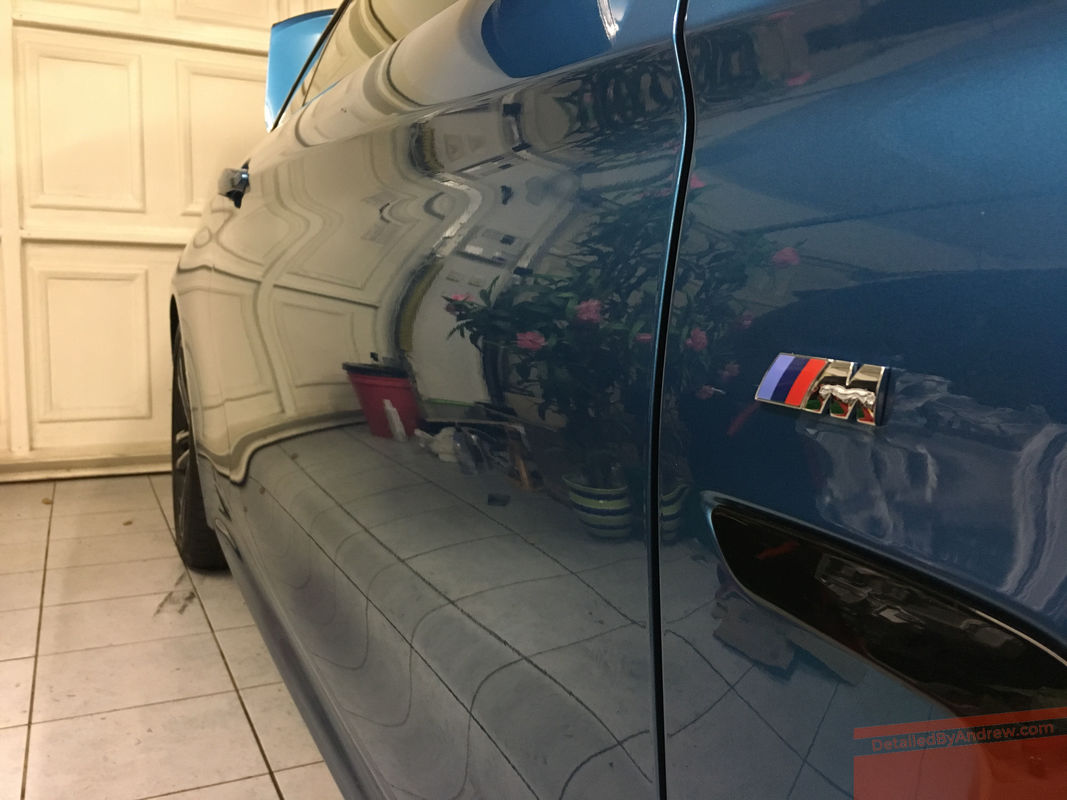
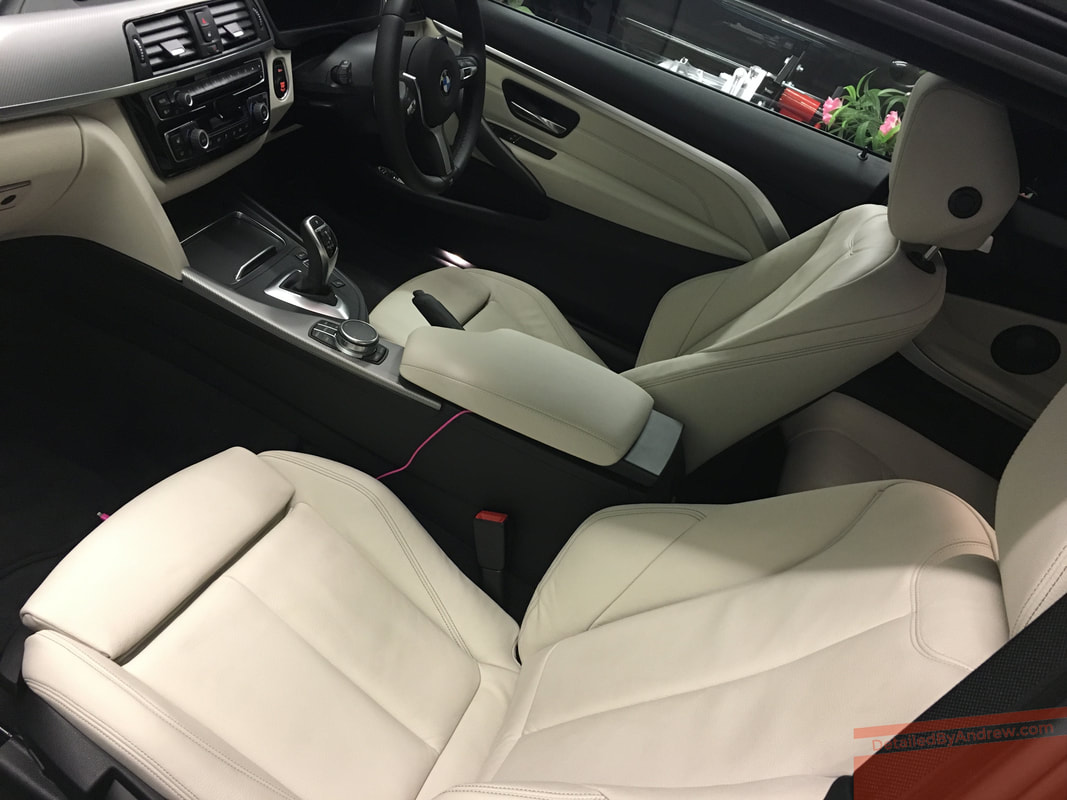
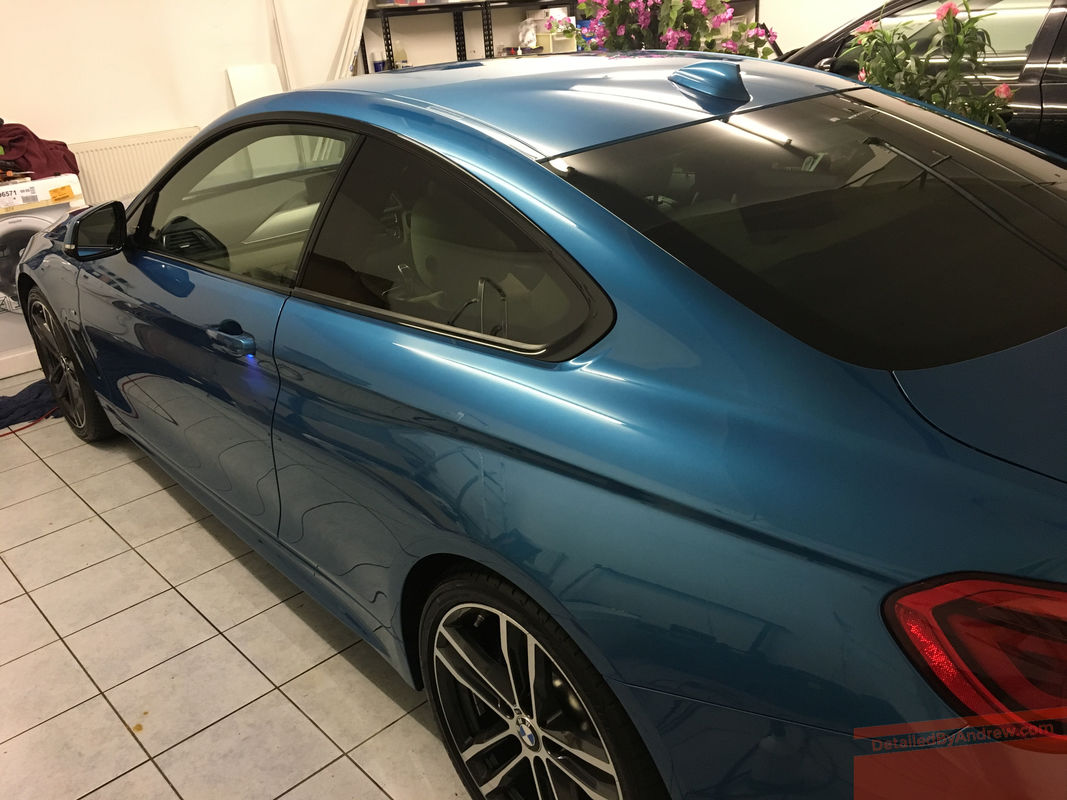
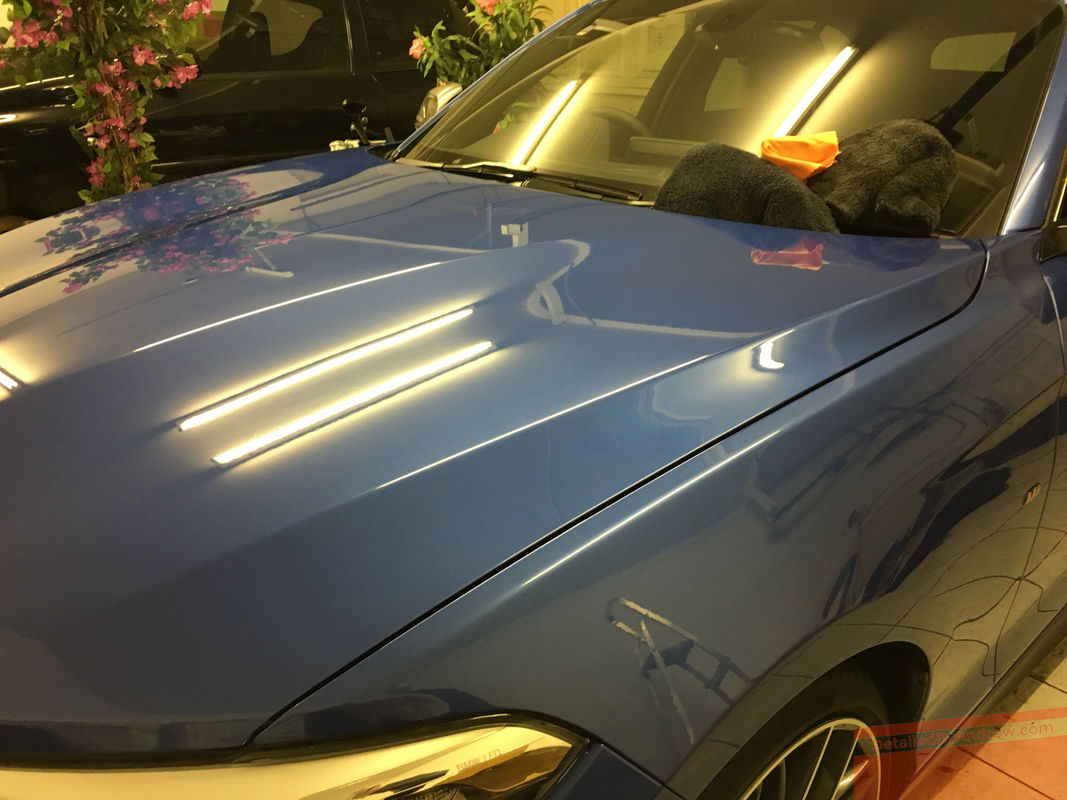
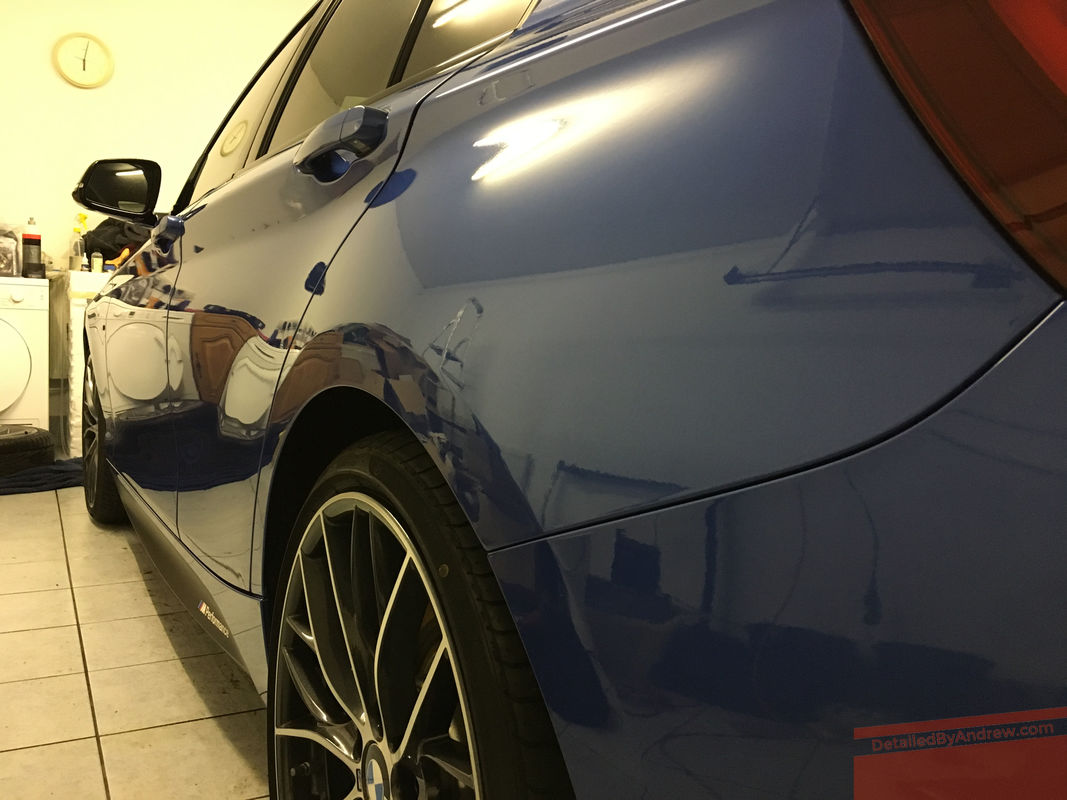
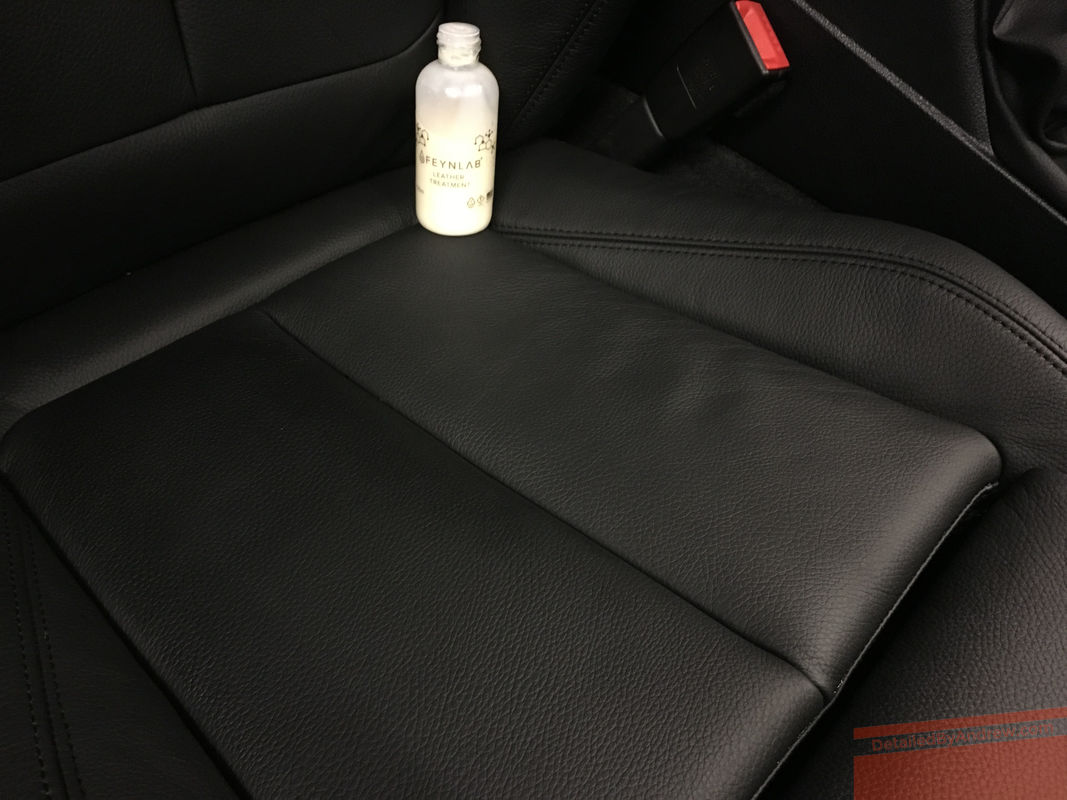
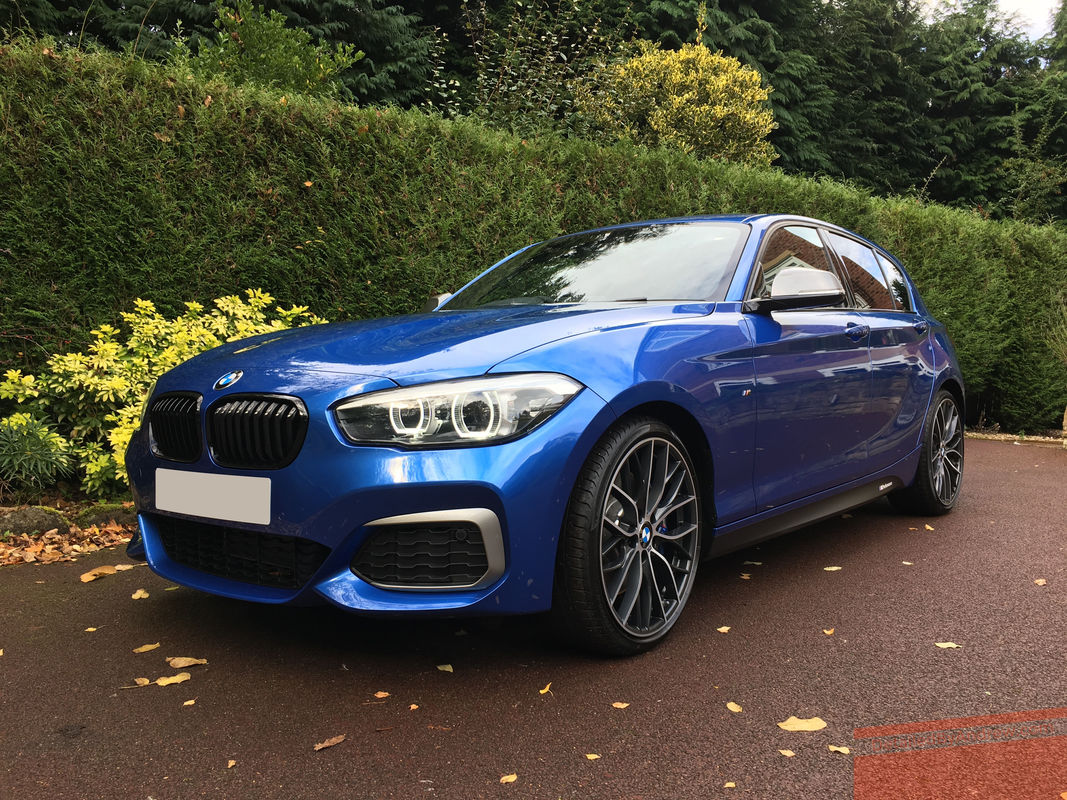
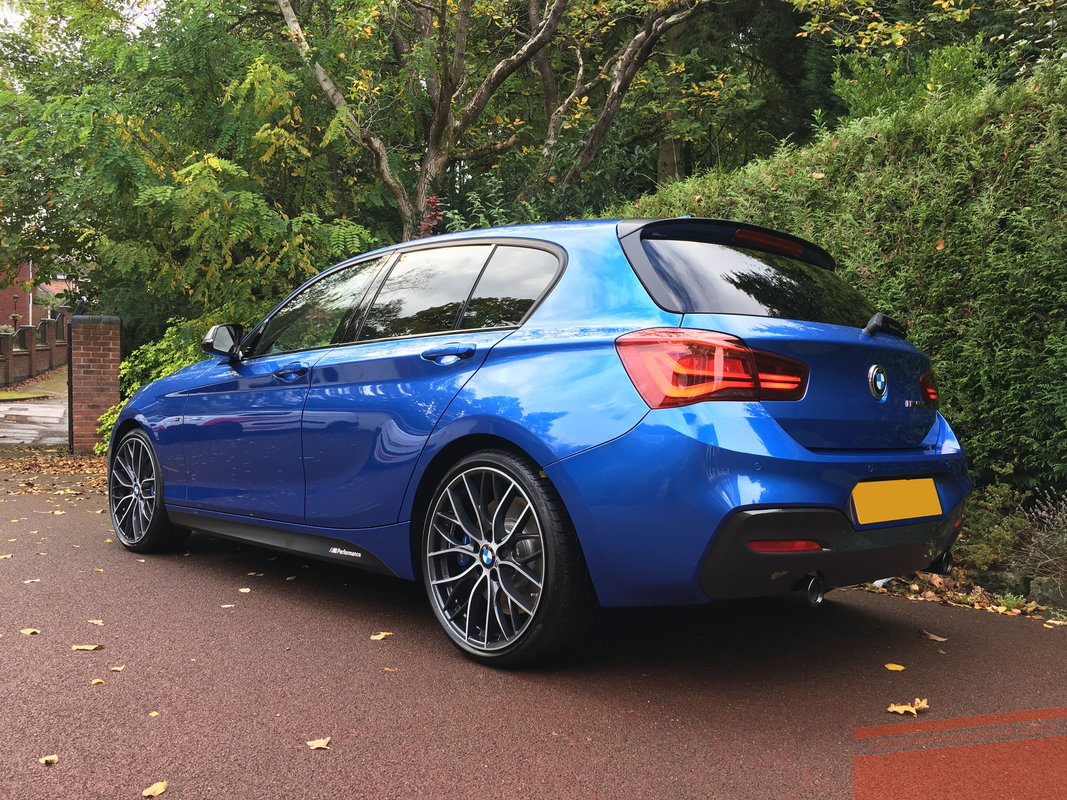
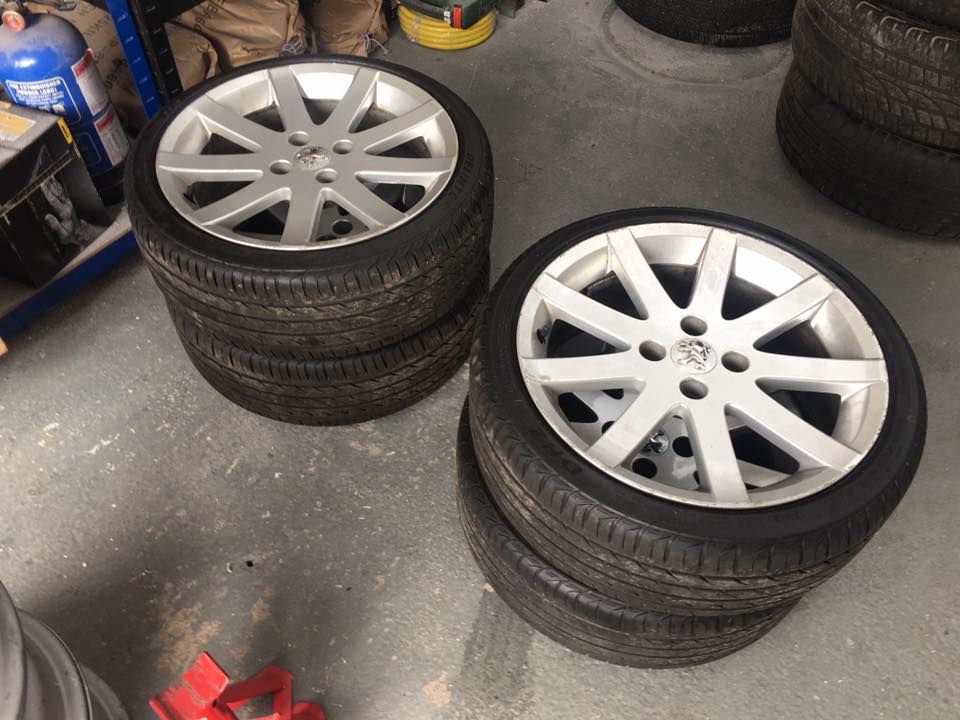
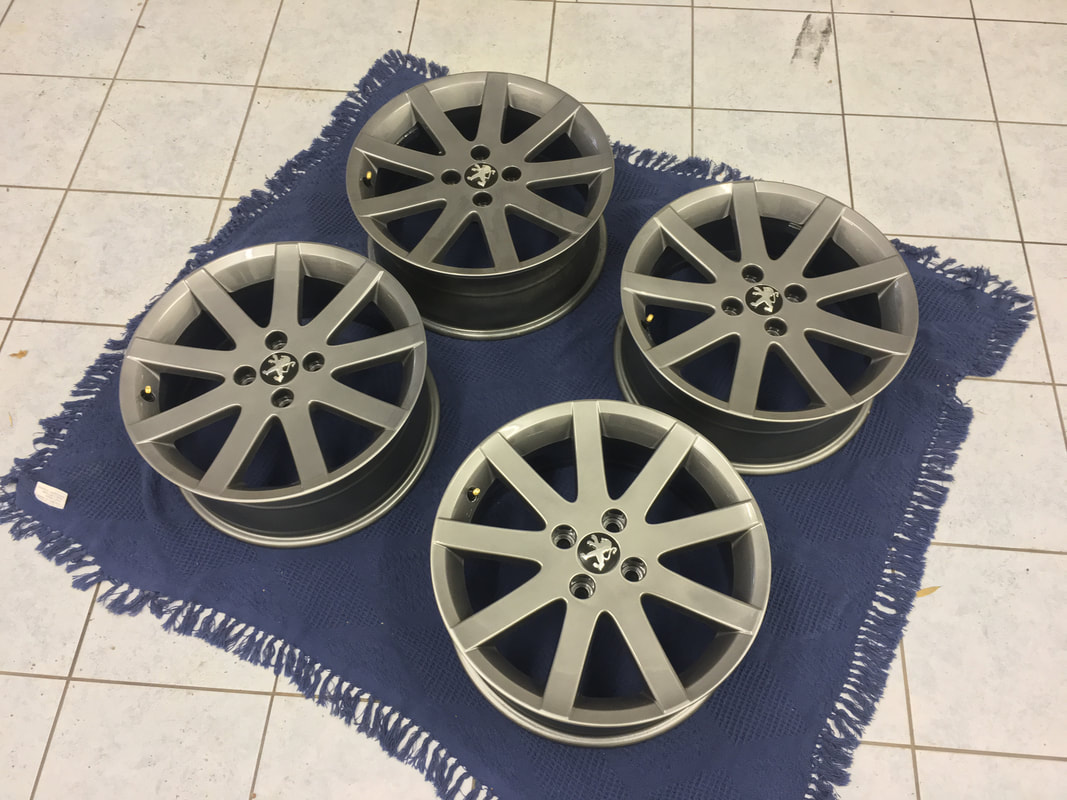
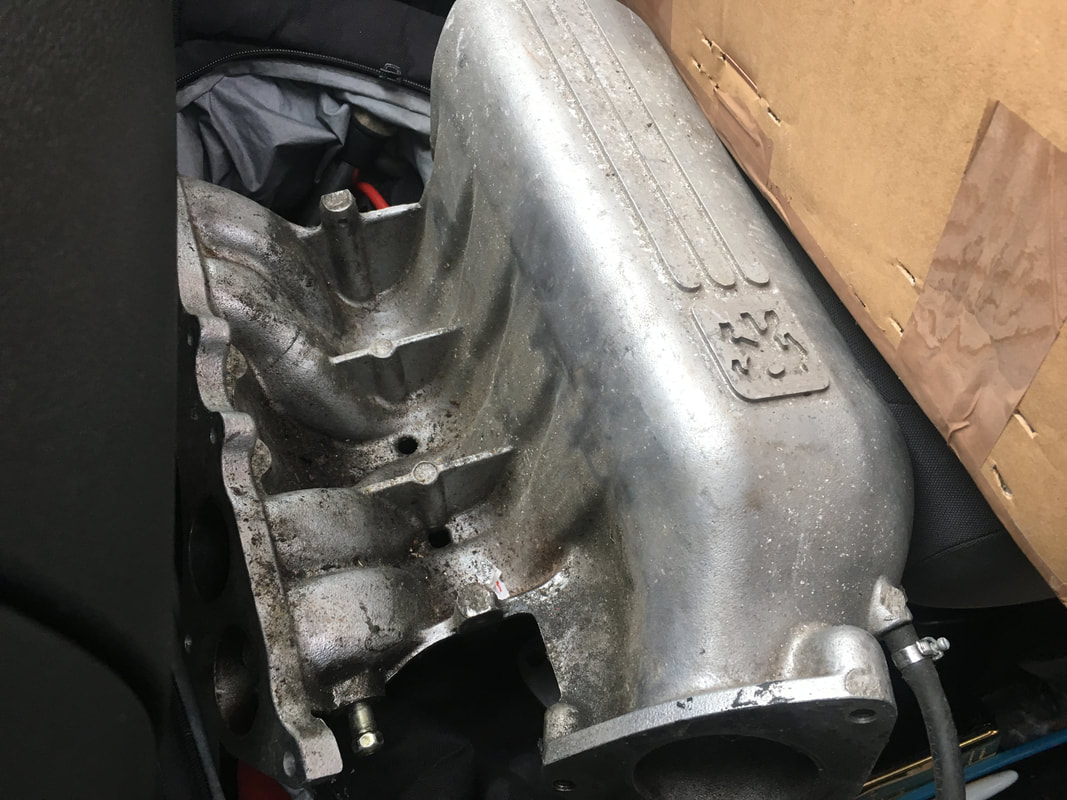
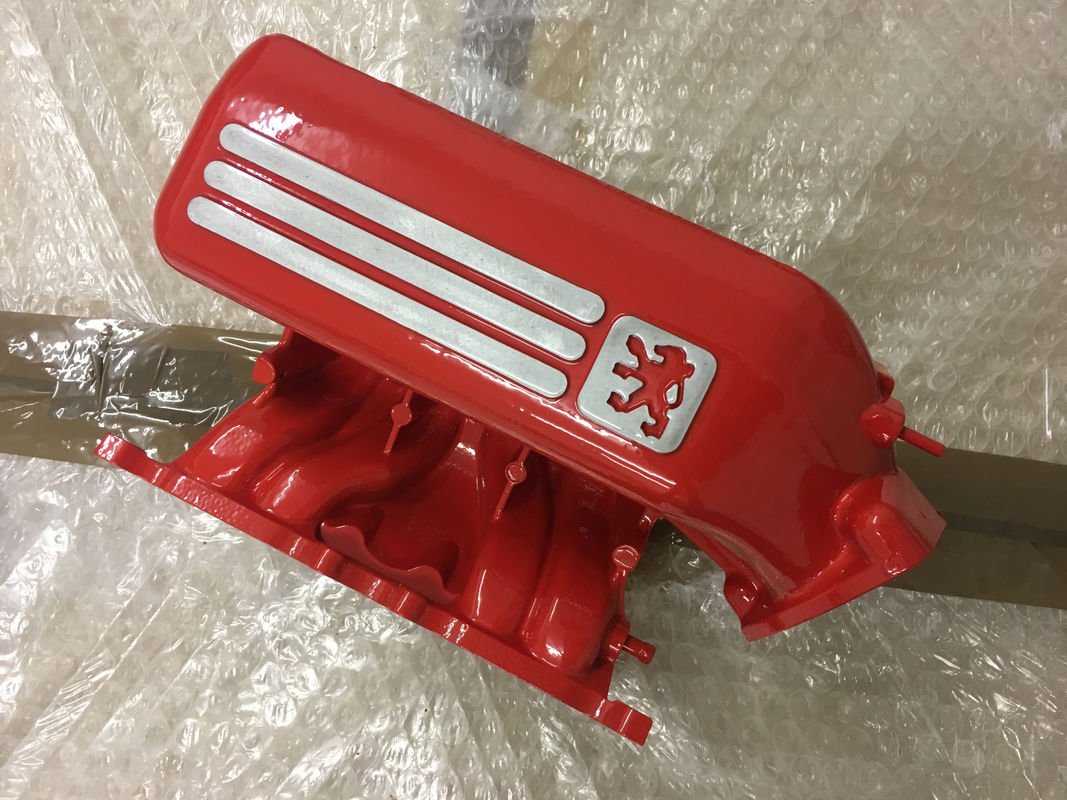
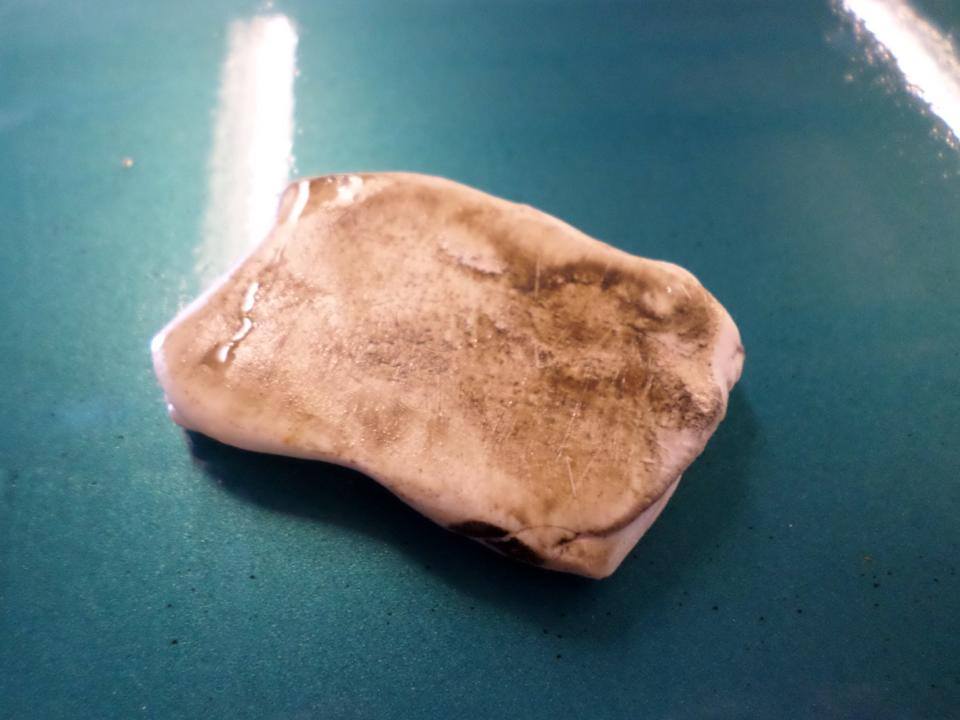
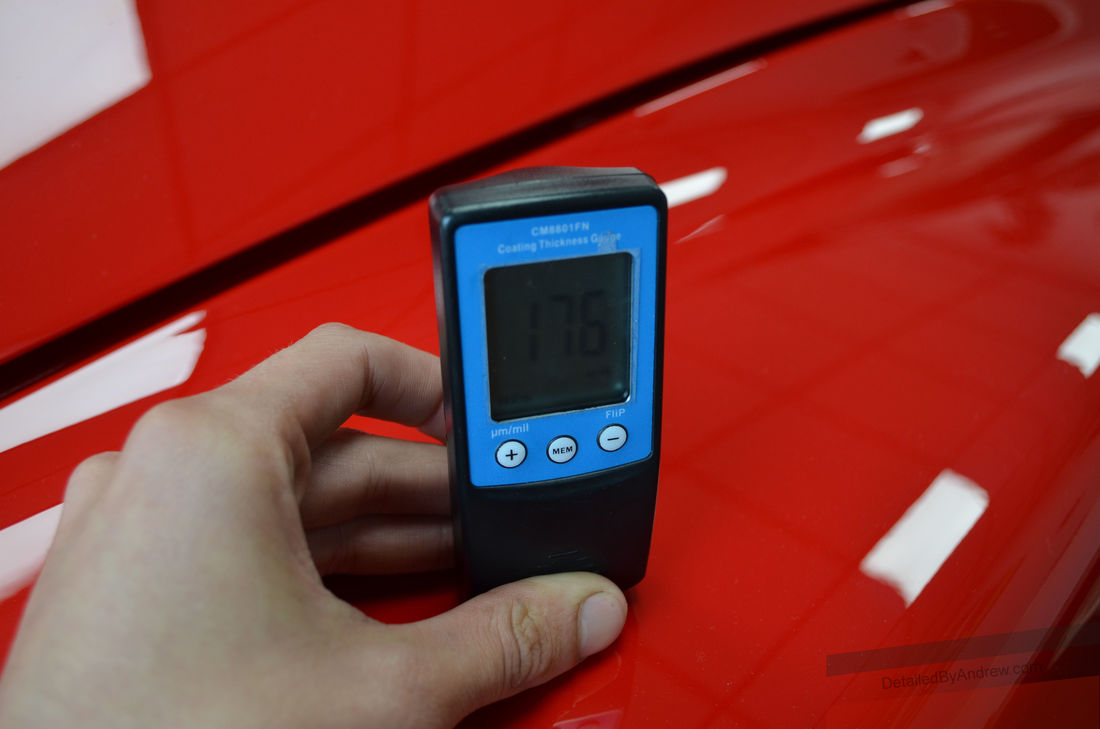
 In this latest post, I aim to provide a bit of insight for members of the public, and potential customers in particular, as to what paintwork protection actually is, and what type they may consider the most suitable for their needs. I also understand that amongst the audience of this blog that there are fellow pros and enthusiasts so I hope they find this article to be mildly stimulating at the very least. Please note that what with the intricacy and ever expanding offering of products I aim to cover things in a broad sense and make no claim to this post qualifying as a perfect dissertation. First things first, bodywork. Your vehicle is constructed out of various substrates such as metals, plastics and as we progress into high end sports cars and specialist vehicles, some weird composites as well such as Carbon Kevlar. An illustration I made for a previous blog post features to demonstrate and recap the layers found on your bodywork. Essentially, you will have the substrate, then primer layers to help the above colour base-coat bond to the substrate, and then (barring old cellulose and single pack paints) a clear polyurethane lacquer to protect the base-coat underneath. This clear lacquer is what gives a vehicle that lustrous shine when it rolls out of the factory, and from there on in will be subjected to road debris, general contact and car wash chemicals. We want the paintwork to look as clean, shiny and as blemish-free as the day as it rolled out of the factory for as long as possible - and this is why Detailing exists, as well as the plethora of treatments that entail. Below I will give a brief outline of the various types of protection below, and whilst I am no scientist or "master", hope to advise on what offering may be of best interest to you. Disclaimer: I take no responsibility for any use of product that you may personally carry out having read this blog. Liquid Detailing Sprays and Sealants Two similar product kinds combined into this segment because they are both similar in their application. The simple, to start with. Detailing sprays are the most inexpensive, easy to use, and minimal risk of all offerings. As they are a liquid, by working them into the paintwork with a suitable high quality plush towel, the risk for marring clean paintwork should be minimal, and can be done during the drying phase to be time efficient, and even make drying the vehicle easier and safer for your paintwork's finish. Detailing sprays should not be used on dirty paintwork, or the action of moving dirt around on your paintwork can induce marring, the presence of fine hairline scratches in your paintwork often casually referred to as "love marks", or as I call them, "rub rash". Some examples include: Autoglym Rapid Detailer, Meguiars Last Touch, and Krystal Kleen Detail Mist X. Detailing sprays; whilst their design often does not usually offer much in the way of water beading and sheeting as a stand-alone product, I have included them here as they are there to be implemented into a car care plan because they should not strip or deteriorate any existing protection - therefore being an essential asset to any car care regimen. Liquid sealants are similar to detailing sprays in their application and use, but will contain some kind of carnauba wax, polymers or other kind of water repellent ingredient that technically means they can act as a stand-alone protection product, but even better when layered over something more robust. The trade off for this protection means that in some case, they may not bond or be as durable when applied on a wet vehicle. Examples of liquid sealants include: Optimum Opti-seal, Krystal Kleen Detail SiCoat (a product on offer at Detailed By Andrew), and Sonax Brilliant Shine. Liquid Paste Wax and Sealant You've got the gist of quick sprayable detailing sprays and sealants, we now move on to products that are still a liquid, but are a little more paste like and need to be applied with an applicator sponge. Rather than a sprayable water-like liquid, they have a viscosity similar to yogurt. The fact that they have to be lightly rubbed into the paintwork, left to cure before being buffed off means that the vehicle needs to be more thoroughly decontaminated than say just a regular wash. When applying any product that requires buffing we don't want there to be a presence of tar spots or suchlike in case they come away from the paintwork onto the buffing implement, and then end up being dragged along other areas of the paintwork, potentially causing what we call random deep scratches. Therefore, at the very least a tar remover should be appropriately applied to the car during the wash phase. Their effect is further amplified by polishing the vehicle first but may not be necessary, and their application and buffing should take around 20-40 minutes. Examples of liquid paste waxes and sealants include: Chemical Guys Butter Wet Wax, Poorboys EX-P Sealant, and Collinite #845. These kinds of products add gloss water repellent behaviour that should last 3 to 6 weeks, which minimal fuss of application. They bridge the gap between a liquid spray sealant and a hard wax. Hard Wax Good old carnauba wax. Scraped from the leaves of the Copernicia Prunifera ever since the day we got jelous of how shiny the leaves on that tree were, and how they repelled water. Tried and trusted for decades, and have been blended with polymers and other protective chemicals over the years. The preparation for a hard wax to be applied is more stringent than the previous two types of protection mentioned above, as you may notice I personally only offer hard waxes as optional extras to Detailing specification works, and not at all in Service Cleans. A little unfair you may ask? Not at all. When a hard wax is to be applied, the surface should be perfectly cleaned of all contaminants, meaning tar spots, iron fallout and anything that the paintwork did not have sitting on it when it came out of the factory. Therefore a full process including clay barring needs to be completed primarily. Then, once the paintwork is clay barred it must be polished as clay barring by essence, whilst beneficial in removing microscopic deposits, can marr the finish as after all, you are rubbing two surfaces together to remove debris. This marring is only faint, and comes away easily with polishing. Moreover, some hard wax manufacturers recommend their own pre-wax cleaner polishes to help their own product adhere to the surface properly - such cases being Autoglym Pre-Wax Cleaner and Swissvax Cleaner Fluid Regular. When opting for my Detailing services, you will only ever receive polishing via machine, as opposed to by hand, as it is much more effective in giving a superior result and uniform finish. Hard wax offers an amazing shine, and depending on vehicle use, aftercare and mileage can last for 3-6 months depending on which one used. Although some premium waxes such as Swissvax Best of Show (a product I use) can cost as much as £225 for a 250ml jar, hard waxes can be relatively cost effective, with some costing as little as £20 for a similar jar. At around £45 for a 150ml kit, Autoglym's HD Wax offering makes a great entry level upgrade which lasts for quite a while. I always felt that HD Wax made my own Peugeot 206's black paintwork look better at car shows than other products in its price bracket. As I have mentioned, the process in getting a vehicle ready for applying a hard wax is much more time consuming than anything discussed in this outline so far, and the actual application is also much more time consuming. On average it takes me 40 minutes to 1 hour onwards to apply and remove a hard wax purely down to it's nature. In cold and damp environment this can be even trickier as the carrier solvents struggle to escape as the product cures, often involving many passes with a towel to level it off nicely. I'm sure you can now understand why these products are a premium extra to my service as it's not just the cost of the product but business working time on top. 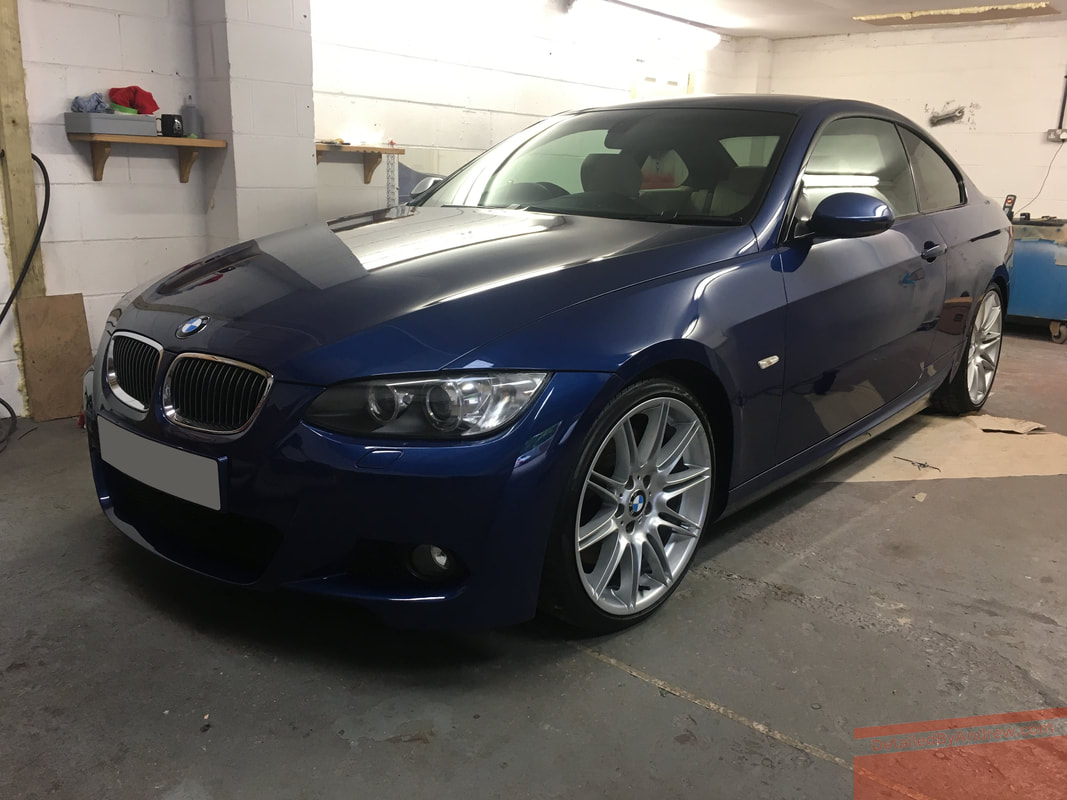 So who would benefit the most from a hard wax? They are right at home on classic cars and show and shine entrants. As they do not permanently alter a vehicle's finish, they can always be removed and re-applied for that freshly done look that is very hard to replicate. The every day car enthusiast or customer who would like a shiny car would also see benefit. On the other hand, unloved vehicles that transport sales reps up and down the motorway may need to look at something else. Ceramic Coatings Ceramics have been the buzz word of the last couple of years, with their potency ever increasing. They are formulated out of Silica and its derivatives, such as Silicon Carbide and Silica Nitride. These compounds form a cross-linking layer on the paintwork's surface, essentially adding another micron or two to the total paint thickness reading. They are incredibly durable, some offering 12-18 months, with some manufacturers claiming a lofty 5 years+. However, the higher the potency, the greater the need for a controlled application environment. Ceramic Sealants such as Feynlab Universal I find are happily applied outdoors in the summer given high temperatures, low humidity and zero wind to blow debris onto the surface during application. Whereas those that claim higher defensive properties require specific indoor conditions not just during application but also through a specified curing, or "gassing out" time, often being between 4 and 24 hours. Often times you will find coating specific to certain vehicle components, such as CarPro FlyBy Forte to glass, Krystal Kleen Detail R-Evolve X for alloy wheels and so forth. The main benefit of a ceramic coating is it's durability, so is most suitable for those who want easy aftercare and minimal fuss. Although, my main concern is managing what people should expect from it. Contrary to some videos circulating, it won't defend your car from laser beams, rocket attacks or stone chips - it will help to minimise wear and tear though. Another point is to ensure that customers look after their car properly afterwards. I always make a point of informing customers of the importance of washing their car at least once a month, as road salts and contaminants will degrade the coating over time; to be kind to the coating is to keep it clean, so it can keep looking after your paint. If it can be layered over with products that top it up, even better, which is why products like CarPro Reload exist. Products such as CarPro Essence Plus exist to be lightly polished into old coatings that may be showing signs of needing revitalising, so there will always be a need for ongoing maintenance. The main considerable point with ceramic coatings is cost. If you struggle to justify the cost of an Enhancement Detail, which restores your vehicles finish, you may as well forget ceramic coatings which can go well into three figures cost for the prep and application, with some companies charging well into four figures for top-end specialised coatings to be applied. As per the hard wax paragraph, a ceramic coating would be a little out of place on a classic car where that particular original factory paint is in its own right, a historical document. The Ferrari Testarossa I worked on would be a little bizarre to have received a ceramic coating. Cars like my own Peuegot 206, which is undergoing part-restoration and lives indoors, a ceramic coating would be wasted on, so a hard wax would be preferred. On the Detailed By Andew works van, however, a ceramic coating would be right at home as it is a high mileage vehicle that doesn't get much of a look-in. There are other things I could cover, such a paint protection film (a clear laminate applied to panels) but they are another type of vehicle installation all together. Either way, I hope you enjoyed this article and that it has given you some food for thought - which one would your vehicle benefit from the most? Let me know in the comments below.  Time has flown by, and before I even realised, a whole month passed me by since my last blog post! Things have been rather busy as of late, with spare time to dedicate to my tertiary passion of writing proving to be rather scant. Nonetheless, I am a man of my word and have stuck to my promise of getting this particular blog post out this weekend. So, on with the show. The majority of this last week has been spent on two new car protection details; the fact that they are the same manufacturer, and similar dates may suggest they might be a dealership outsource of work to myself, but you would be mistaken for believing so! They were for separate customers, purchased from separate dealerships. The first being a BMW 4 Series Coupe, and the second being a BMW M140i 5 door. To get a vehicle off to a good start in life, getting a robust layer of protection in place is key. Both cars were tailored to customer requirements, as I find that giving people flexible options helps to give the opportunity to decide on a level of service that reflects on a given budget. A common misconception is that new cars do not need as much prep work. This quite simply is not the case. Think about it, before a single mile is put on a new vehicle, it will have gone through a production process in the factory, exposure to the environment during transportation, and then dealership cleaning and so forth. So if a durable and high quality layer of protection is to be applied to any given surface, we at least want to make sure it's cleaned and prepared properly, or why bother in the first place? Each car taken the course of two days to complete, as at this time of year it is important to ensure paintwork coatings are given a curing time without being impeded by rain. You can see by the image of the temperature and humidity gauge that these measures were monitored for peace of mind. I personally ask customers opting for a new car protection to ensure that the booking takes place before 500 miles are put on the car; the closer to 0 miles the better. This is because once the car is driven and used too much, extra measures may be taken to prepare the surfaces resulting in more time and a higher fee. Further to this, I look back on a job from last year where a brand new Mercedes GLA had buffer trails all over the bonnet from where it had been machine polished incorrectly by either the dealership or factory. Personally, if I were to order a new car and were taking it to a Detailer, I would firmly instruct the dealership to not even touch the paintwork, and possibly even leave the protective film and sponge buffers on. If you are thinking of having new car protection, get it booked in before the car arrives! Ceramic coatings can be applied to used cars too, it's just that the extra time decontaminating and machining out paintwork defects to a suitable standard therefore take longer and do reflect on the cost. My next blog will cover the various types of protection, whether that be ceramic coatings, polymer sealants, detailing sprays, and even good old wax! There may also be an update on FrankenPeugeot down the line, hopefully... Anyway, enjoy the picture gallery! 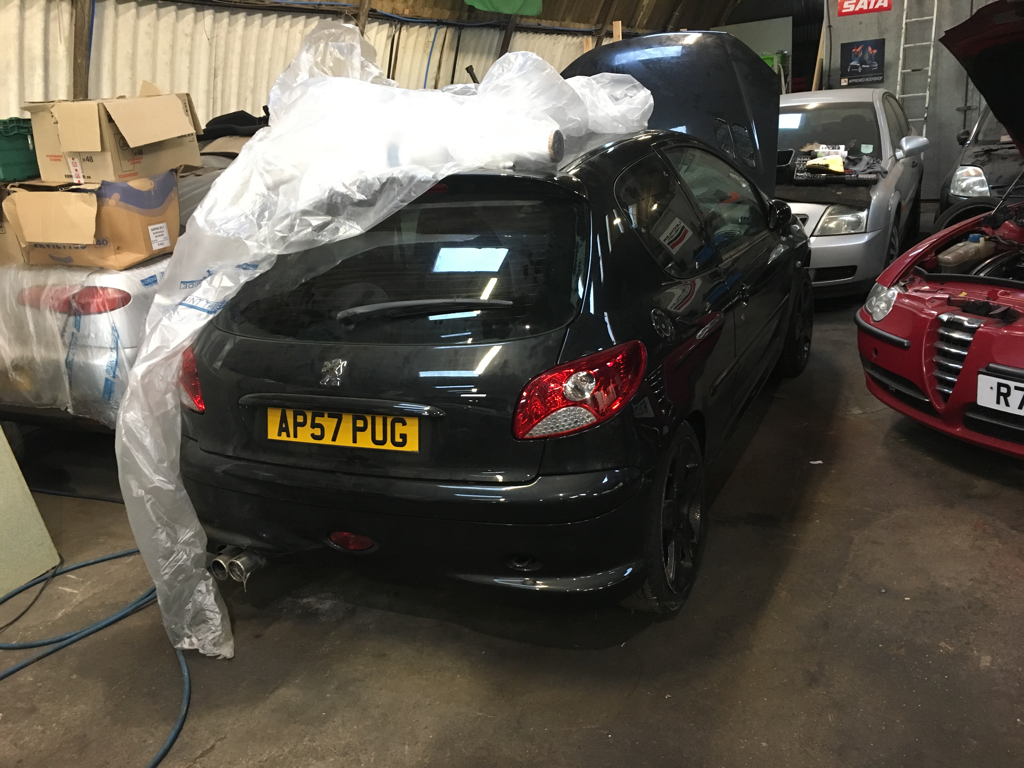 I wouldn't be a true Detailer if I wasn't also a true Petrolhead with "Diagnois: Modbug" and a somewhat delicately fettled car to show for it. The subject is my beloved Peugeot 206 which I have owned since 2010, when it was an unmolested 2 and a half year old one-lady owner example as seen below. What starts off as an innocent change of wheels, soon escalates into a roof spoiler, lowering springs, exhaust, ad infinitum as things progress down the line. We'll fast forward past the first 6 years to 2016 where up until then things were moderately slow moving and basic, to where we are now as I have aptly named it "FrankenPeugeot" - a strange amalgamation of parts from the Peugeot/Citroen parts counter catalogue. 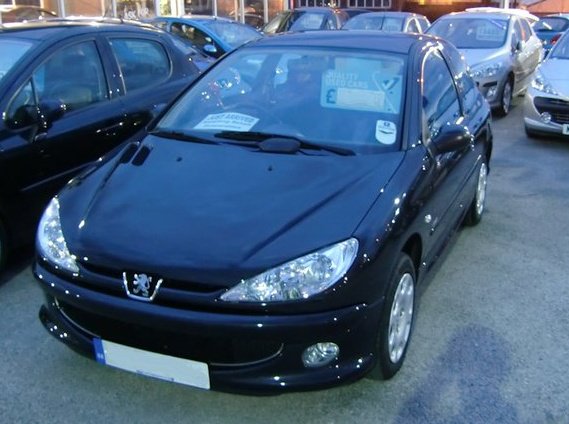 In April 2016 I SORNed the car so it could receive an engine transplant as my friend was selling his tuned 2 litre XU10J4RS (306 GTi-6, for those without Peugeot on the brain) complete with Jenvey individual throttle bodies. The notion of such a power increase proved all too tempting, but alas I abandoned this engine swap as we found that the engine's mounting points were slightly positioned wider than the car's mounting positions; causing the engine to sit slightly on the twist. Driveshafts, were to be chewed up aplenty. Remedying this issue would have involved cutting and welding at the engine bay, a feat I did not want to proceed with in-case we ran into problems getting my originally electric fly by wire throttle set up car to run a cable throttle and still have all of it's weird CANBUS features working reliably. An engine such as this, perhaps belongs in a dedicated track car. One of these, my little 206 is not. All was not lost though, and no effort up till this point was in vain. Stripping down the engine bay allowed me to treat a small bit of surface rust hiding in the corner of the firewall with Deox-gel and red oxide primer, and paint it all satin black rather than the drab primer grey colour reminiscent of the corner-cutting production factory. I didn't do a perfect job, but this can always be addressed later. Not only this, but I sent my piddly 19mm thick radiator to City Radiators of Bilston who used it as a template to fabricate a new one from scratch, with a much thicker aluminium core of 40mm, with super duper "S" pattern air tracts, or something! This design allows far more coolant to pass through and the increased air flow efficiency cools things down much better. 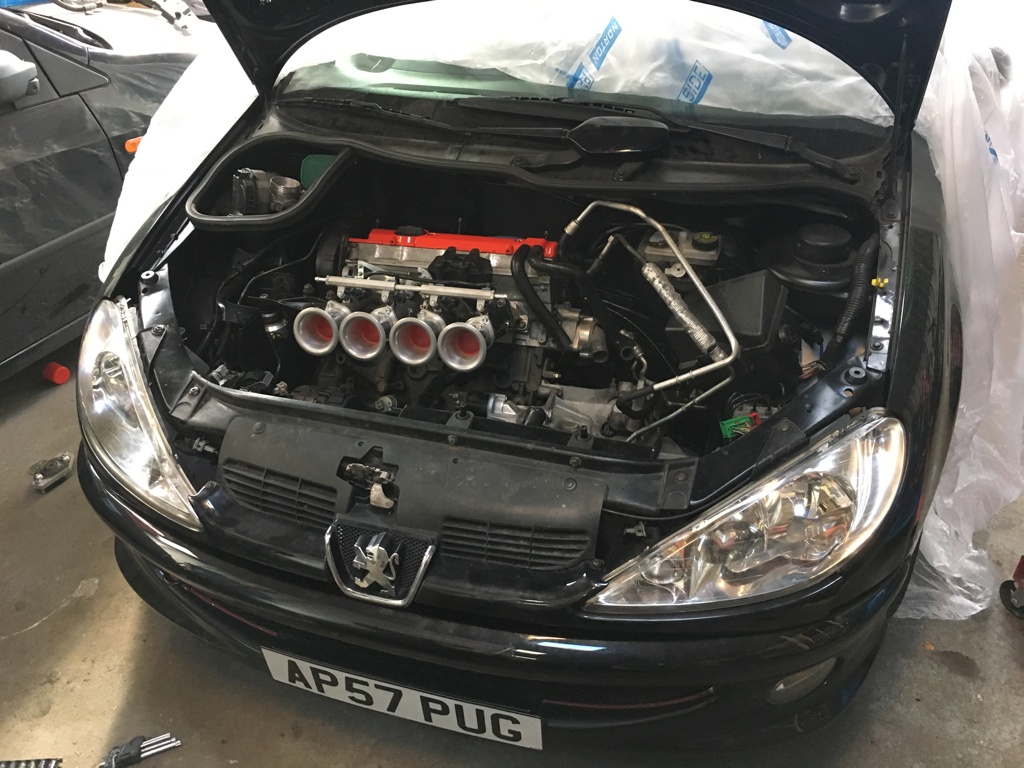 So, with the XU10J4RS going out the window, figuratively, not literally, I decided to go back to the trusty 8 valve that the car was designed for. But that doesn't mean settling for mediocrity, whatever that means subjectively. Sure, this car isn't exactly going to be catching bright green Nissan GTRs, and will be built with the aim of winning show and shine competitions in mind, but that doesn't mean it should be a paperweight either. Cars like this can easily be tweaked to hold onto the corners like politicians to their seats, so a little extra oomph can't go amiss either. The improved radiator was warranted as this particular 8 valver will be running a Kent PT40 camshaft*, 4-2-1 exhaust manifold and 2.5 inch system with 200 cell sport cat - the latter two sourced from MIJ Performance of Walsall, and the former of eBay Performance.... *A performance camshaft opens the valves further and for longer, per engine revolution, thus allowing a bigger volume of air and fuel mixture to enter the chamber, resulting in a bigger *bang* forcing the piston down harder delivering more force to the crank, in turn, erm, turning the wheels. As your can imagine, more power equates to a slightly higher operating temperature, so now it should make sense that the improved radiator will hopefully keep under-bonnet temperatures down. Also fitted to the car whilst locked up and not being let out, are a pair of Corbeau Sportline Boss Evo reclining seats, purchased around 18 months prior to the time of writing. They were ordered via GSM Performance who taken onboard my special request of the diamond quilt stitching and logo to be customised in red, in keeping with the cars black and red theme. The option to purchase the seats on a flexible finance scheme proved helpful at the time as I was also making huge investments into reviving APS Valeting like a phoenix from the ashes, to what you see as Detailed By Andrew today. The seats hug the shoulders and support the back nicely, offering a solid build yet not surrendering the race-car-esque vibe that the Corbeau brand represents. 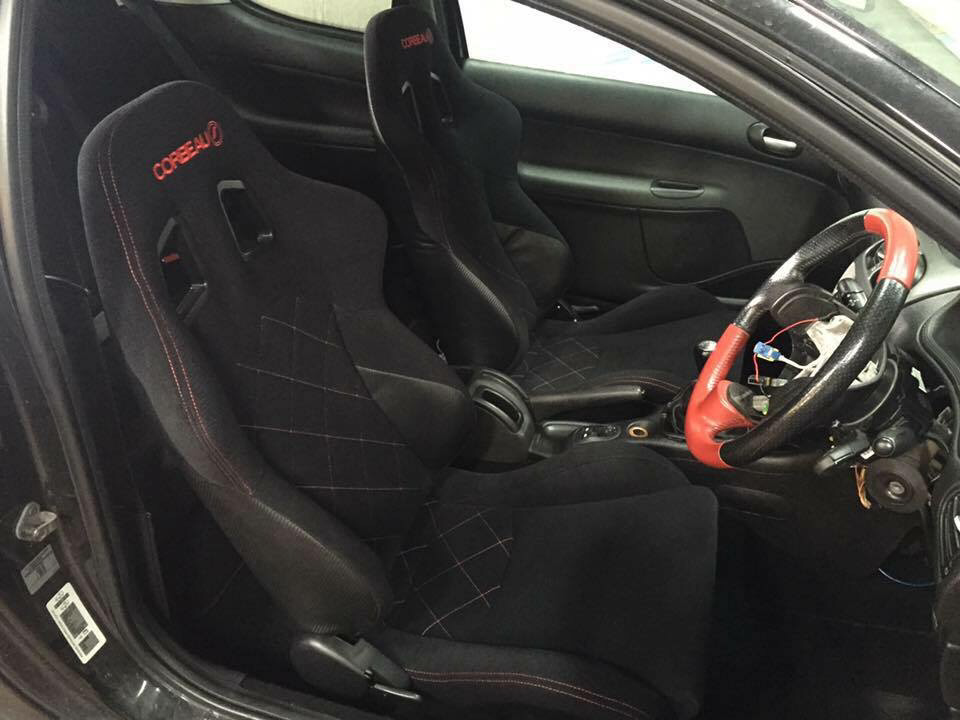 By now you may wonder what would possess a person to spend so much time and money on a cheap car that is depreciating faster than my patience for the off-hand remarks Joe Public make about the cost of my work. You see, the words "Detailing" and "Esoteric" go hand in hand. Not everyone understands the passion, dedication and enjoyment that can be experienced when meticulously planning, building and looking after a car. It's a hobby, for which little regard is given for resale value, quite simply because I do not intend to sell the car, and cannot put a price on a phenomenon that adds to the enjoyment of my life and the many friends I have made as a result. When I hear a quip along the lines of "oh, I dunno, it isn't going to add resale value to the car", I say "well, neither does your road tax, fuel or insurance but nobody bats an eyelid at that!". Enjoy life, is the moral of this story. 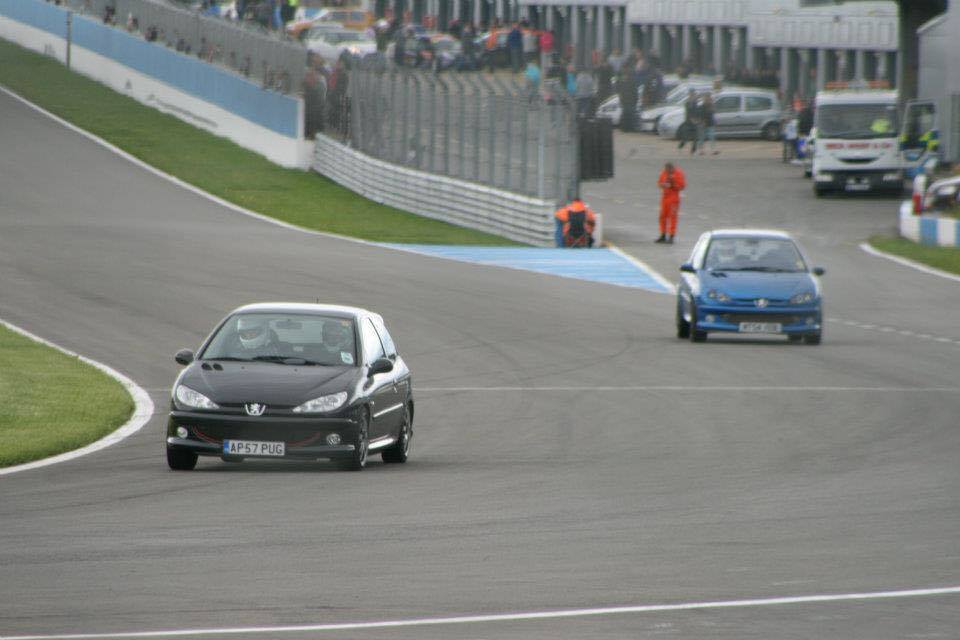 For the majority of its time off the road, the car has been sat there under a plastic sheet (I know, terrible for the paintwork) not doing much as I quite simply have invested all of my time and money into the business over the last two years, but I am now stepping things up a gear to get my pride and joy the way I want it and back on the road... Literally!  The short ratio gearbox attached to the little TU engine aids acceleration, but boy does it wail at 70mph! So a trip to the Parts Counter in Regal Motors of Bilston saw me order a 5th gear ratio from a Citroen AX 4x4 of all things - the only car in the Peugeot/Citroen range that had an MA gearbox with a 0,66 sized 5th gear. I really had to trawl the archives for this information! This modification will drop the revs at 70mph from 3,200rpm to 2,750rpm. A much welcomed increase in fuel economy and decrease in cabin noise should result. 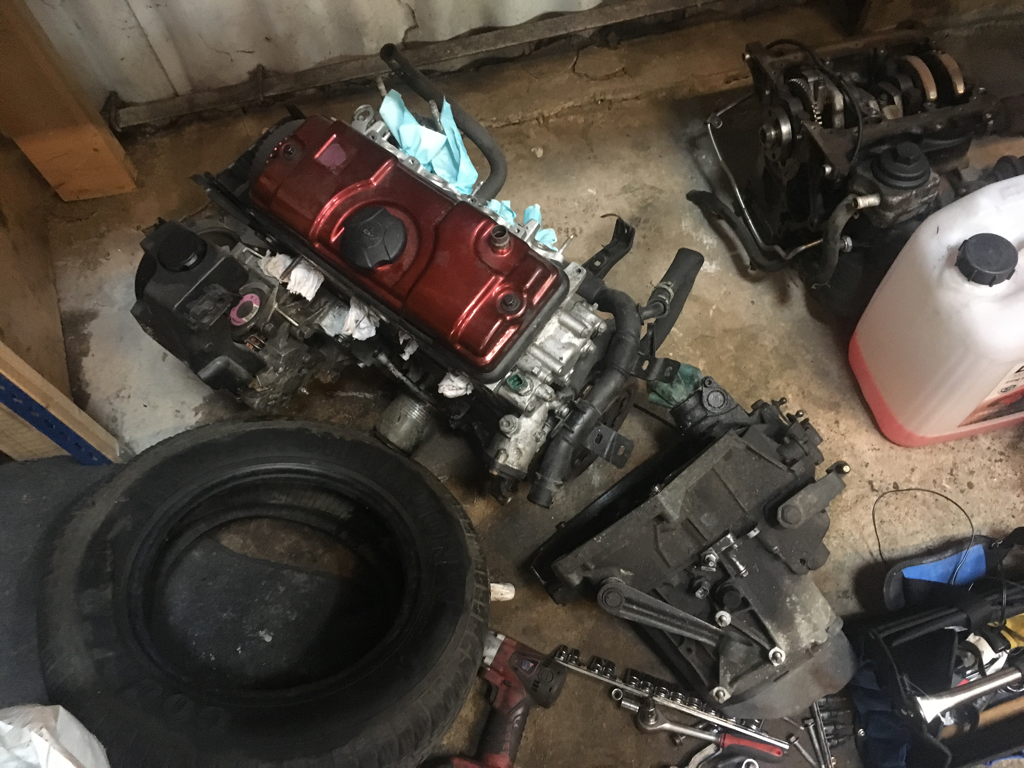 Concurrently in the process of bringing everything to a location closer to home, I separated the gearbox from the engine block and proceeded to take it on the 50 miles trip home from Shropshire. This is where we take Detailing to a level beyond machine polishing. Dirty components do not get re-installed into a car on my watch - so on top of changing the 5th gear ratio, the gearbox is going to be affixed to an engine stand to be fully degreased, cleaned, polished and enamel painted. The engine will be brought home separately, and will also undergo the same treatment. This will be covered in Part II. Meanwhile, my 17" Pitlane alloy wheels, originally from a Peugeot 207, were being refurbished and powder coated by Wheelfurb in Dudley. As part of the process, they acid dip to remove old paint, shot blast to prime the surface, DA sand to remove light curb damage, and then put them in the bake oven to be powder coated a colour of your choice. On top of this, I opted for the wheels to be checked on the balancer and two small buckles to be removed using a high pressure machine. The only thing left to think of here is whether I want to go for 215/40r17 sized tyres, or 205/40r17... And do I go for the tried and trusted Toyo T1R, or the newer CF2? The intention where the wheels are concerned, is that closer to the time of their fitment to the car they shall be machine polished with 1-inch spot pads to get the very best out of their gloss levels, before being thoroughly ceramic coated for future ease of cleaning.
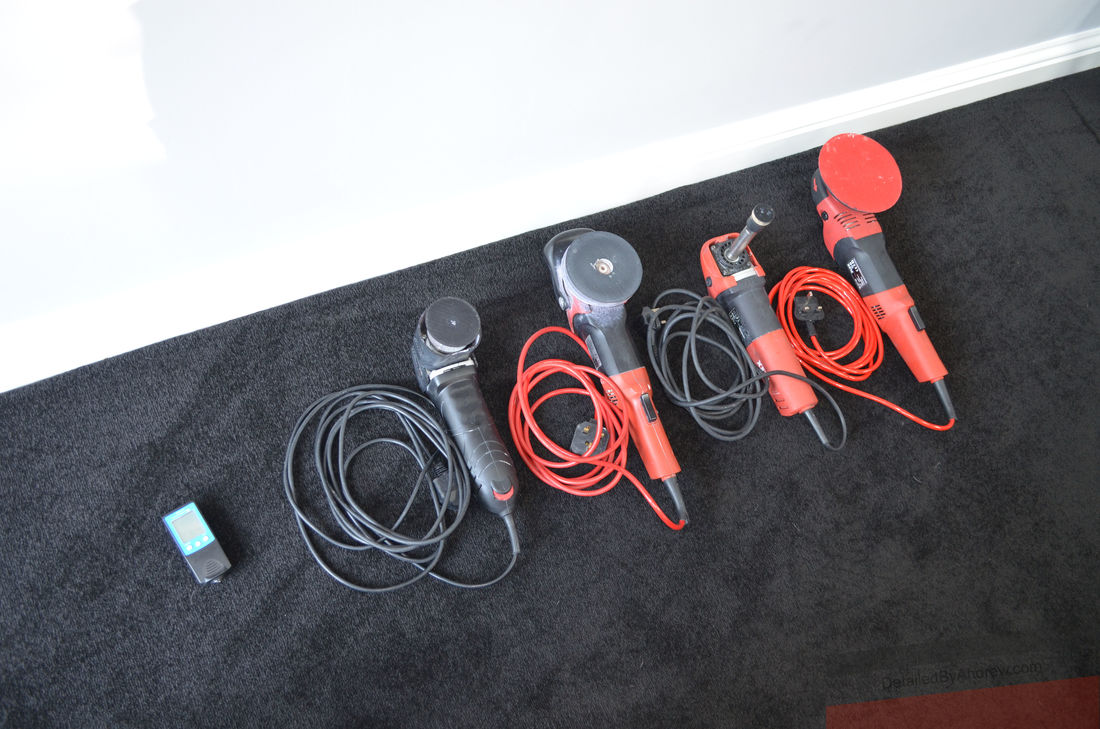
Wheelfurb also worked magic on my upgrade intake manifold from a Peugeot 106 Rallye; with bigger inlet tracts and plenum helping to get more oxygen into the piston chamber and work in synergy with the other aforementioned modifications. My request to them was to powder coat it pillar-box red, machine sand the raised logo and design, before going back into the oven to be clear lacquered. They executed this perfectly, as my friends from near Falkirk might say, I think it looks "Braw". This being the final (big) piece of the engine puzzle, I required a suitable cylinder head so one was sourced from the "Bay of e" and will be sent off to Motorcast in Wem to have the face skimmed, valve seats 3 angle cut, and the inlet ports opened up to match the tracts of the Rallye intake manifold. The reason a different cylinder head is required, in my case the donor being a 1998 1.6 Peugeot 206, is that the TU 8 valve cylinder heads from 2001 onwards (like FrankenPeugeot) have an inlet spacing that looks like this: "O-O-O-O". The Rallye intake manifold, and thus the car it came from has an inlet spacing like so: "OO-OO". With this underway, Part II will also involve fitting it all together. Already with a multi-layer steel rubber faced Cometic headgasket, I don't need to buy another, but what I do need, is new head bolts... Let's get straight into this one. I am often asked about my opinion of being a mobile service compared against being a unit based one. For those who are only just tuning into the blog or Detailed By Andrew social media, or are even just relatively new customers, I wouldn't blame you for thinking of me as "Andy that turns up in the van". It may be a new story for some, or a tale repeated just like Groundhog Day to others: I was unit based from September 2012 right up to my last appointment at Building 53a at Pensnett Trading Estate in June 2014, with a refurbishment notice period lasting until the final relinquish of the keys in the following September. The story I am about to write about probably isn't going to have much in the way of structure in a literature sense, so I don't expect any newspapers to be knocking my door to offer me an editorial column any time soon. So, where do we start? Unit? Or mobile? Do I delve into the benefits and pitfalls of each for the customer, or the professional, first? I'll go with unit firstly, because this is primarily what most Valeters and Detailers set their goals to achieve working from one day. Being unit based has many advantageous merits, the most obvious being that you are, in theory, weather proof at all times, and you are not bound to the elastic band effect of our country's sunrise and sunset times throughout the year. Being unit based offers many working environment benefits that lend well to carrying out full paintwork corrections, ceramic coatings, and other intricate areas of the trade. I cast my mind back to the halcyon days of my unit based era, and look fondly on being able to walk into the cafe two doors down to get a jacket potato with butter, cheese and beans down my gullet in the morning before cracking on with the day. There was next to no setting up, as I filled my buckets up the night before; it was just a case of waiting for the customer to turn up. But what if the customer never turns up? People sometimes wear rose tinted glasses seeing that being unit based means everything goes like clockwork and you experience no tediums. If it rained, or was forecast to rain, customers would cancel their detailing work in the abject mindset that getting a bit of rain of the car during the drive home rendered my restorational cleaning and polishing a waste of time. Perhaps it slipped their mind that if it didn't rain today, it was still probably going to rain tomorrow. I allow for prestigious special cars that do not ever get wet, but a runaround has no excuse. Sometimes it's not even the rain, I experienced far higher number of time wasters when being unit based, who would book in and either not turn up, or turn up two hours late, resulting in my schedule descending into total chaos. To the average customer without enhanced rationale, it didn't matter if they were late or failed to show up, they just did not care about the net losses to your income suffered; they didn't realise there were more customers for you to be giving your time to instead. Another aspect to consider when unit based is that you are financially committed to paying for the rent, council tax (where applicable), water, heat, electricity and so forth. If you have no work to do in dismally quiet spells, you still have to pay these fees. Couple that with a total mis-calculation of operating cost and therefore prices charged for time and service, and your bankruptcy is on an egg timer. Being unit based has excellent benefits when things go well though. You can work into the night to get things turned out in fewer days, and if you work smart, you can start a process on one car whilst another car has a process waiting to cure or dry. The advent of specialist coatings lends well to being unit based, as you have more control over temperature and humidity - although doing so adds more to your electricity and/fuel bill - something you must factor into your pricing as Joe Public often fail to think of these little things. On the other hand, being mobile allows the flexibility of not being geographically bound. If you offer a service that leads a customer to believe you are the person for the job, despite being 200 miles away, you can still service them. Building up a reputation to a point where customers want you to travel shows that you are doing something right, and the customer barely has to get out of bed for the work to be done. Also, some of the more prestigious cars that I work on would not be left out of their owners' sight, not a cat in hells chance. So being mobile ensures the customer has peace of mind that their cherised car is worked upon in a manner that they can spectate and see the processes involved. The benefit of being mobile means that you spend time with the customer in person, allowing them to witness how you work, build up an understanding of your process and witness your skill first hand. It goes without saying, I receive far more tips being mobile than I did being unit based, purely because customers see just how hard I work on their car. The perils of being mobile lie within our unrelentingly erratic weather patterns. Sure, a gazebo can be used in moderate conditions but this still limits you to a certain level of machine polishing and net result, and if it is very windy you might as well hang on like Mary Poppins. Ceramic coatings should not be applied or left to cure in damp weather so their outdoor application rests in the mercy of a good Summer's day. Though I will say that my gazebo, especially with side walls does a good job of emulating dry conditions at times. Some time soon I will be re-investing in an even larger gazebo so that large cars can fit inside, with side walls fitted around, so much so that I can say "Welcome to Devvo's studio mayte!" The nature of detailing also revolves around being able to view and give appraisal to potential customers' cars to give bespoke quotation. When unit based, people found my premises address on the internet and came to visit me. In a way, this was an inconvenience because I was easily accessible to people without putting them through "customer qualification" measures beforehand. In other words, I was susceptible to having to put my tools down and stop what I was doing in order to tend to a visitor who more often than not, was expecting me to transform their house-brick washed runaround into a Pebble Beach Concours d'Elegance show winner, with all microscopic defects and swirls removed, in return for a very generously haggled value of a pocket full of buttons. I cast my mind back to someone who came to visit expecting me to fully restore his paintwork, I gave him a price for which I was severely undercharging for at the time, and he still wanted to haggle me down by 50%! Being mobile means that you do not suffer time wasters coming to visit your premises. It's harsh, but it's true. If I had 20 people disrupt my work to a paying customer's vehicle per day, I simply would not get any work done. Now, I can simply allow the phone to ring, and anyone serious about wanting professional services being provided will leave a voicemail if I do not answer their call for failing to hear the phone ring above the sound of the machine polishers, or myself talking face to face with a customer. A major perk of being mobile is that you see so much more scenery and everything is different each day. I certainly enjoyed Buxton Hills on my way to a job in Manchester last year. The main point about being mobile for me is working on special cars that do not leave their owners garage, or is an inconvenience for them to take the car to a unit based company. 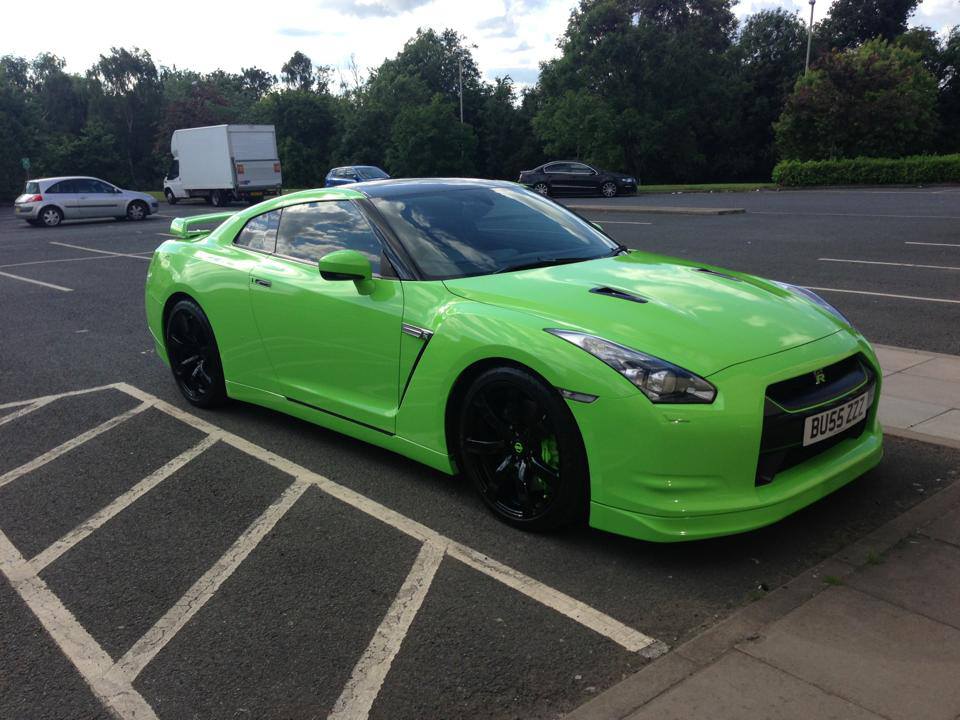 The cons of being mobile here is that you may sometimes have to take time out to travel and view the cars where bespoke high-price services are concerned. Last year, I driven 35 miles to the other side of Birmingham to view a car for somebody who was so serious about having a detail, yet I never heard back from him. So that was 70 miles of fuel, tyres, wear and tear, not to mention nearly 3 hours of my day wasted. You have to be smart when dealing with these things, as I see this happen to fellow professionals a lot.
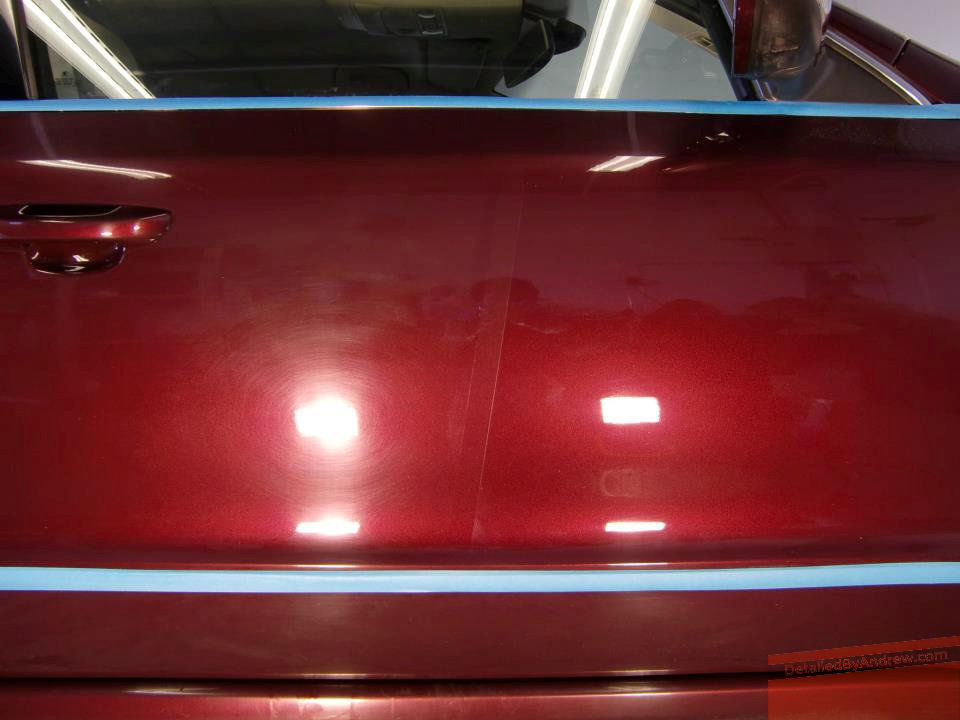
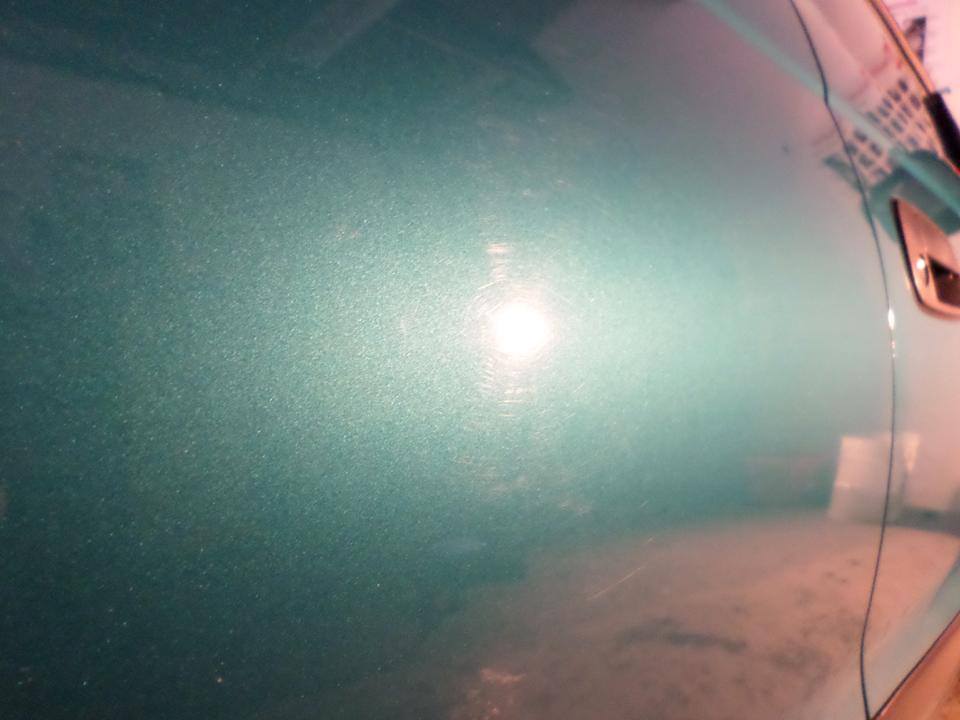
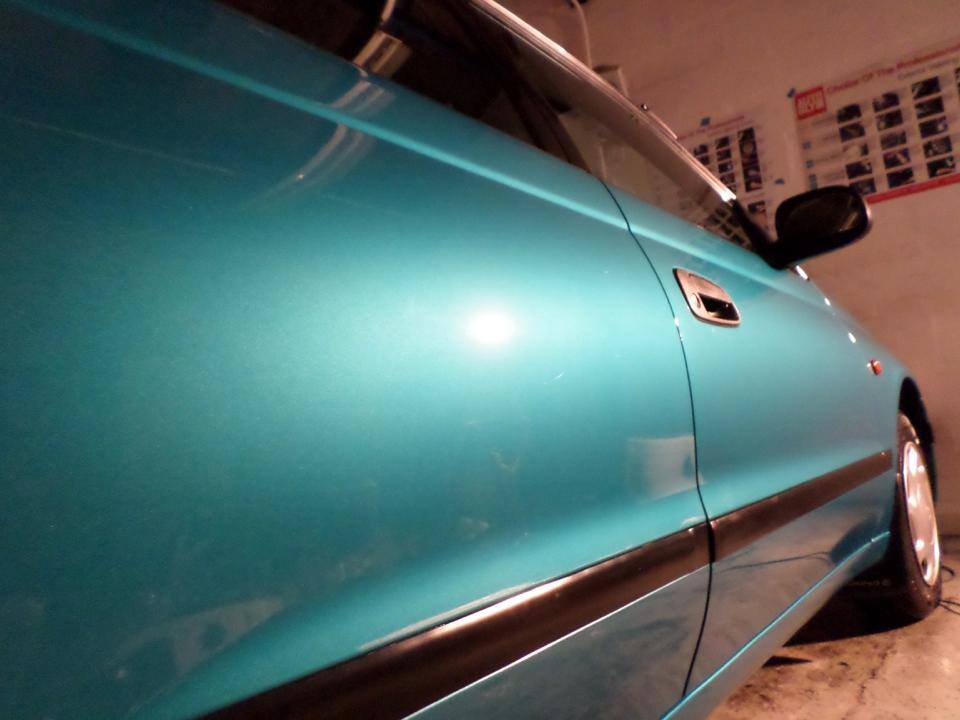
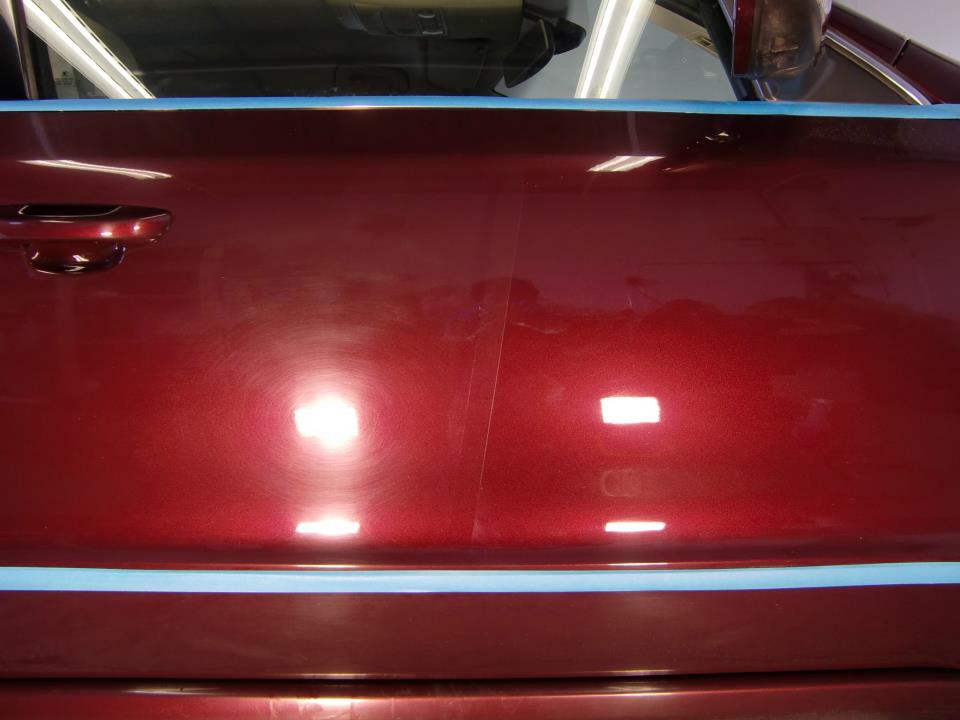
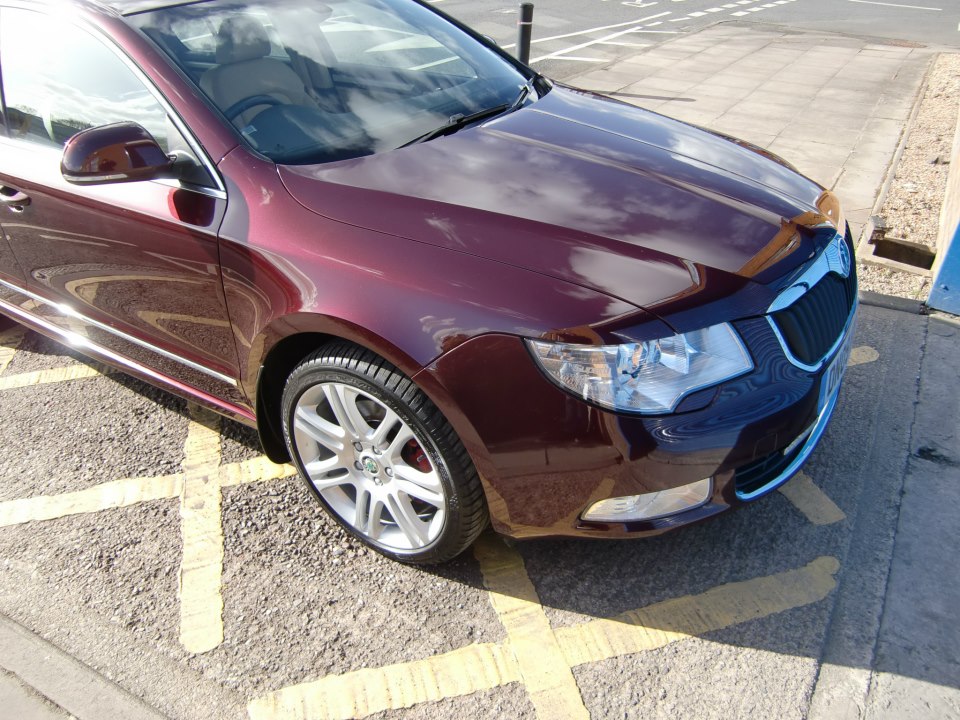
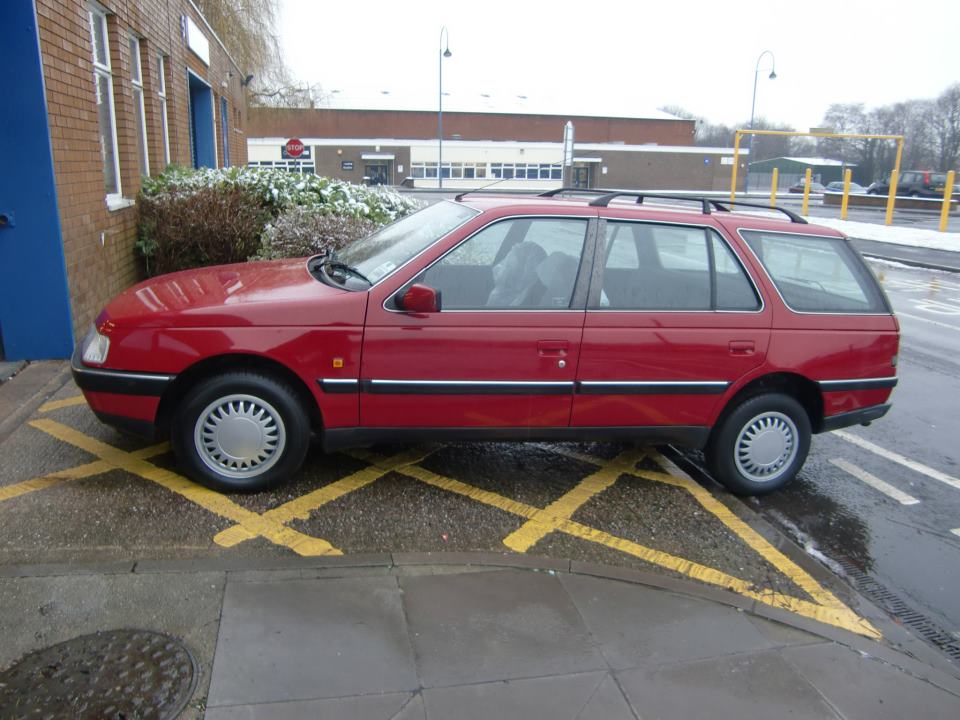
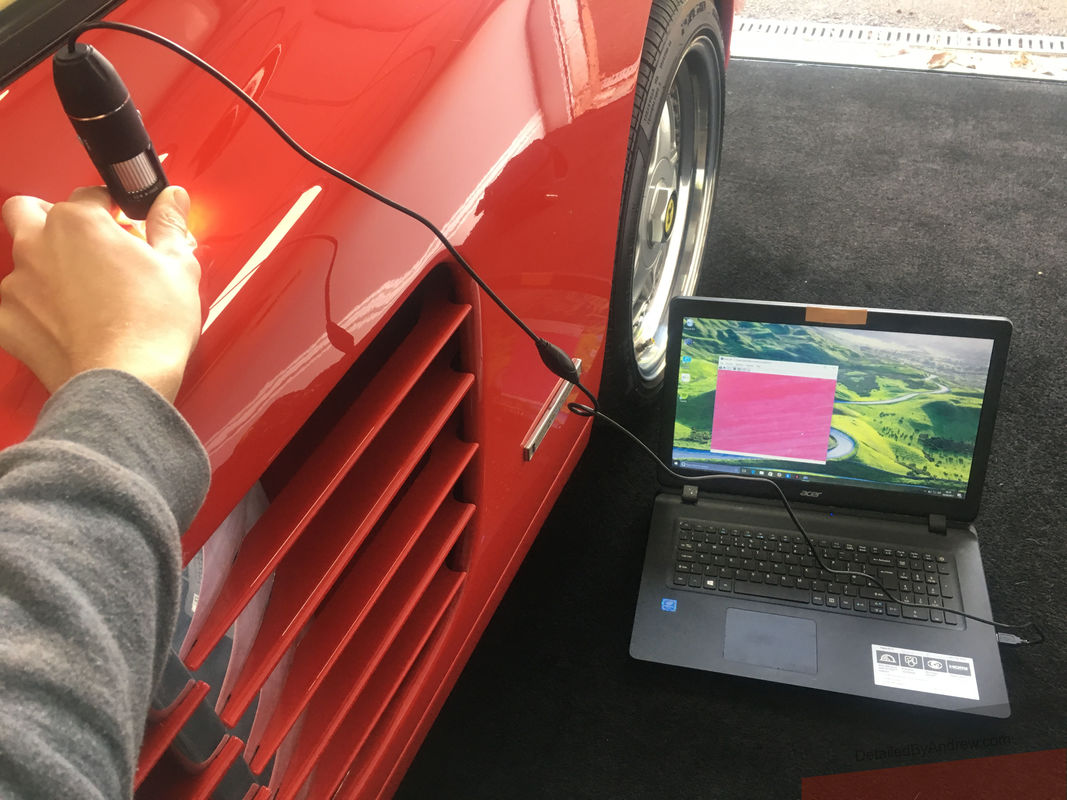
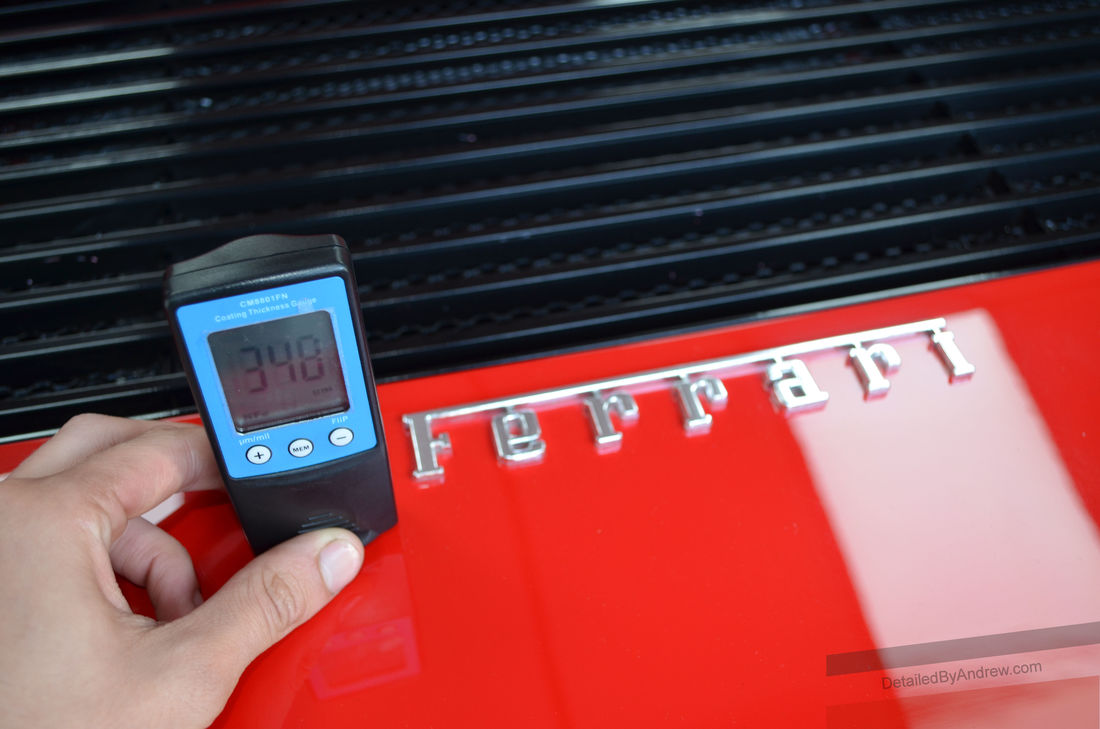
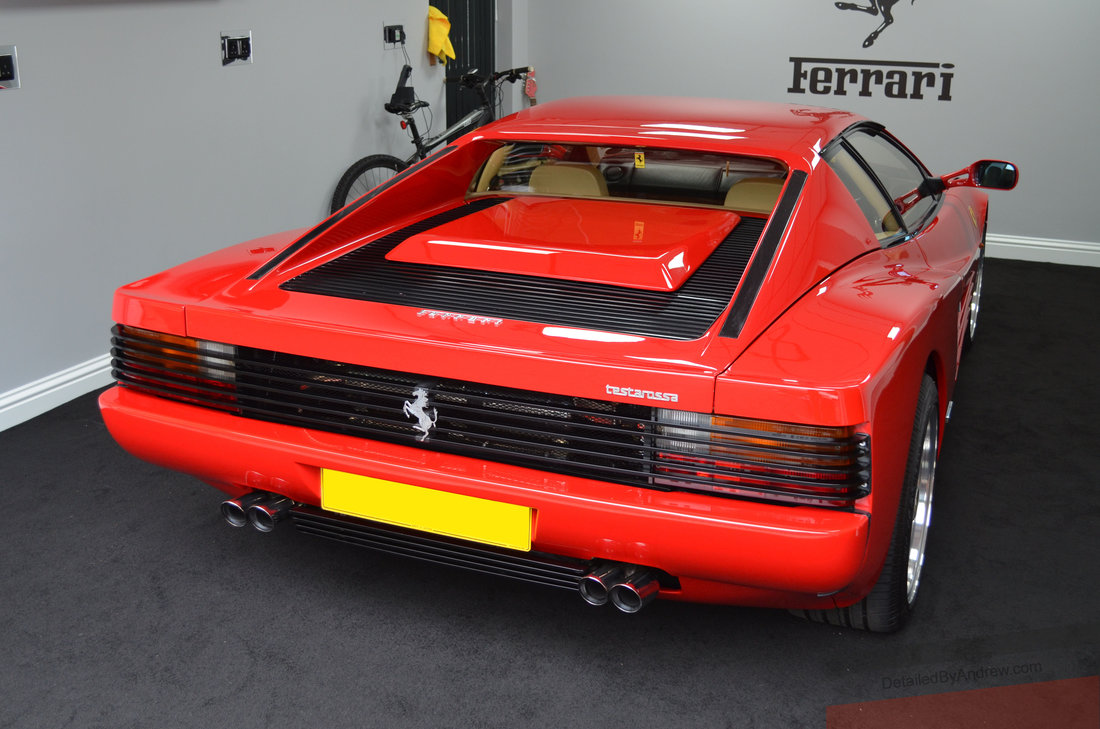
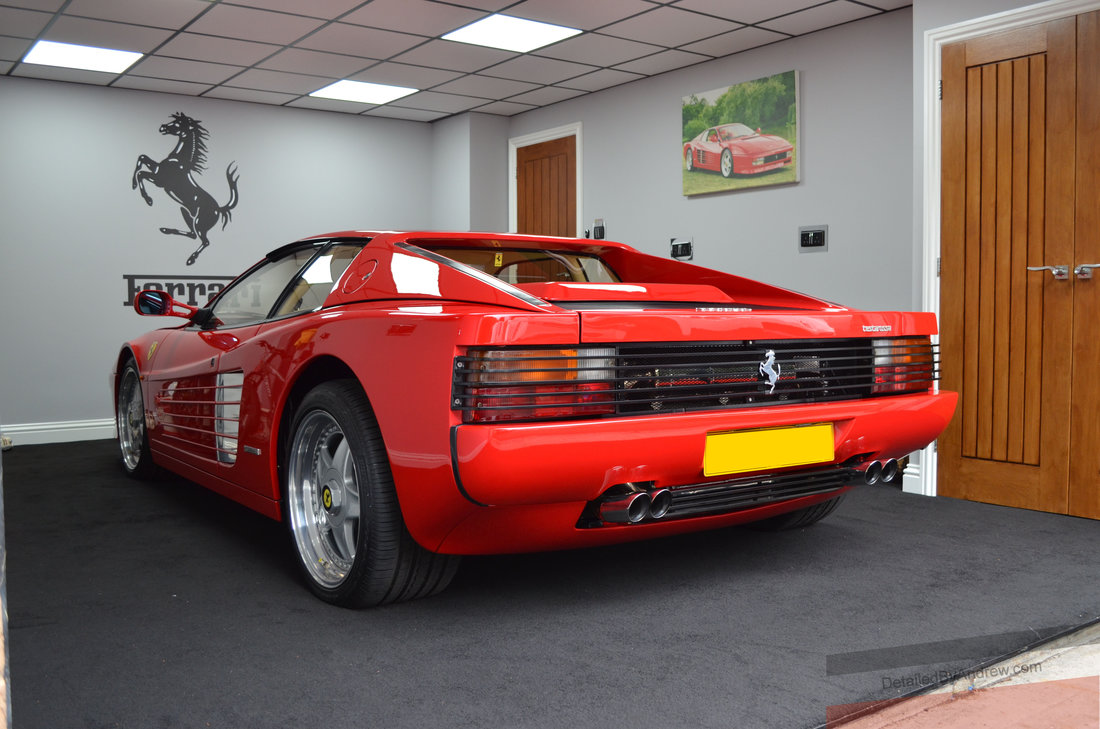
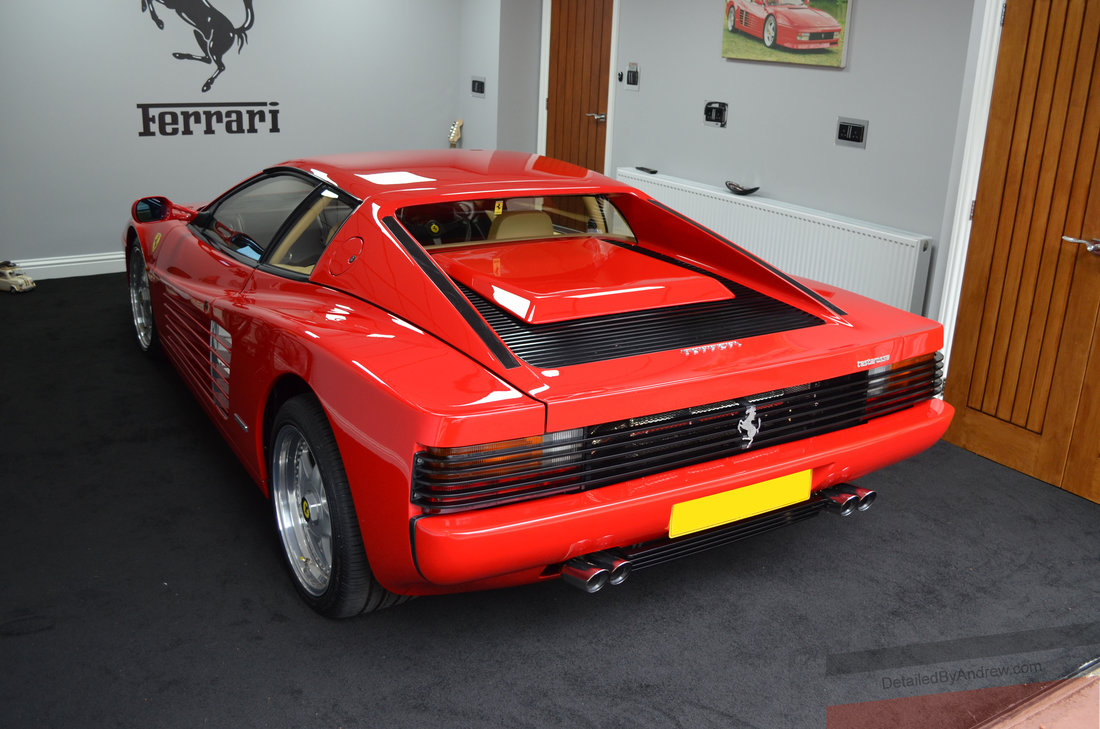
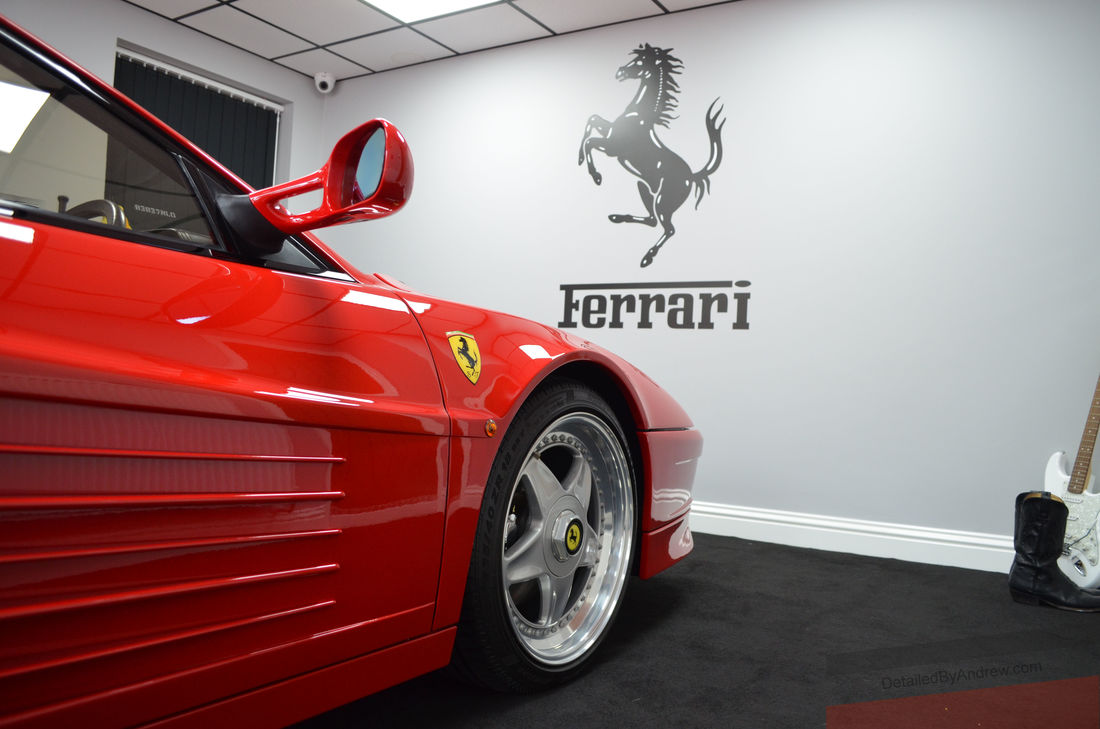
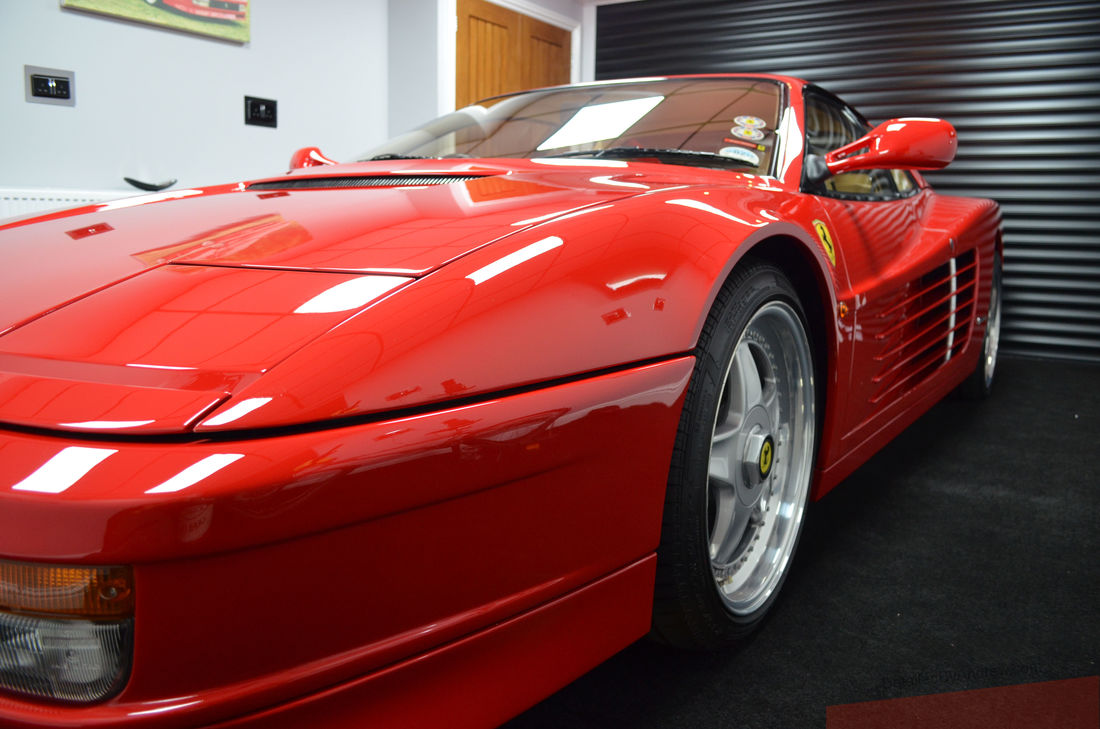
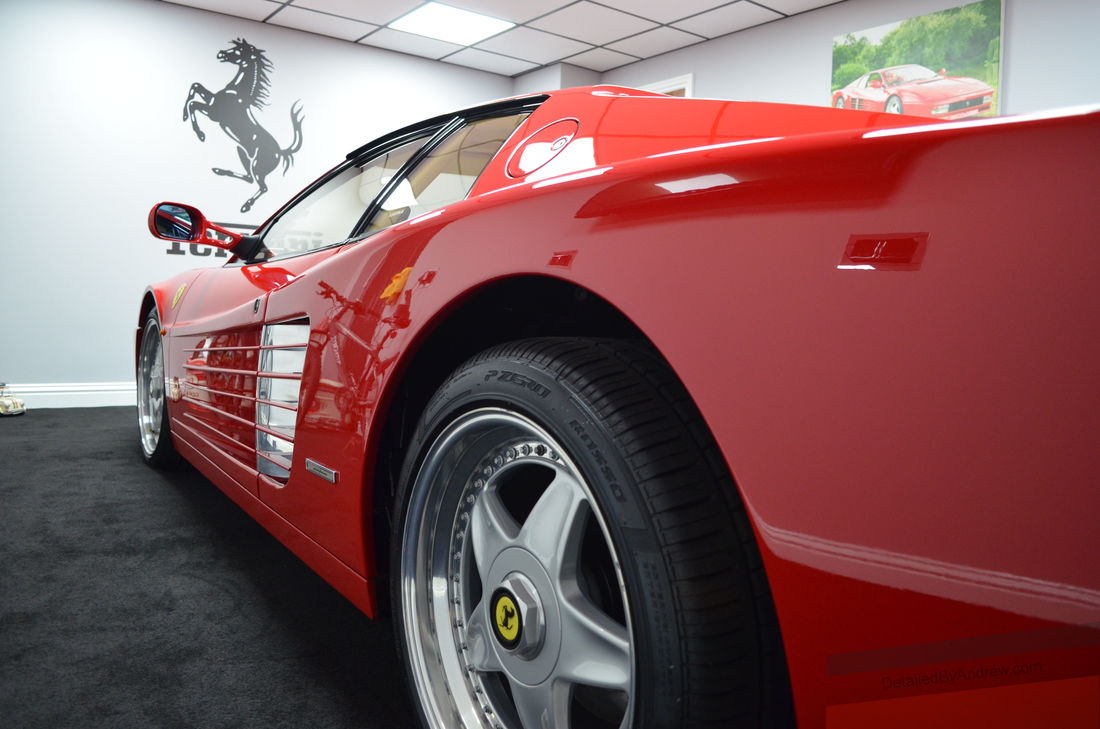
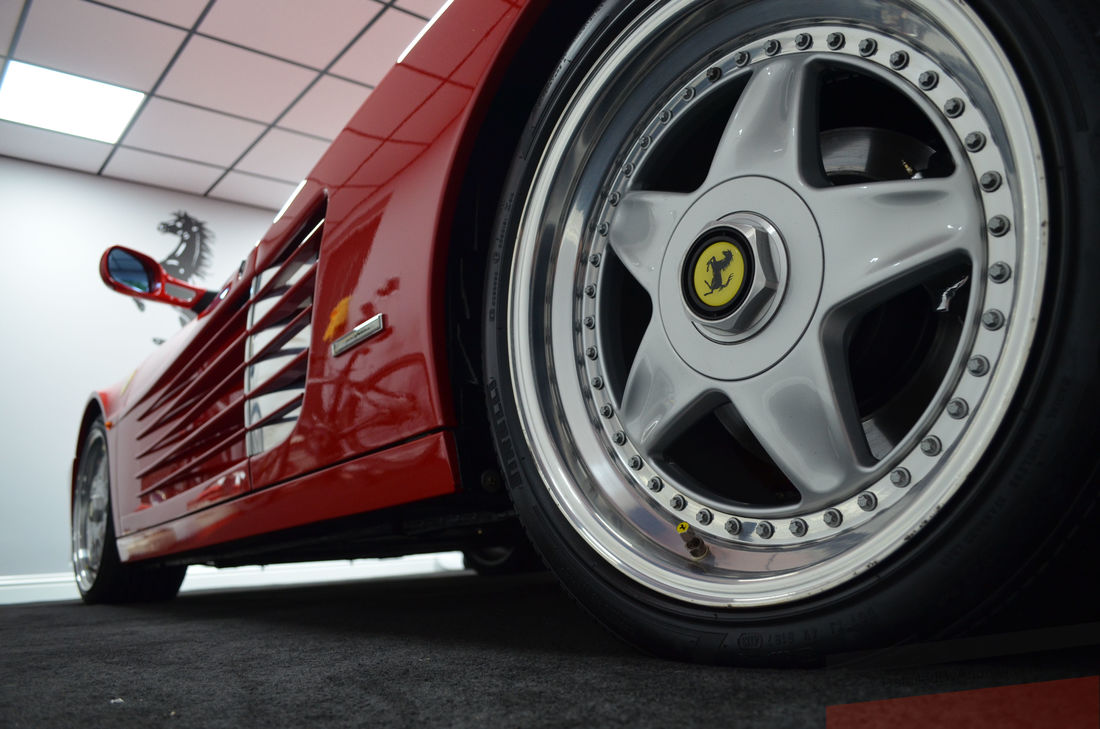
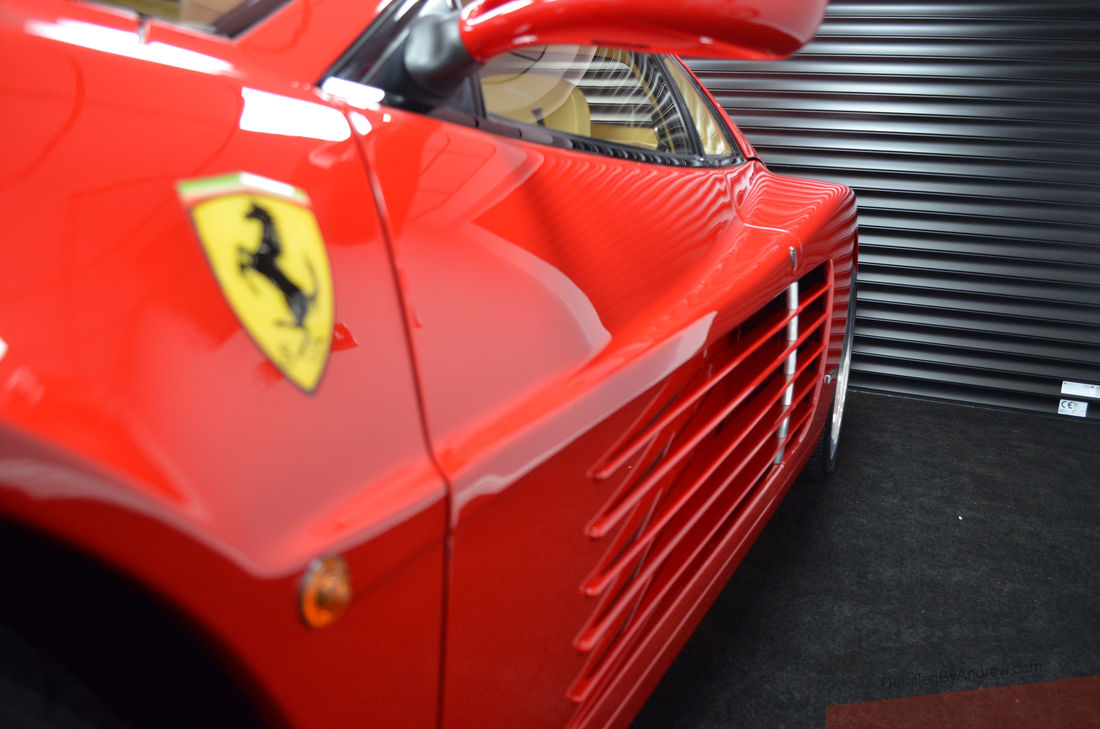
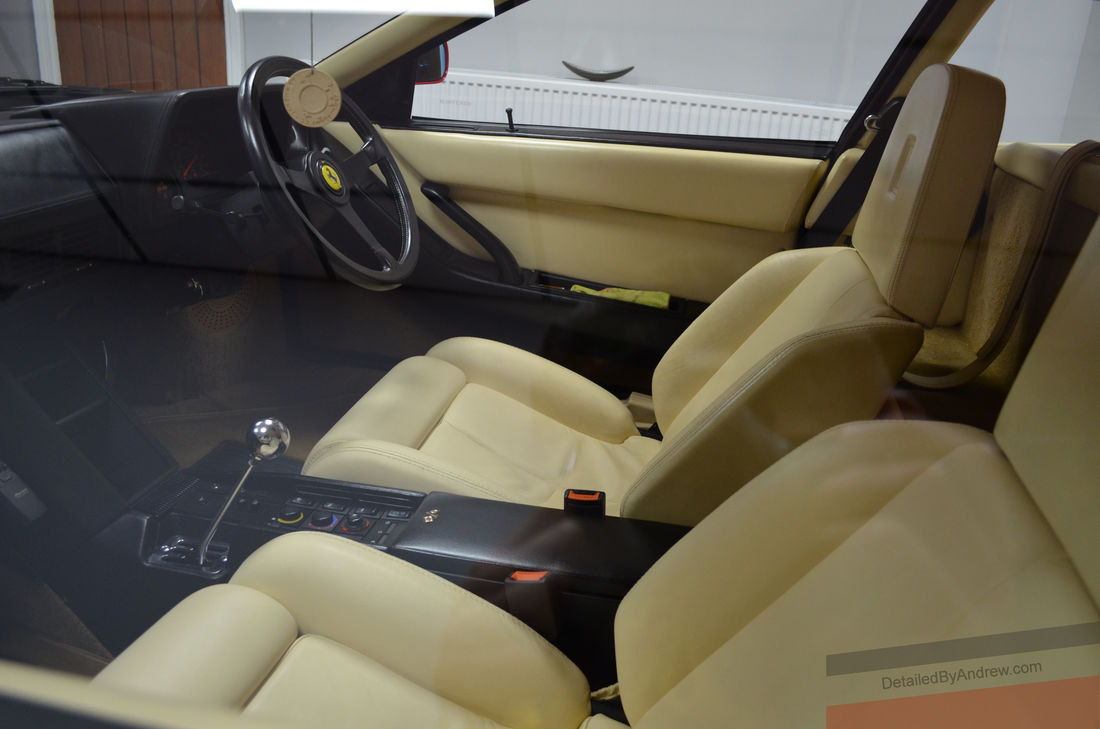
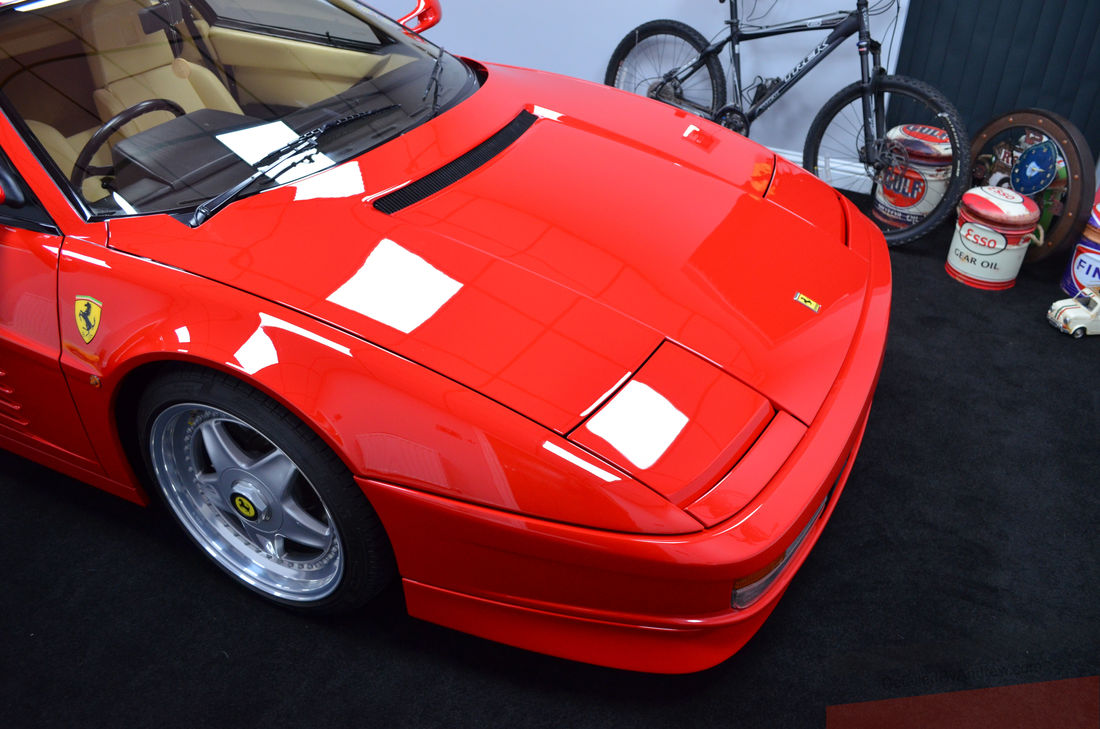
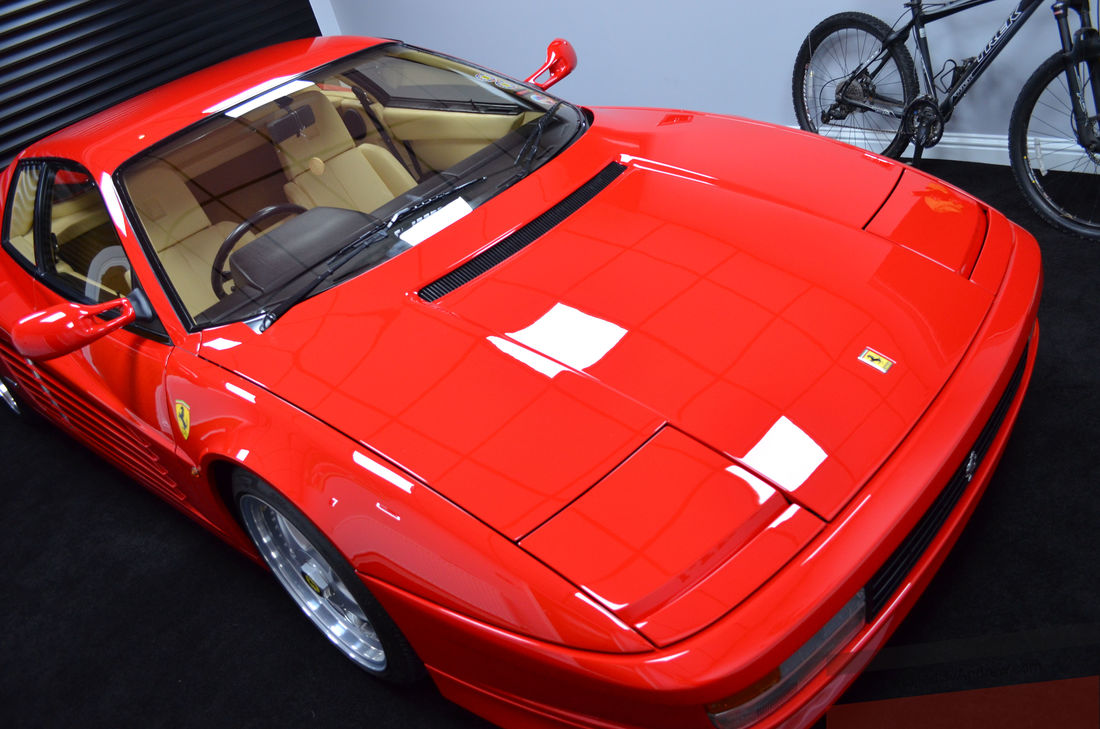
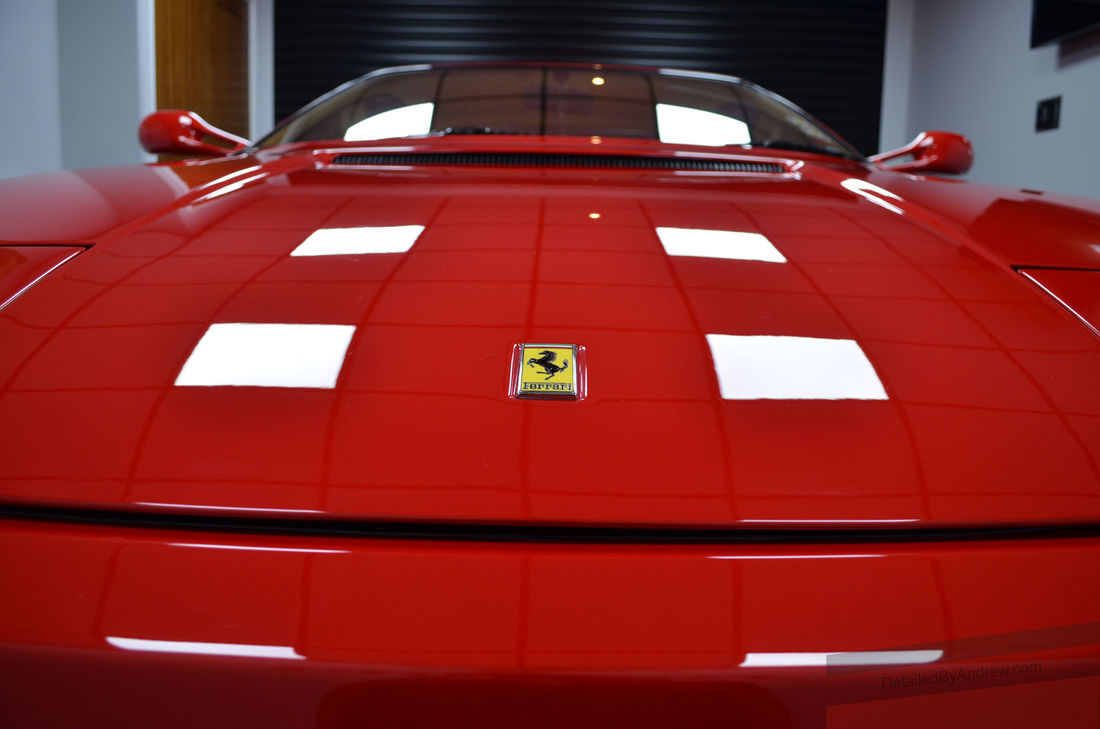
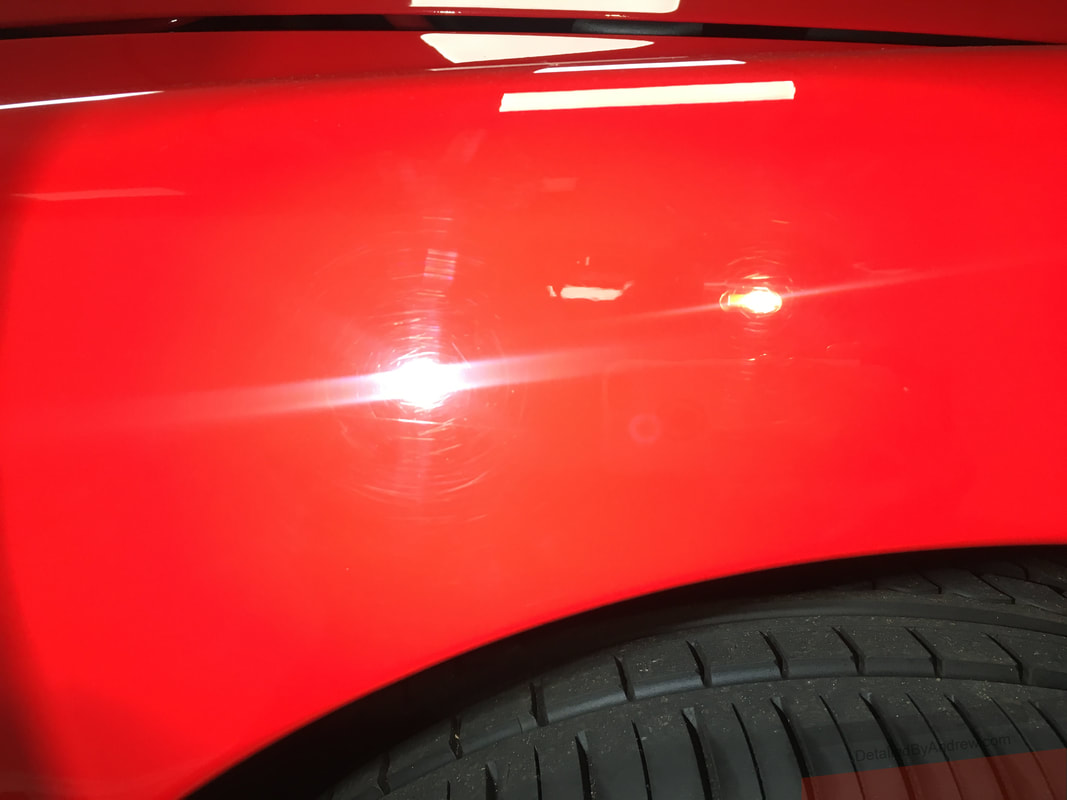
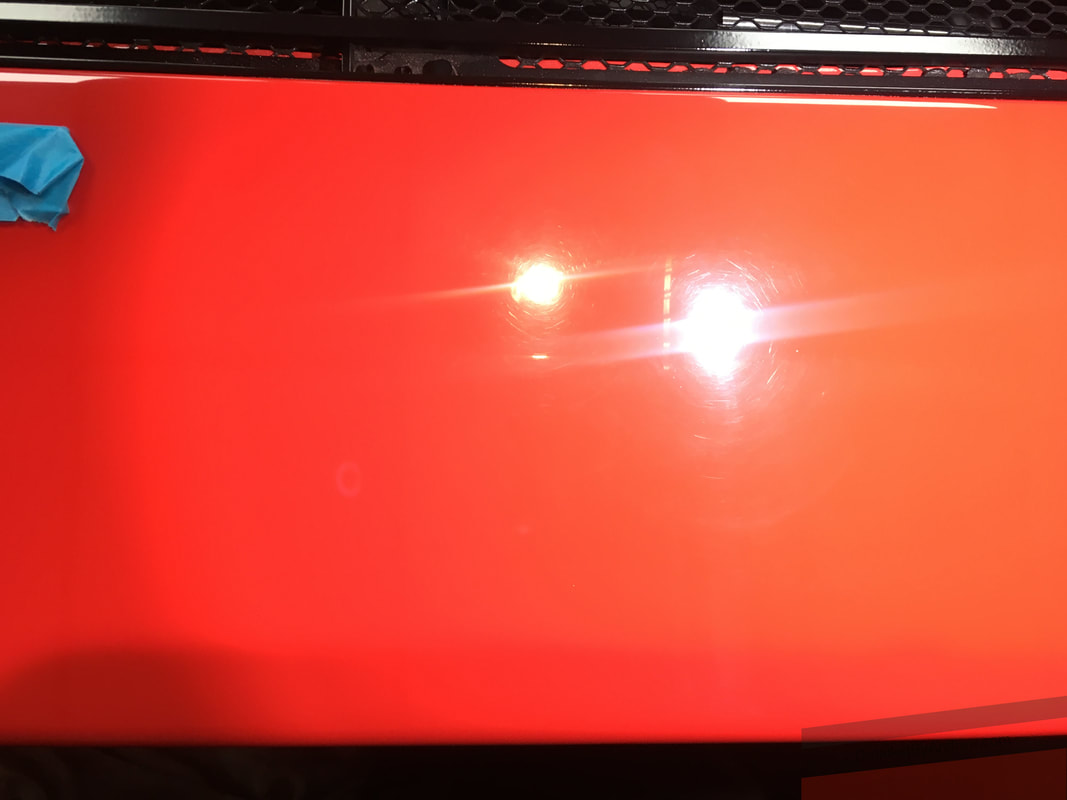
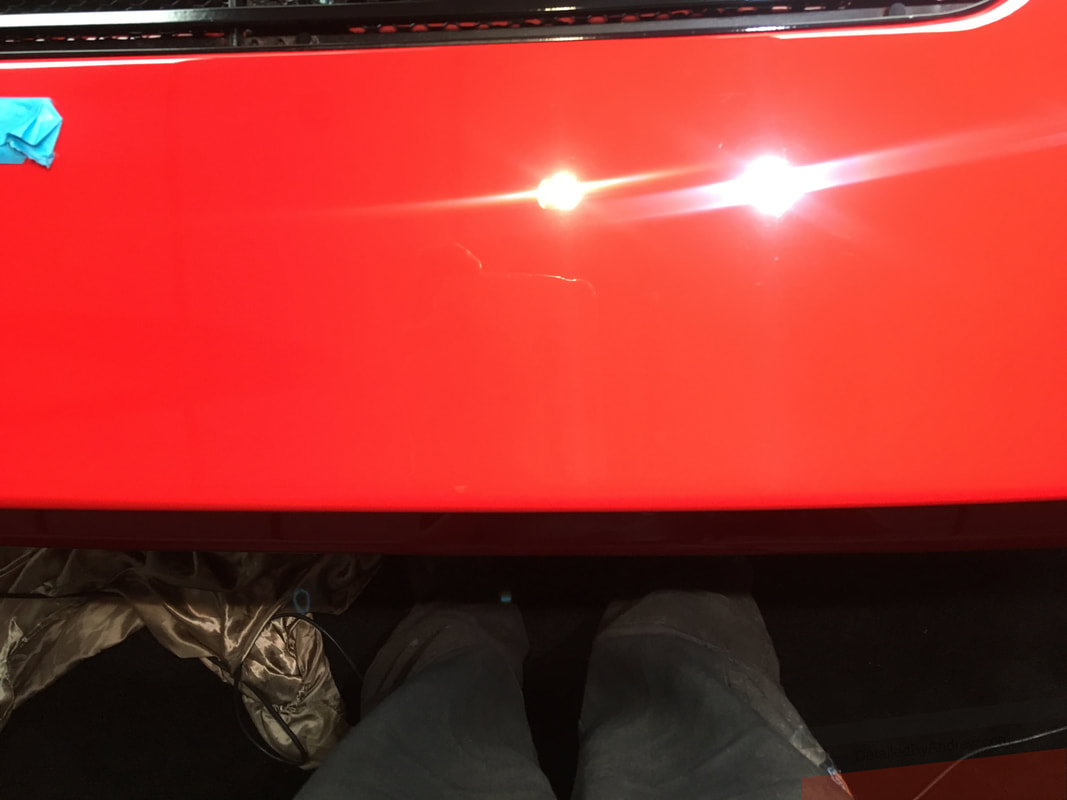
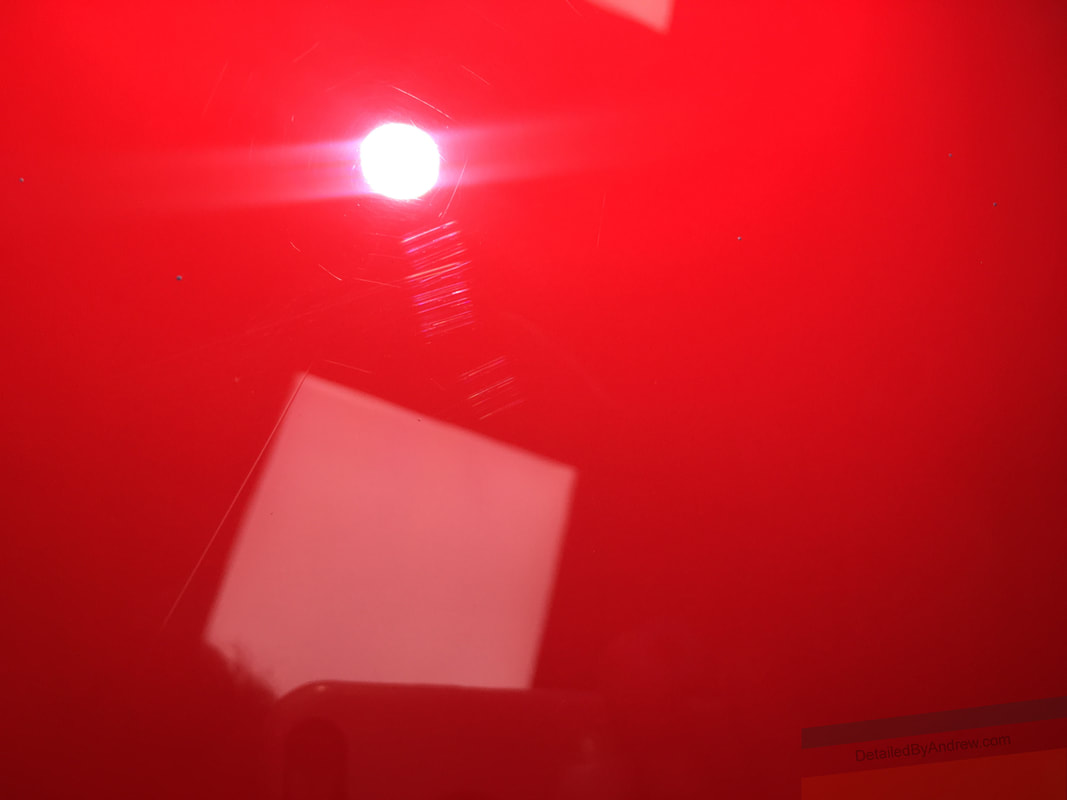
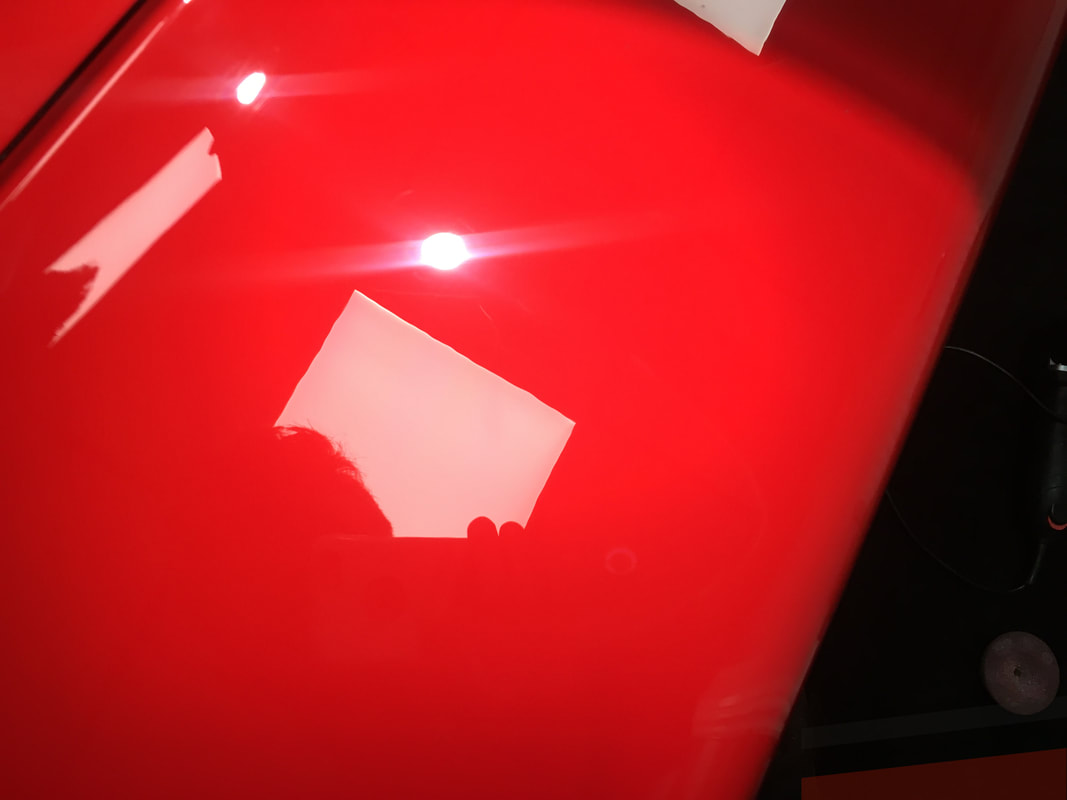
These days, if a car is in want of serious detailing work, the customer should be prepared to pay for an inspection if they can't bring the car to me. Nobody should be expected to drive around giving professional advice for free. Such as earlier this year, where I heard from the grapevine that someone did not book in purely because I refused to disclose what polishing compound and pad combination I was going to use. Firstly, I do not know until I test any combination on the paint, and secondly, asking me for that information is a bit like asking Mr Krabbs to part with his beloved Krabby Patty formula. Not today, Plankton! There is indeed a reason why some of my products are decanted into plain bottles. I have to protect the knowledge that I have accrued over the years in the interest of my business. I thoroughly enjoyed my time being unit based, and do not regret a single moment of it. Indeed, I have carried a lot of customers forwards from this era, and whilst I can look back on these days with the song "I dreamed a dream in time gone by" almost going through my head, I am enjoying my mobile work even more-so. Have you ever driven through Buxton Hills? The Rabbit Run on the way to Welshpool wasn't too bad either, where I kept up with "The Stig's Fat Bald Ginger Cousin" on the twisties. The adventure of going somewhere new every day is so exciting, and if you are lucky, the customers make the cups of tea for you! Blurb: What are these random pictures? The pictures dotted throughout this blog post are of works that are still distinguished in my mind of my time at Building 53a, some as far as 5 years ago. The Toyota Carina E stayed with me for over 48 hours to take it from a minging Grandad car to a fully corrected Time Warp. I also remember the Skoda Superb as a picturesque model of my paintwork correctional work at the time, despite my tools and equipment being so spartan in stark comparison to these days (my money was taken up by the rent, rather than ability to re-invest)... and of course, how could I forget the Nissan GTR!  In the words of Alex Ferguson; it's squeeky bum time. I was trusted to work on this stunning 1990 Testarossa to improve its paintwork as much as possible in one day. This is a 1990 model, with very little over 21,000 miles on the clock, and has been in the ownership of the current owner for over 18 years. If anyone knows this car back to front, it's going to be him. With no disrespect to my usual customer base, this is a very different calibre of car to what I am used to day in day out, not just in its heritage and value, but the fact that it is meticulously cared for and kept clean. In this particular instance, there was no need for the 3 or so hours of washing, decontaminating and clay barring like I have to on daily driven vehicles when carrying out a detail. This was to be a bespoke service not outlined in any set service package. Instead, the initial part of my visit was spent with the customer learning about the car and receiving valuable information on the task at hand, before he left for work to leave me to spend 1 and a half hours just studying the car. Indeed, before even contemplating touching the car, I analysed some of the defects under digital microscope, as unfortunately there were some issues to consider. In the above pictures, you can see what swirls, micro-scratches and random isolated scratches look like in magnified view. However, these were the least of my concern when the owner told me that the car had been detailed many years ago and the detailer had struck through the paint. My initial thought was, "how can it be possible to strike through single stage paint, to reveal another layer of red?" but a quick lesson in the history of the car from the owner taught me that Ferrari painted these cars in a very special manner. You see, in order to get a mirror like finish from the factory using single stage paint (that being, just colour, no clear coat like modern cars), they would apply a fine layer of colour, sand it back flat by hand, apply another fine layer of colour, sand it back by hand, and so forth ad infinitum. Put simply, there were many layers to this cake. Throw into the mix that some panels had been repainted and you have one very tricky car to level out by machine. I had to approach this carefully using initiative if I were to avoid emulating the previous detailer's mistake of striking through to another red layer of paint. So, I taken dozens of paint readings from each panel, and studied their meaning to assess how to approach each panel. Their readings were, lowest thickness to highest per panels are as follows, in microns: Roof: 121-191 Bonnet: 258-451 Offside Front Wing: 127-196 Nearside Front Wing: 127-217 Offside Door: 131-328 Nearside Door: 115-184 Offside Sill: 278-329 Nearside Sill: 309-1165 Offside Rear Quarter: 155-242 Nearside Quarter: 121-216 Boot: 175-377 It may just appear to be random number to you, but the intra-panel differences highlighted the need to be careful of the fact that these cars were hand painted and flatted down, as well as this particular car having been cut back before. The aforementioned area of strike-through was on the nearside quarter, where readings were around 120-140 microns in the damaged area. On a modern clear coated car, this would be a very healthy figure. I could literally see in numbers where readings started to increase across the panel - so I knew where I was safe to cut. The absence of a need to do heavy cleaning and prep like I have to on "normal" daily driven cars meant that I could do a two set machine polish in one day, meaning the first set being a specially selected cutting compound and pad combination, and then a refining polish and soft pad combination. The choice of machine used was also paramount. After the machine polishing process, I applied Swissvax Best of Show to the paintwork and wheels. To ceramic coat a car like this would be a little absurd in my opinion, as a permanent coating applied to such a historical document of a car would almost spoil its heritage. Cars of this ilk prove that there will always be a place for wax. There were many fiddly areas to get in and around, before the interior was treated with leather conditioner. All told, this visit taken around 11 hours of solid working time. I couldn't get the paintwork 100% blemish free, because doing so would have involved using high levels off cut too risky of causing strike-through, but I removed a moderate amount of defects, and left it with a sharp reflection. I worked as carefully and attentively as possible, no phone calls were answered this day as I needed maximum concentration without distraction; if I damaged this car I just don't think my confidence would have ever recovered. Also, it was encouraging to be so trusted to do this work, without being watched over, checked upon or otherwise - this enabled me to relax and focus. The time absolutely flown by, in fact I lost track of time. It's a another milestone and privilege for me to have this car in my portfolio. But there is one thing I would like to address before people jump to conclusion and spread rumours that I only work on high-spec cars - I am not above working on any car, in fact, my next job may well be a clapped out old Transit van. I stay humble, you keep yourself factual! Enjoy the pictures below! Most of my case studies up until now have involved the higher specification Detailing service packages, so I thought I'd break it up a bit with a Service Clean variant carried out on this 2015 Range Rover Sport. This was booked in by the owner about a month ago and carried out last week - back in June and July I had a waiting time of around 4 weeks because of the great weather we had creating an influx of customers searching the internet for this kind of work. Recently though, the weather has been absolutely dismal. Perhaps we should rename the kids' "Six Weeks Summer Holidays" to "Six Weeks of TV and Sega Megadrive"? On arrival, it was clear to see that the car, whilst kept clean, suffered from incorrect wash technique. Sure, it is naive to think that a vehicle will stay swirl free forever (we do not live in an idealistic world, sediment and debris as well as the fact that any form of contact with paint has the potential to mark it), but this doesn't change the fact that a proper wash regimen would have prevented the eyesore in front of me to a large degree. I mean, the car looks great, it's just the finish! 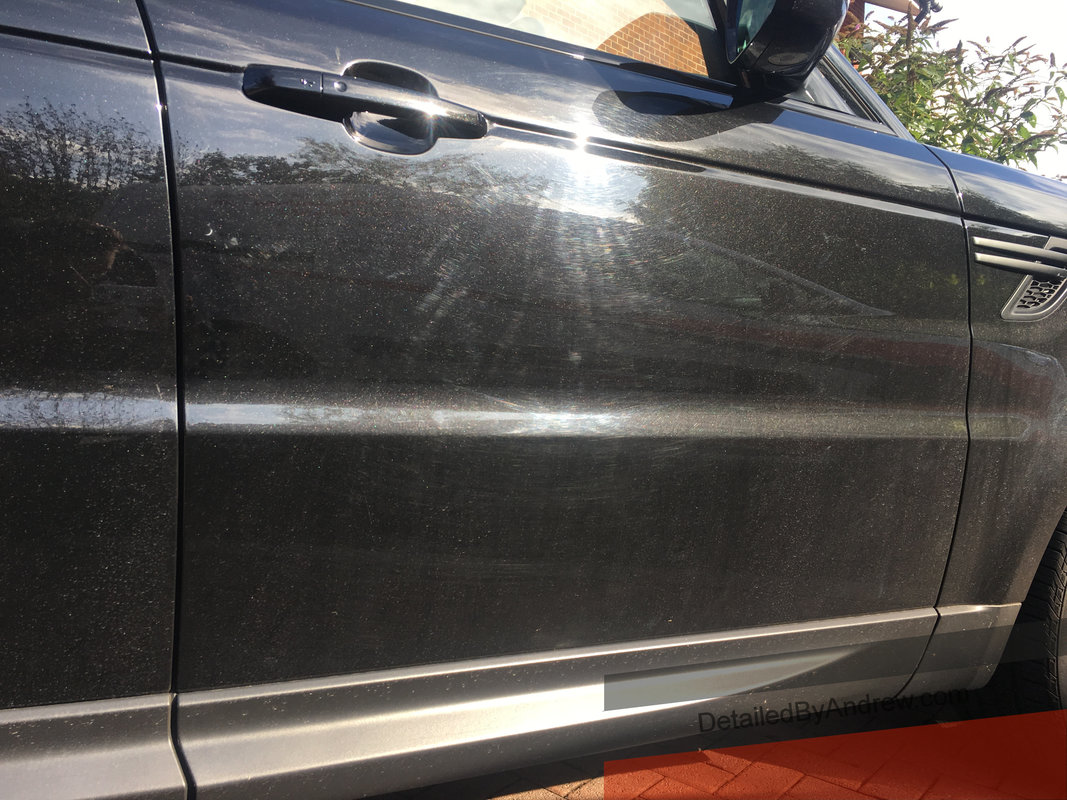 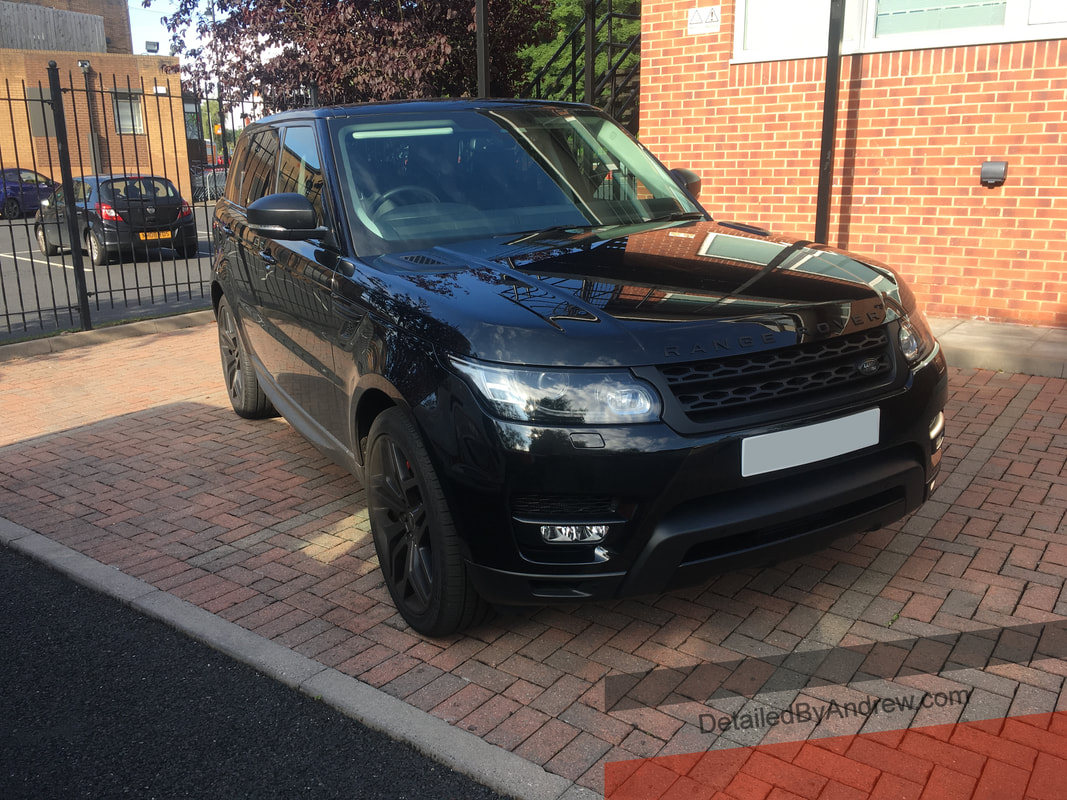 What I like to call the "meet and greet" is essential when visiting a new customer. You can gauge what they are going to be like to deal with (99% of my customers are lovely, as I can 'vet' them on the phone, the customer here being no exception), what they expect, and also gain valuable clues about the vehicle's history and what you may expect to uncover. So off I start getting set up, filling up the buckets and starting with the wheels. Instantly I clock that they are a matte finish, so a good bit of product knowledge had me reaching into the van for Krystal Kleen Detail Matte Wash. When working on any kind of matte finish, you need products that do not have gloss enhancers, and also contain very gentle surfactants. 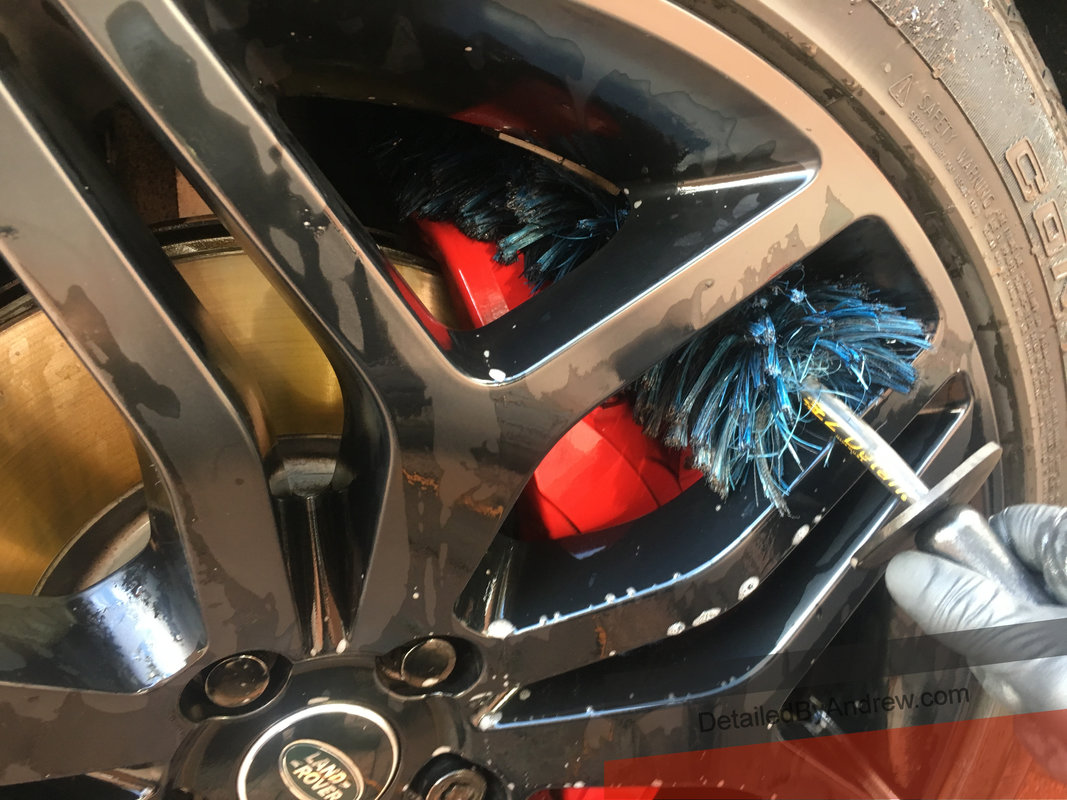 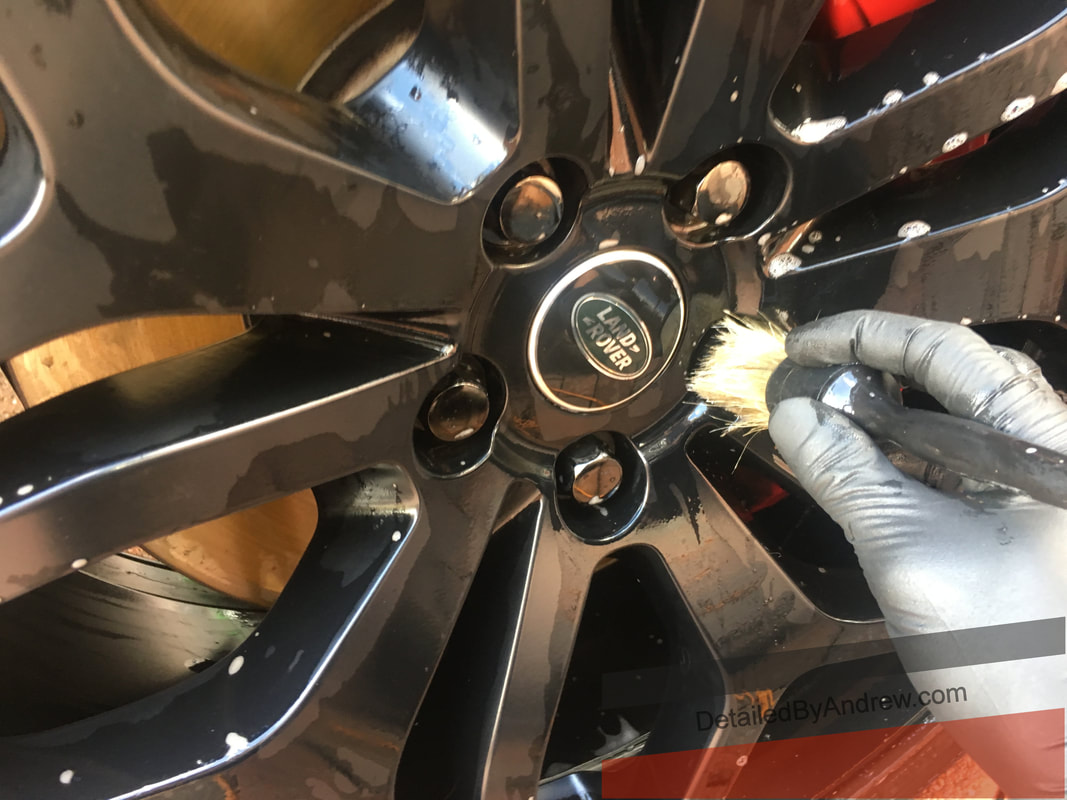  The wash technique I use for wheels is pretty simple to grasp. Pre-rinse, bog brush in the barrels, paint brushes in the bolt holes, and loofah to clean the face and backs of the spokes. Making an attempt to clean the backs helps keep the faces cleaner for longer, as there is less mess to trickle outwards when the car is driven in the rain. "I like what I'm seeing", the customer declared, "I didn't know you did the inside of the wheels." It's nice to get little words of positive reinforcement when starting a job, 'we're in for a good innings'. 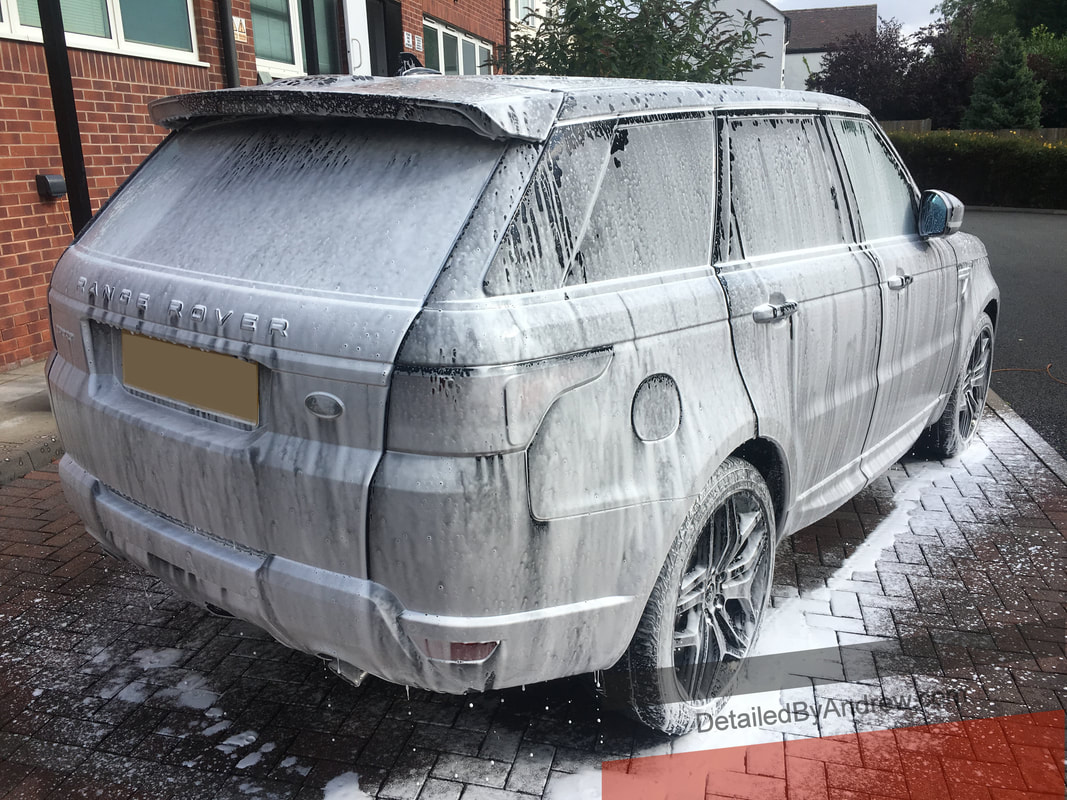  After the wheels were cleaned, the bodywork was soaked with pre-wash and then pressure rinsed of any loose sediment and grit that is obviously not wanted when contact washing. This is the first step of ensuring that the paintwork is put to as little risk of marring as possible. Not all professionals subscribe to this particular wash method, but I like to use snow foam as a lubricant when contact washing, re-applying to any dry areas. Beginning with the top and the glass, moving on to the front end, sides, rear, door shuts and then the yucky bits underneath. I clean the 'cleanest' bits first, leaving the worst until last. It's a bit like when bath water was shared in World War 2, you didn't exactly let the one who had the dirtiest job and had eaten curry the night before in there first. In the picture above, you can see the "two bucket wash method" in action - one bucket designated to clean the wash mitt off, and the second with fresh clean shampoo water. This process of cleaning the wash mitt off before dunking back into the shampoo bucket should be carried out as frequently as possible to reduce the risk of, yep, you guessed it, marring. If the 'rinse' bucket becomes too dirty, I dispose of the water and fill it up fresh. 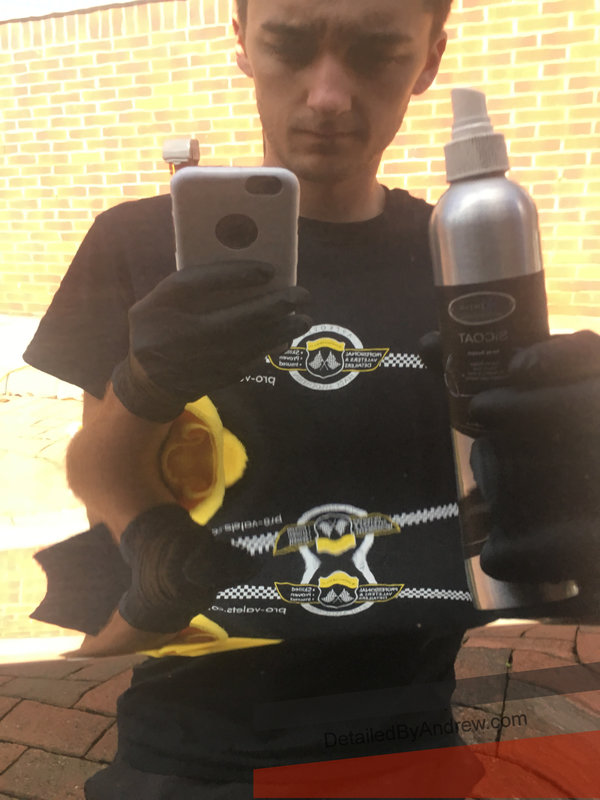 The bodywork was cleaned in this fashion before being rinsed down and dried with mega plushy towels using a polymer detailing spray as a drying aid. Once dry, Krystal Kleen Detail SiCoat was applied. This is a silane wax blend which is my go-to protectant as standard. I'll do a blog post on different forms of last step protection in detail one day, but in short I like this because it is easy to use, isn't fussy on climate, adds gloss and has accountable water repellent behaviour. Working out at around £55 per litre, it isn't exactly a thrift store special. But I don't deal in cheap stuff. I deal in good stuff. 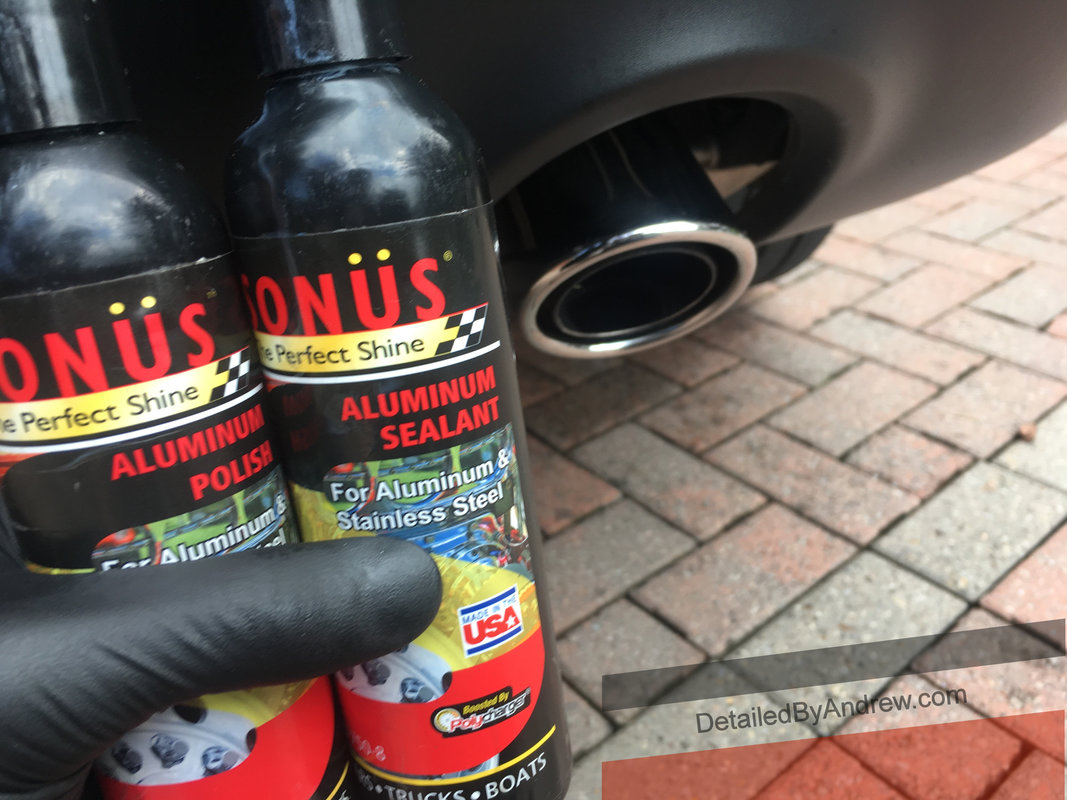 Whilst these products are from America and I anticipate for them to be named accordingly, I just refuse to refer to them in their manufacturer's spelling. It's ALUMINIUM, dude! Even though these exhaust tips are stainless steel, it is intended for all bright work and does a great job. 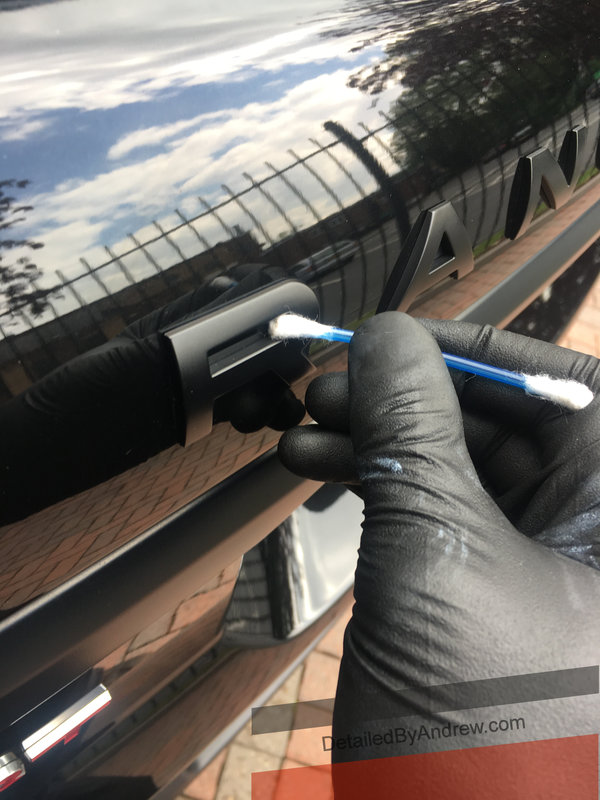 It's impossible to clean around badges perfectly on a nano-scale, but getting a good cotton swab laced in quick detailer spray in there helps presentation. Clean paintwork, and dullness around the badges? Not a good look. If you're new to reading my blog, I sure hope I'm giving an insight as to why the £5 car wash is a little different by now... 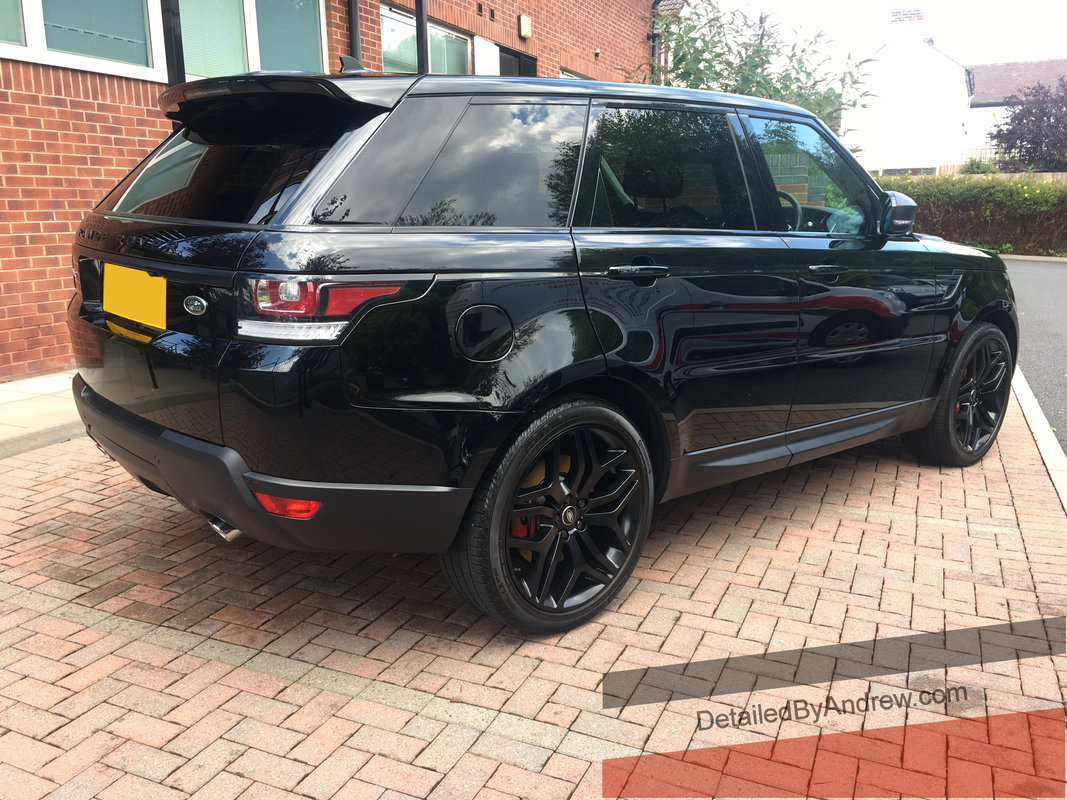 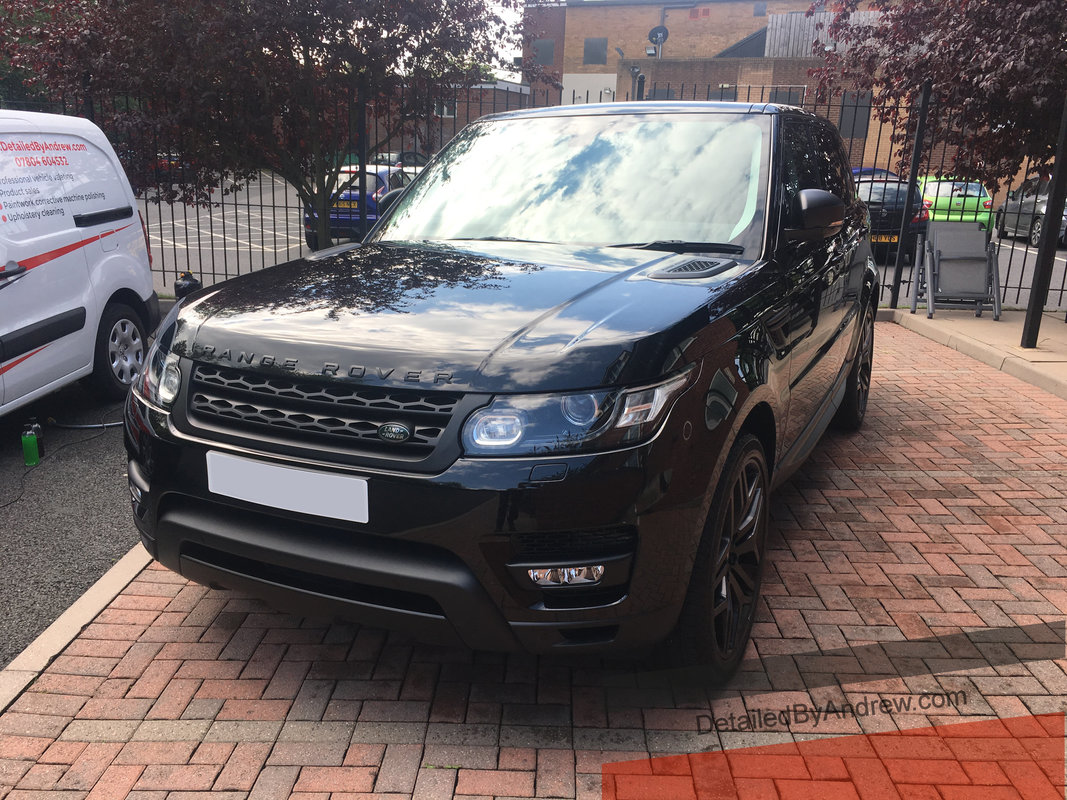 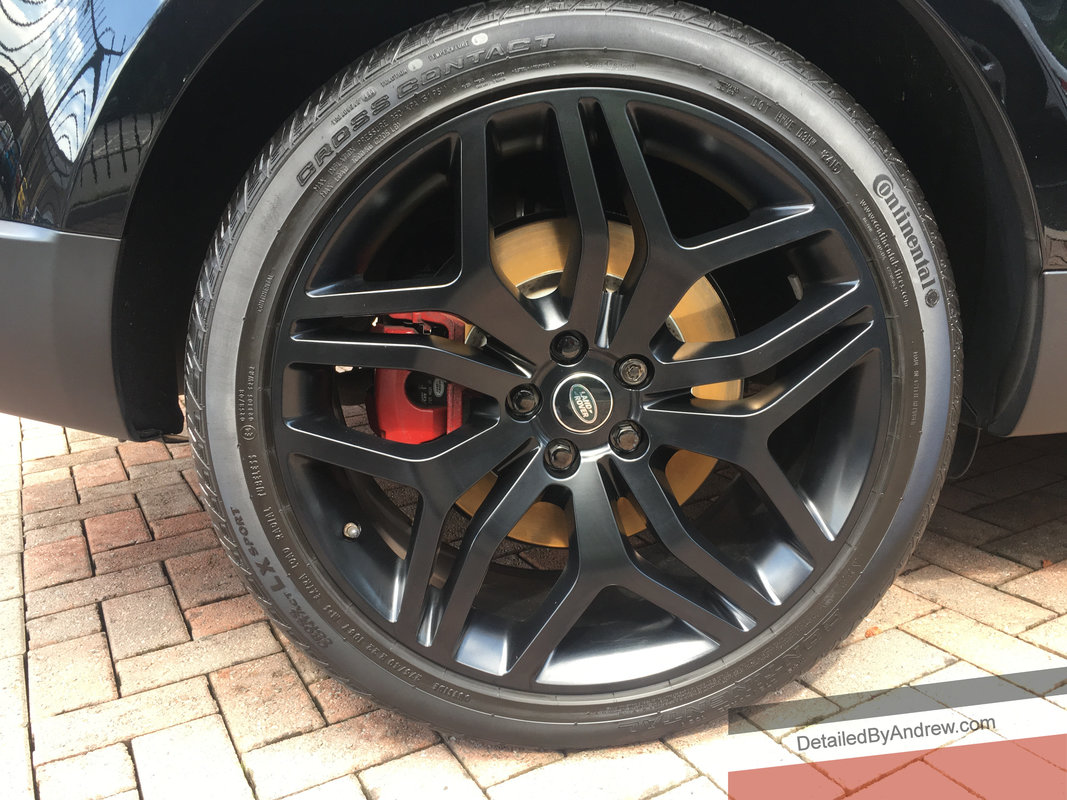 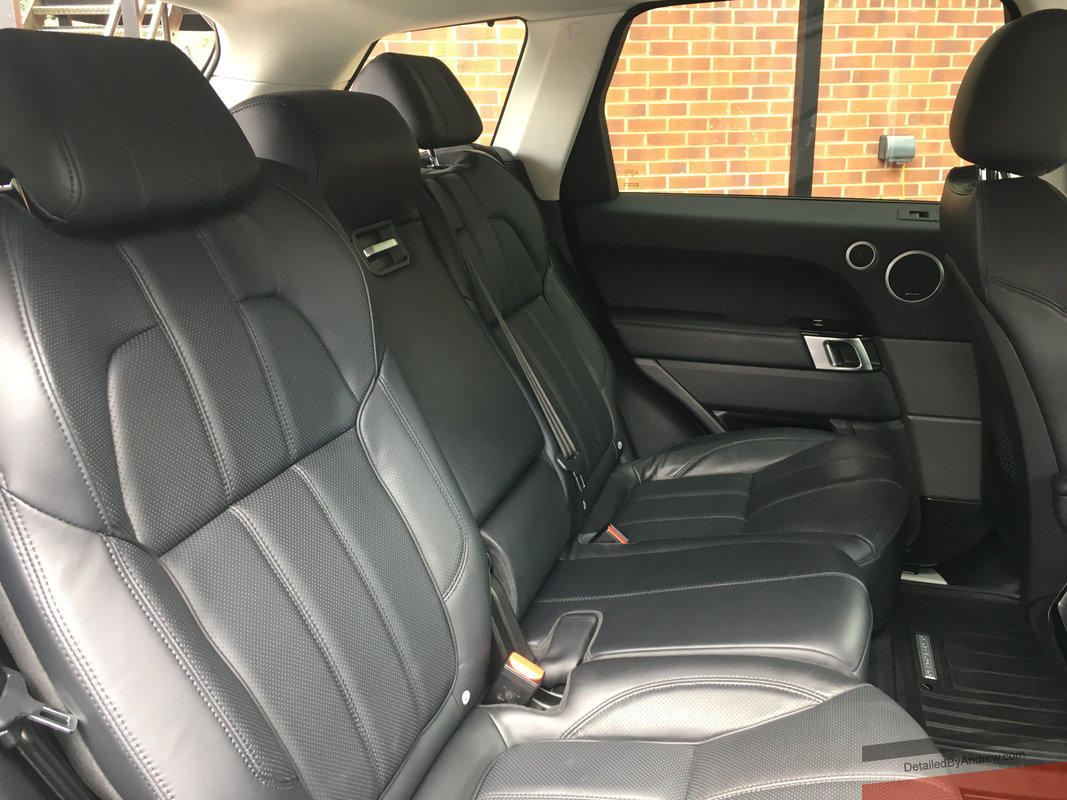 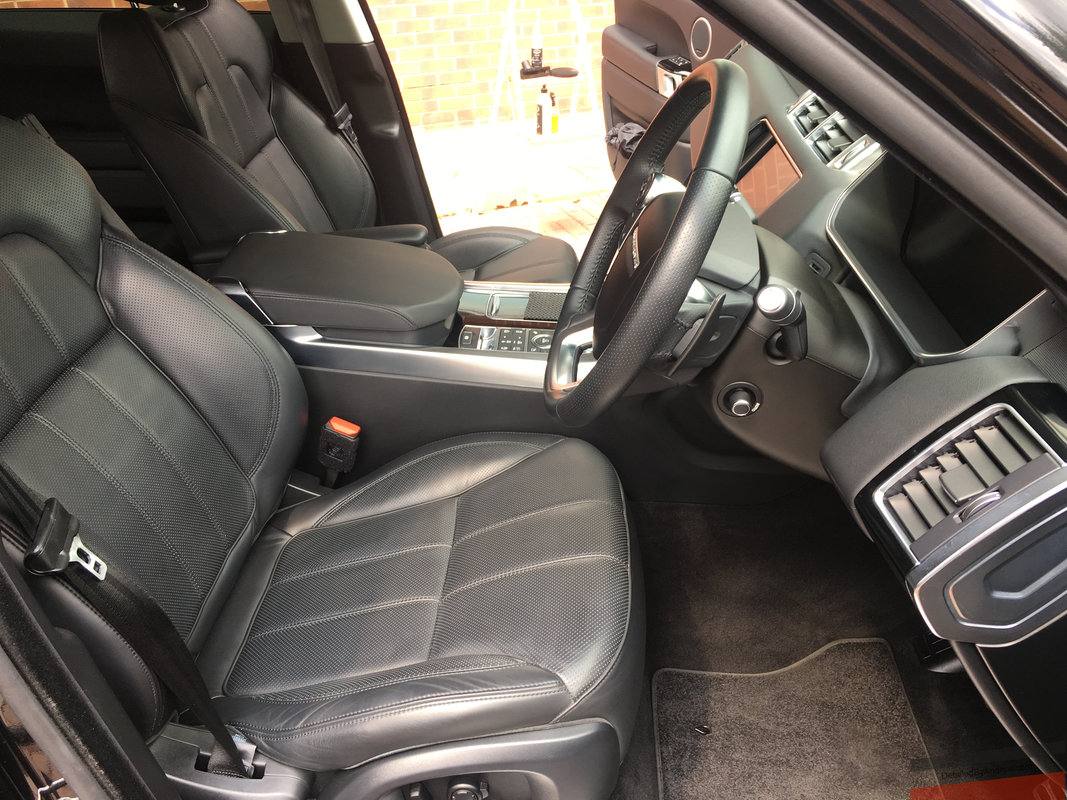 So we're all finished up with the exterior looking pretty snazzy, and the interior given a thorough vacuum through, with tiny paint brushes used to get deep into the vents. The seats were cleaned and conditioned with Krystal Kleen Detail Lush Leather, with the interior plastics treated to Meguiar's Inner Clean dressing and UV protectant. The glass was cleaned including the top bits, and one of my many choices of smellies was applied. I went for Autoglym Golden Sunset on this one. The owner seemed quite happy with the work, and we discussed the possibility of a future visit to get machine polishing mad on his paintwork. Then, we may have one seriously slick looking car on our hands.
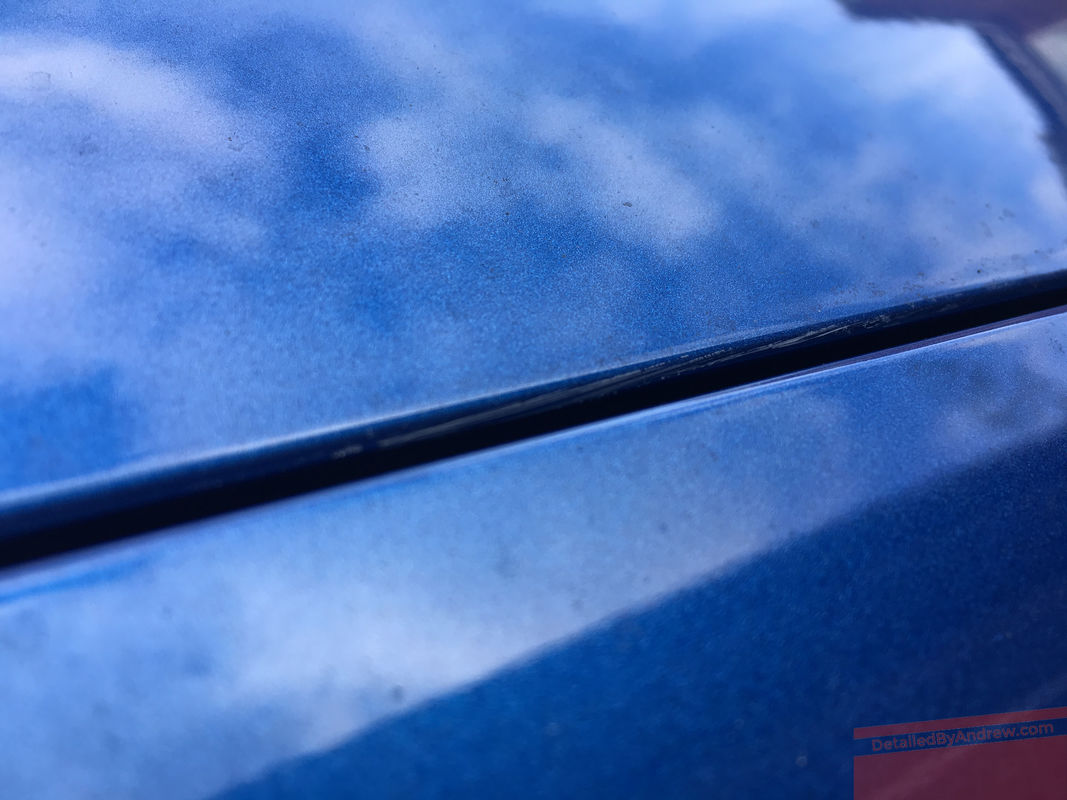
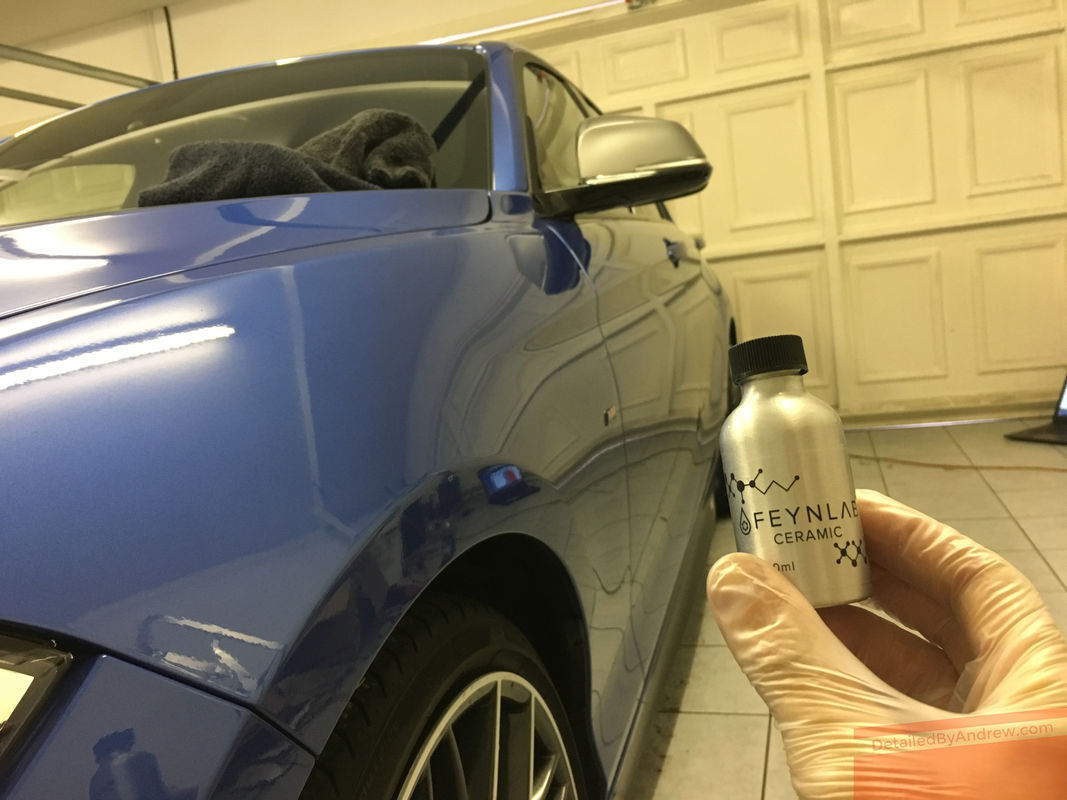
Out of interest I'd love to find out how long you may guess this service to have taken to carry out, and how much you personally would be prepared to pay for such a service - all part of R&D! Leave your answers in the comments below! I've had a couple of interesting jobs in lately that have received Ceramic Coating treatment, so this post will have two case studies rather than one! For those that don't know, 'Ceramic Coating' is a barrier of protection applied to the car which does what a wax does, and so much more. Firstly, these coatings are generally made up of Silica Dioxide (SiO2) or some modified variant of, which is an incredibly tough and durable material. Once applied to a surface and cured, they manifest in a durable, hard and shiny finish. "So it's a bit like that dealership stuff, then?" Yes, in a fashion and to a degree. There is a huge mistrust in dealership applied packages, and I have seen enough evidence that they sometimes aren't actually applied at all, but the customer is assured that their three figures have been well spent and that the car won't need any polishing. A professional detailer will take pride in using what they think is a good product on your car, and the benefit is that you can watch them apply it in some cases. Before I start with the write-ups, I would like to clarify that the consensus amongst most professionals is that coatings should be applied indoors. This is correct in some cases, especially with more specialised and sensitive coatings. However, having spoken with Krystal Kleen Detail/Liquid Elements UK/Feynlab UK mad scientist and proprietor Marc Linekar quite a while ago on the phone, I was imparted with the knowledge that coatings are good to go in conditions above 11*C temperature and relative humidity below 70%. Indeed, there is even a reactor product available to Liquid Elements approved technicians that help with the curing of coatings if conditions are borderline unideal. 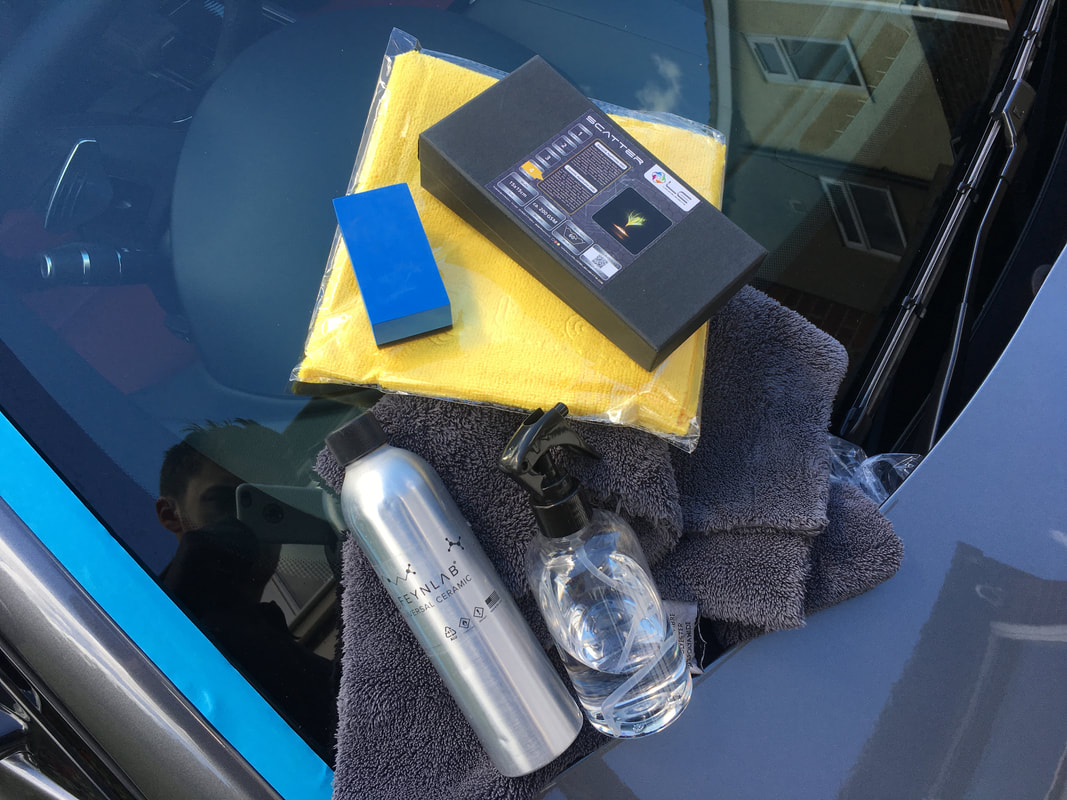 I've used many coatings over the years, the first being Optimum Opti-coat back when my business was unit based between 2012 and 2014. However, there wasn't much call for this at the time so it wasn't something I did often. It did however, contribute to how well my Peugeot 206 looked.  Aside from Optimum Opti-coat, I have also used CarPro CQuartz UK. I have a customer on the books for regular cleans to a vehicle I applied this to back in November 2016, at the time of writing the car is still looking very glassy. The key to prolonging the life of a coating is keeping it clean; allowing dirt to accumulate and bind to the coating will degrade it. As Craig Hall, head of CarPro UK recently wrote in an article for the Pro Detailer magazine, coatings will start to fail on the bottom edges of the car where there is the most impact from road debris. Small pinholes will cause the coating to lift microscopically. CarPro have launched a Silica based polish called Essence Plus that is designed to repair coatings that are showing signs of wear. Here are Craig's own words in a message: "Essence Plus as mentioned is a filler polish with a resin coat that we call a "coating restorer" You've probably had the following scenario.. coat a car, 6-12 months down the line that customer comes back and the coating is still performing as new but the car has picked up some marring, maybe the customers wash technique isn't quite tip top. Essence Plus can be machined on to hide this marring, and top the coating up with a Silica resin protection for up to another 6 months. Before now, it would require polishing away the perfectly good coating to remove swirls and re-apply. So for all intents and purposes it's for the client who wants there car looking good, but doesn't want to pay out for another enhancement and re-coat 6 months later because they've picked up a little wash marring." I have also used Liquid Elements Eco Shield, but these days I am currently applying Feynlab Universal as pictured above. This particular coating product was in fact designed with fleet management companies in mind, where their particular cars will be beating up and down the motorway and seeing high wear and tear. To counter this, Feynlab designed Universal to be very strong, helping it to be scratch resistant (but not scratch-proof, remember this is coating not a forcefield) and durable. Another attractive feature of this product for me to want to use it on my customers' cars is that it was formulated to be used where prep work may not be carried out properly by fleet management companies, nor in ideal conditions. Myself being mobile, and not all of my customers owning a cushty garage for me to work inside of, was drawn to this to minimise any potential 'come-back'. Think of it this way - if it was designed to work on and protect cars that may not be looked after too well and be applied by non-detailers, then it should be perfect for cars that do get cared for and especially being applied by myself as I am very anal about the preparation process. But don't let this fact decieve you though, whilst a 250ml bottle may treat 5 or 6 cars, it still costs me £180 to buy, with my suede applicators and other paraphernalia costing more on top. I like to think I'm paying for quality. Oh, and don't forget the panel wipe, no polishing oils can remain on the surface when applying coatings. 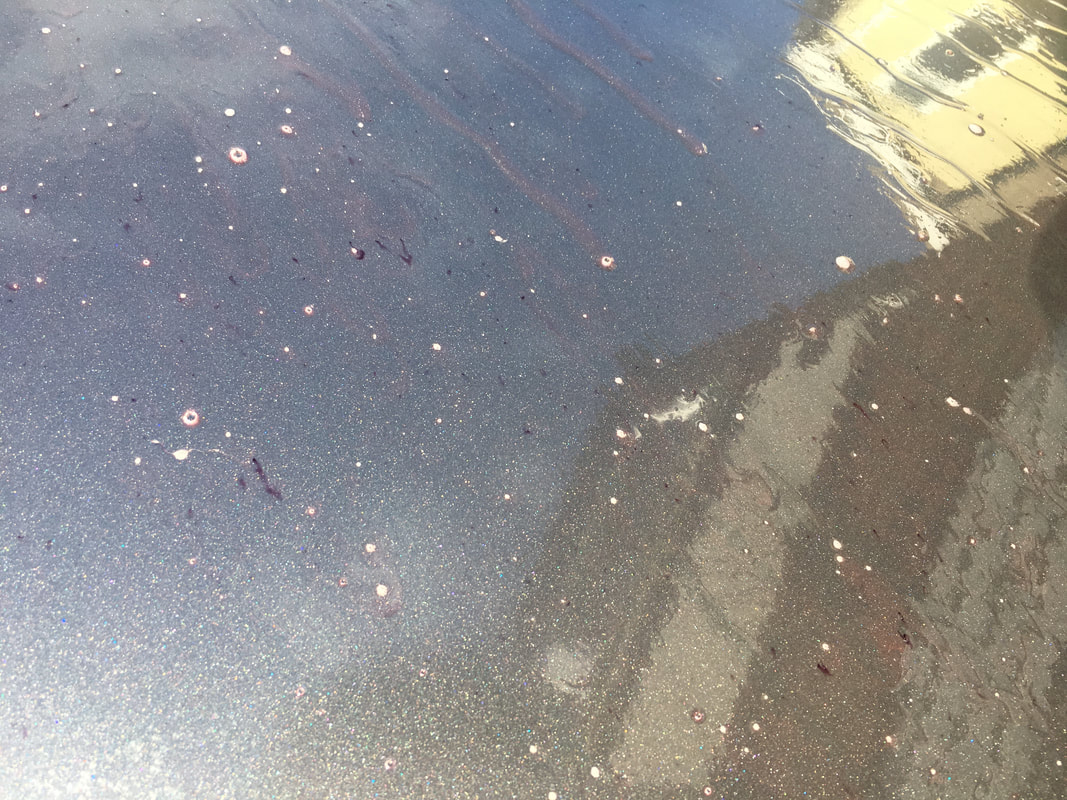 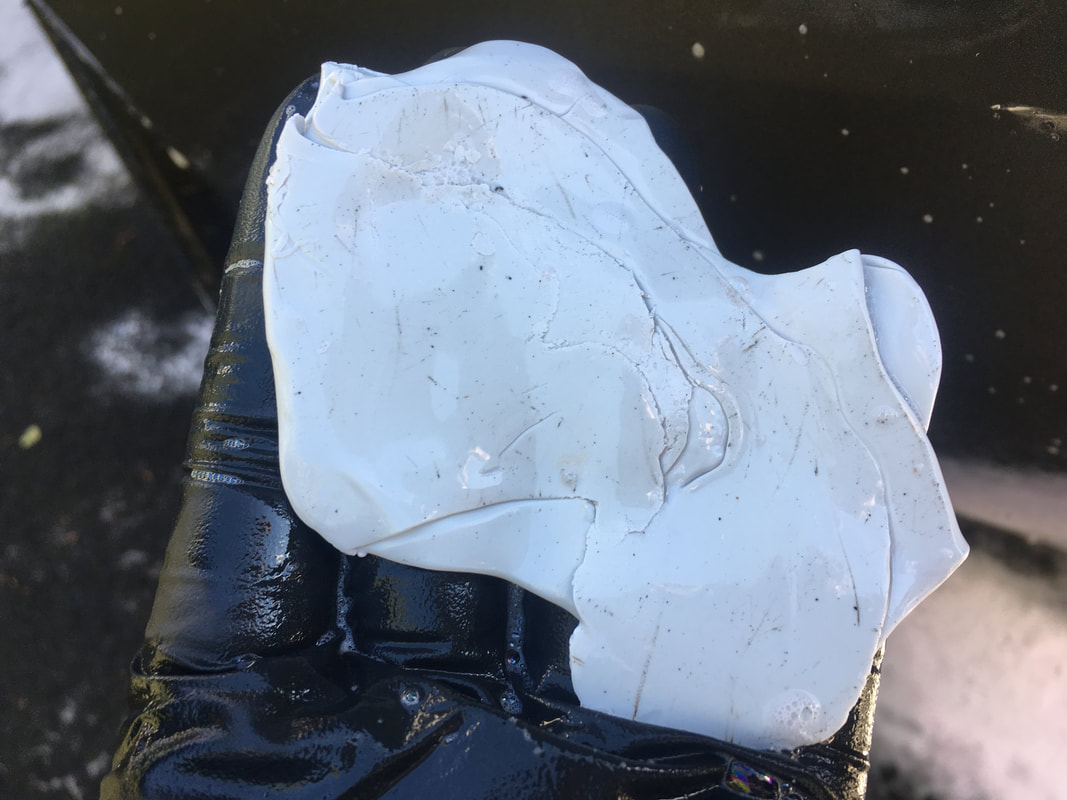 Take for example this Jaguar XE, it was only purchased new by the customer two weeks before my visit to detail and protect it. The Iron Fallout treatment identified a numerous amount of metallic deposits sintered into the paint, which were then confidently removed with clay barring. This probably occurred because the car is kept on the driveway next to a busy main road with high traffic. 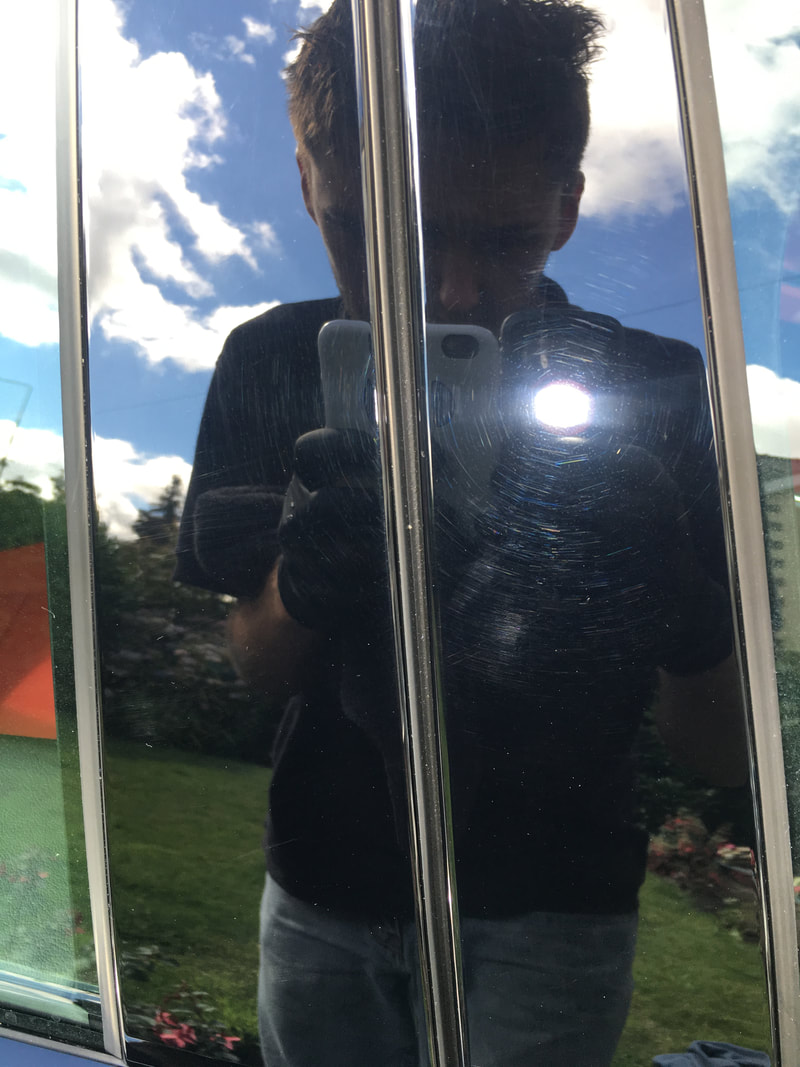 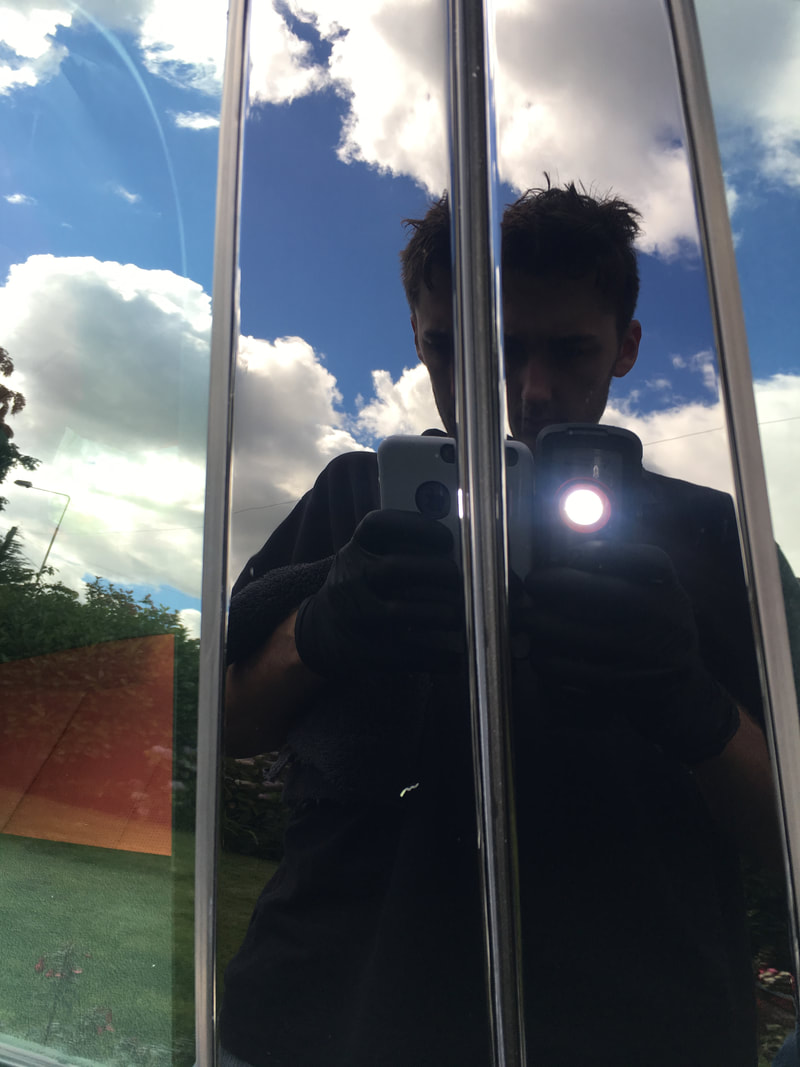 There were some marks and blemishes to be removed so the whole car was given a light machine polish. So there we go, not even brand new cars are defect free and the preparation and polishing processes should always be respected. I did encounter a small issue with this job, another peril of working outdoors, in the form of the gardeners turning up and blowing clippings and sediment all over the vehicle just as I had finished machine polishing. Some panels had to be re-done as a result of this, so for any potential customers that may be reading this post, please ensure that there are no destructive interferences during my visit. 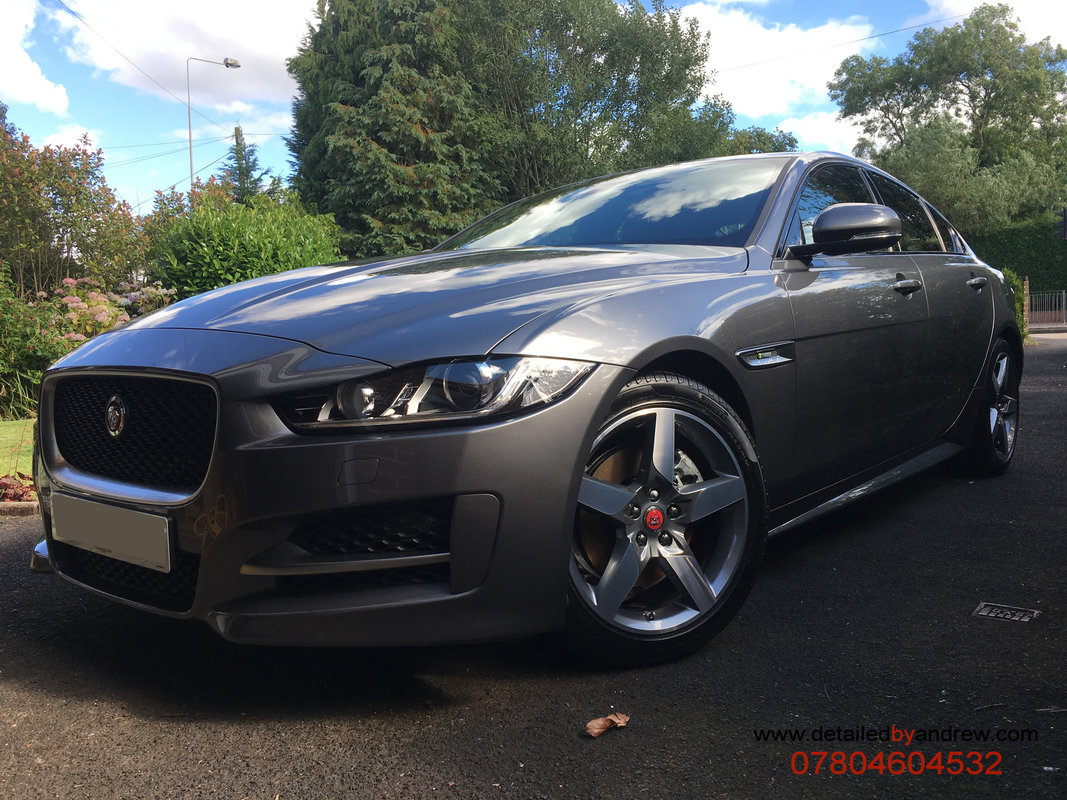 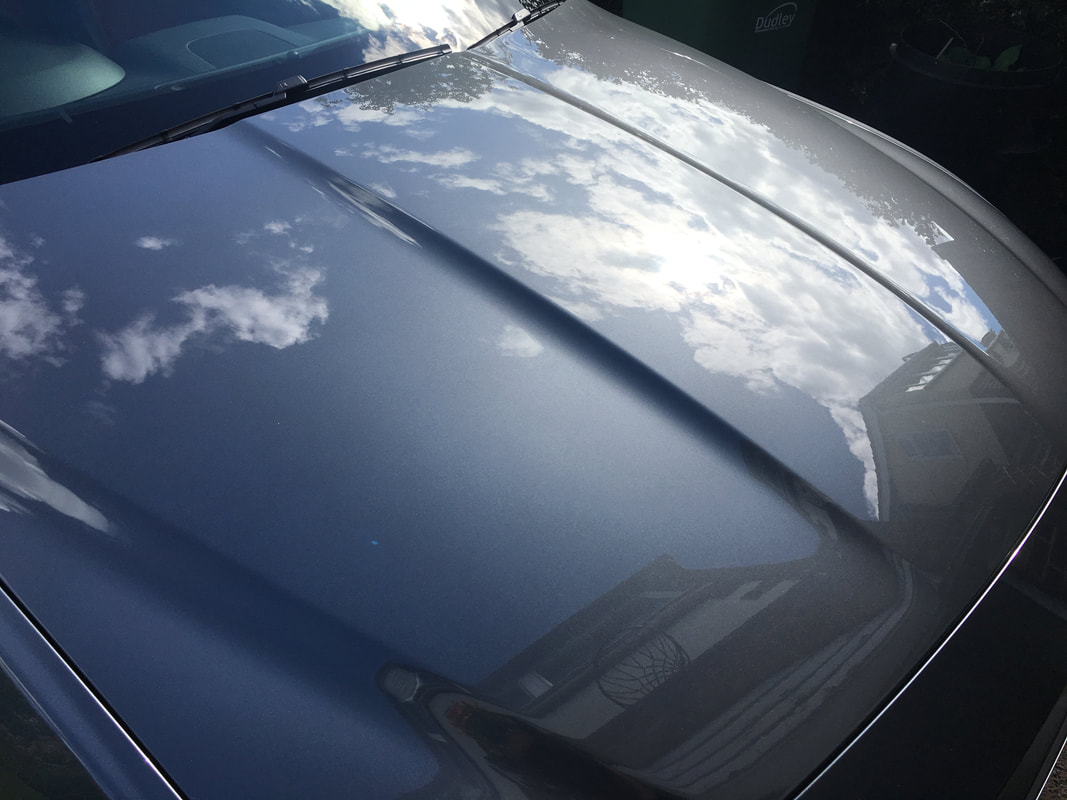 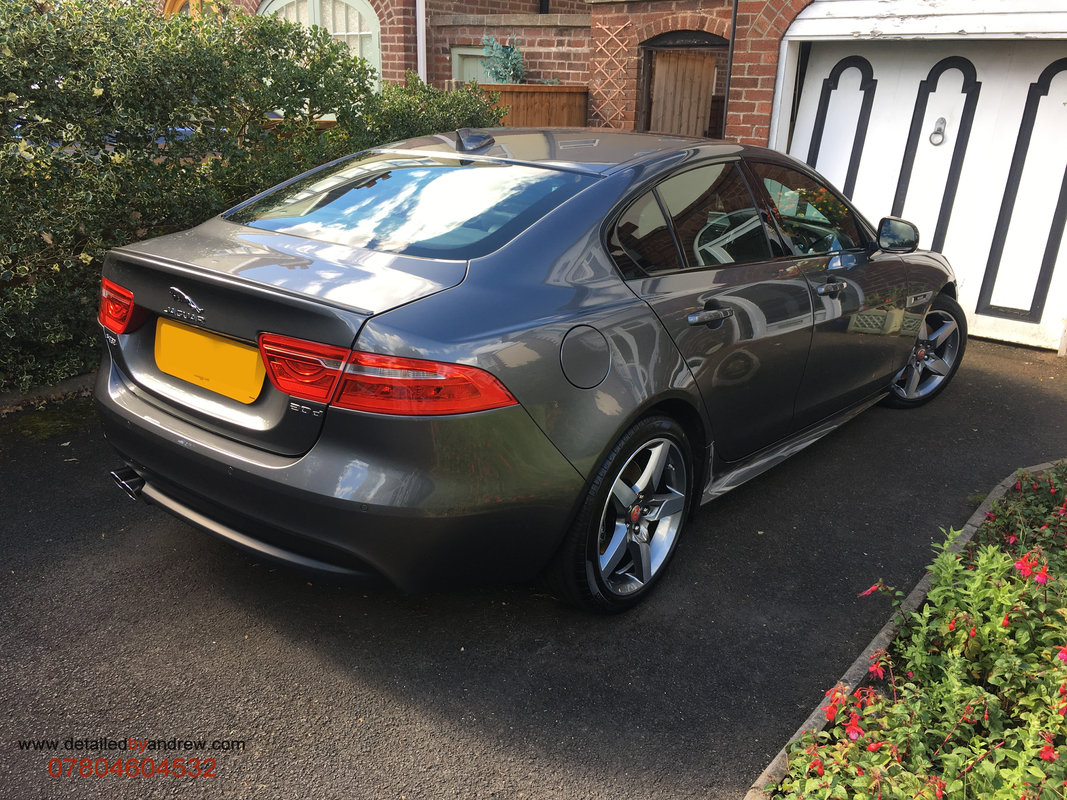 The following car is a 2008 Volkswagen Golf R32 that I had already detailed last year, but wanted freshly re-visiting and coating ready for sale. Enjoy the images, I even taken a microscope image of the paintwork afterwards... 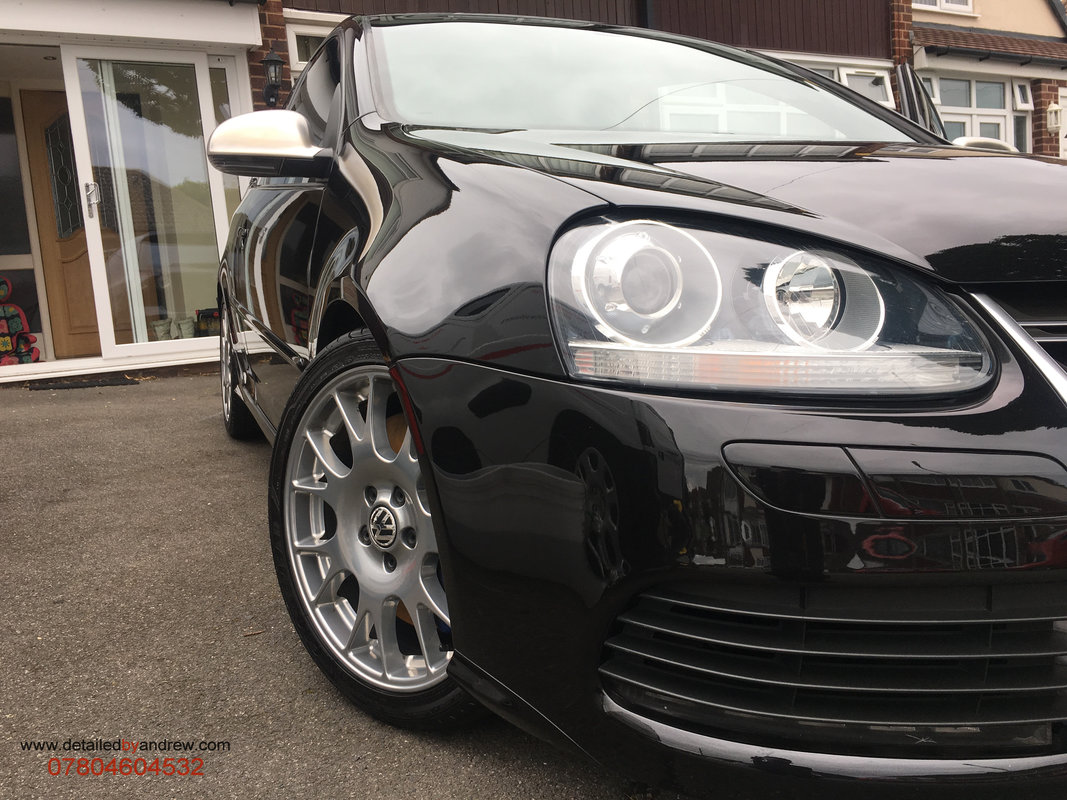 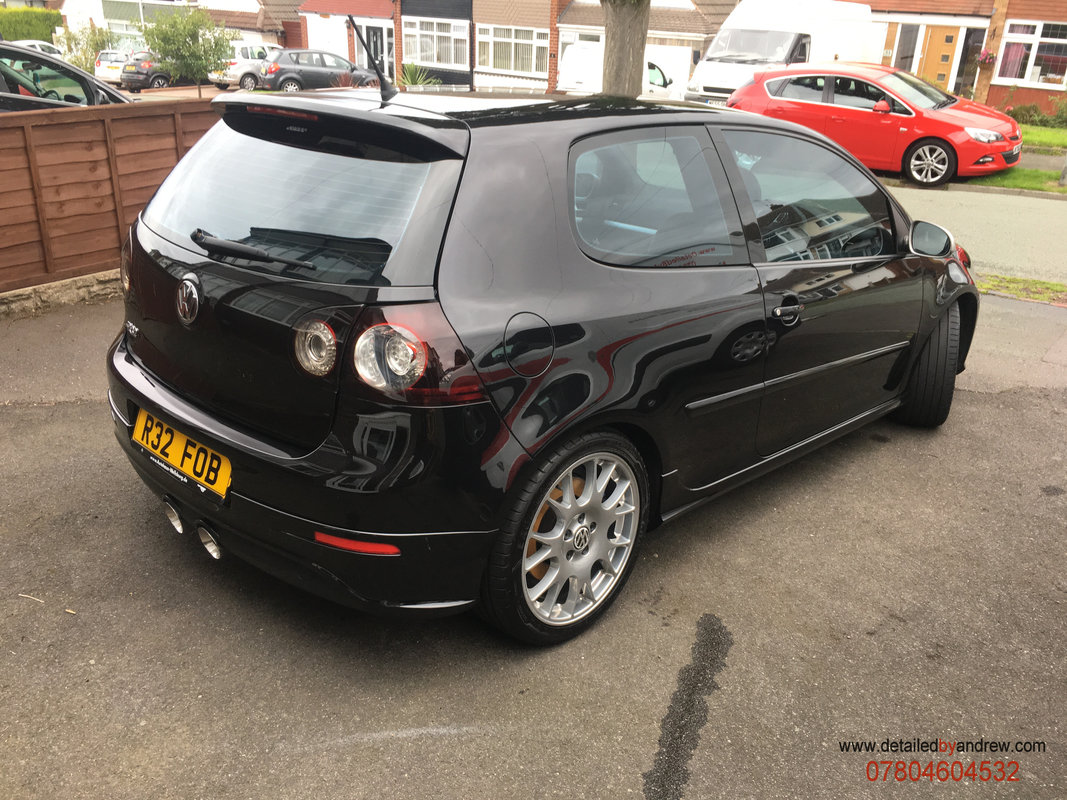 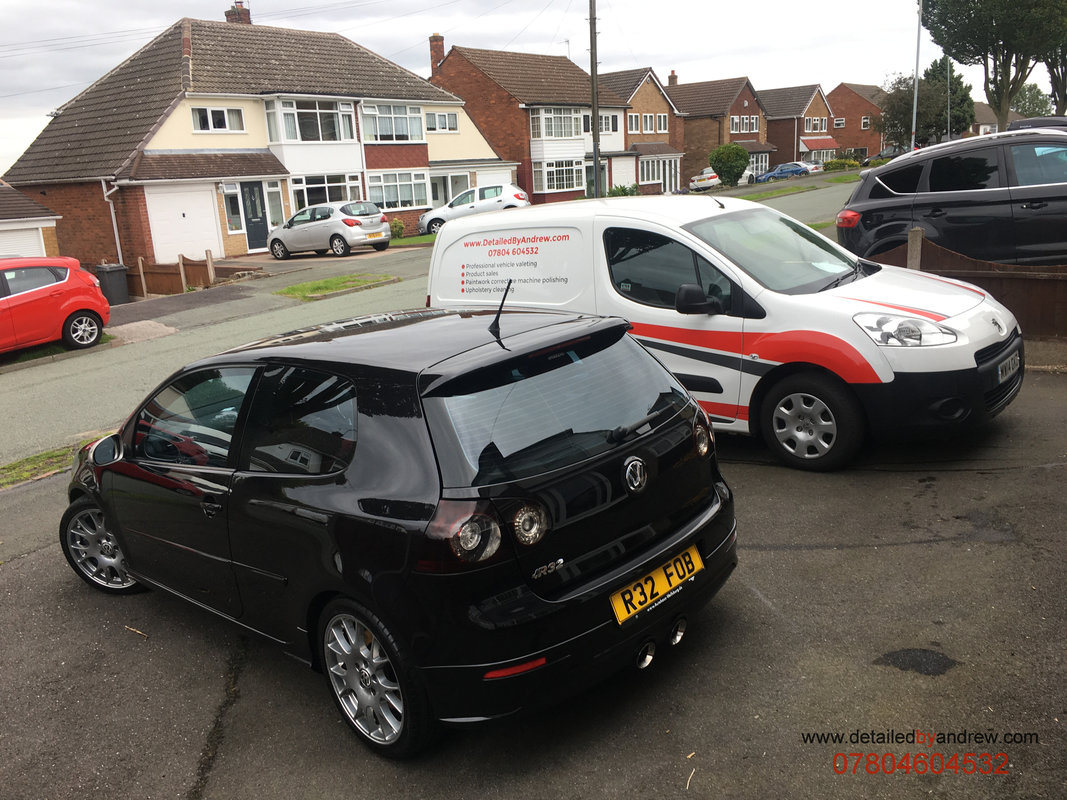  |
AuthorAndrew Southall, just a guy obsessed with shining up cars. Archives
March 2021
Categories |


 RSS Feed